
Bending Wood Using Hot Water
Fill a tub with hot water and soak the wood for at least 30 minutes. Turn the hot water on and let it heat up. Plug your bathtub and set the wood you want to bend down in the water. Let the tub fill up and leave the wood to soak for at least 30 minutes. How long you soak the wood is entirely up to you. As a rule of thumb, if you can squeeze the wood and feel a little bit of give, it’s ready for bending. The thicker the wood, the longer it will need to soak. The hotter the water, the faster the wood will be ready to work with. Don’t mess around with boiling water or anything, though. It’s better to just take your time than risk getting burned.
Set the wet wood inside of a jig or clamps to bend it. This is where you get to be a little creative. If you have a jig for bending wood (also known as a forming plank or forming jig), set the wood inside and close the pins to lock it in the desired shape. Alternatively, you can set two tables or chairs up and use two C-clamps to pin the wood at both ends in the general shape you want. If you don’t have clamps, you can try weighing the wood down on each end with something extremely heavy. The clamps will make this much easier, though.
Wait a few hours for the wood to dry out and remove it. Wait at least 2-3 hours for the wood to completely dry out; even if the surface is dry, the interior of the wood may still be damp if you remove it too quickly. Once you’re confident the wood is dry, remove the wood from the clamps or jig. If the wood immediately begins unbending, that’s okay! You can repeat this process as many times as you need to.
Continue repeating this process until the wood is bent and holding. If you’re happy with the shape of the wood, you’re good to go. If not, repeat this process as many times as you’d like to continue bending the wood. Soak it in hot water, set it in a jig or clamp, let it dry, and inspect the curve. Seal the wood when you’re done to encourage it to maintain its shape. If you’re serious about reinforcing the wood so it keeps its shape, repeat this process with multiple pieces of wood and then glue them together. This is ideal if the bent piece will retain weight, like the legs on a chair.
Bending Wood by Lamination
Build your template out of scrap wood or plywood. Any piece of wood that is at least ⁄4 inch (1.9 cm) thick or bigger should work. Use a jigsaw or circular saw and cut out the shape that you want to bend. The wood you’re going to bend must fit inside of the opening you cut. If you need to separate the template into two bigger pieces, cut the template into two pieces.
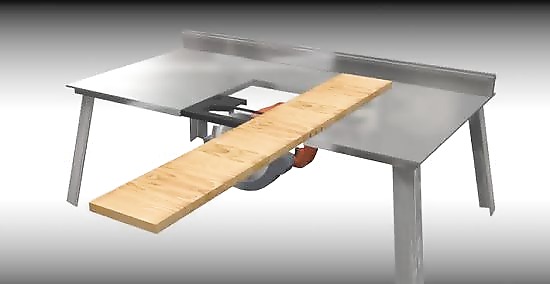
Cut your wood into extremely thin strips. Take the piece that you’re going to bend and use a table saw or bandsaw to trim it into pieces that are ⁄8–⁄4 inch (0.32–0.64 cm) thick. Really take your time to ensure that your strips are clean, since making more than one cut may risk removing too much wood for the strips to fit together cleanly. Create as many strips as you need based on the size of the wood. If you can cut a piece into 3 thin strips, do that. If you can cut it into 12 thin strips, go for it. The important thing isn’t the number of strips, but the fact that they’re thin. The premise here is that bending a big piece of wood is difficult, so turning it into a bunch of thin strips will make bending much easier.

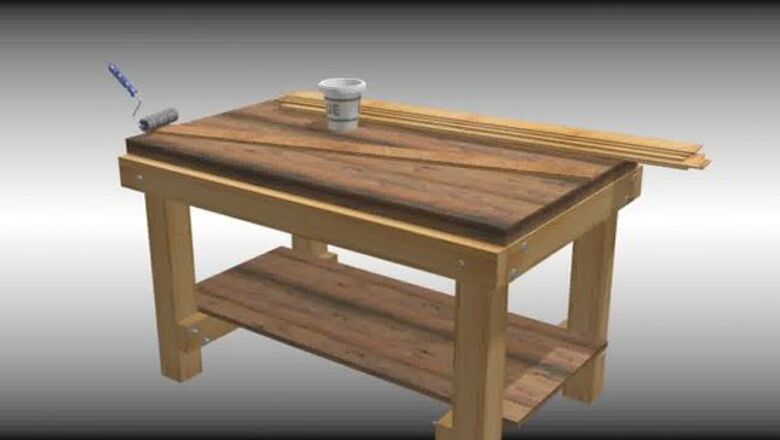
Spread glue on top of each of your wood strips. Use a disposable roller to dispense the glue onto the wood. Any kind of wood glue will work, although many woodworkers have the most success using a wood epoxy. Leave the “top” and “bottom” sides of the wood unglued, but coat every other side. Wear rubber gloves to keep the powerful wood glues off of your skin. Work quickly. Wood glues and epoxies tend to dry out very quickly, so time is of the essence here.

Place the strips in the template and compress them together. Set your strips together inside of the opening you cut for your template. Once each strip is in place, clamp the pieces together so the template holds firm around the strips. Once the glue is dry, cut the ends to your desired measurement. For best results, wait at least 24 hours before disassembling your template.
Bending Wood by Kerf-Cutting
Mark the cuts you’re going to make with a straight edge. Grab a ruler or any other straight edge and mark a line every ⁄4 in (0.64 cm) where you want to place your joint. As a rule of thumb, place 7 hash marks for 7 cuts to make a roughly 90-degree bend. A kerf refers to the line left by a cut from a saw. The goal with Kerf cutting is to remove thin cuts from a sequence of rows so that you can bend the wood where it is weakened. Just FYI, kerf-cutting also works with metal and plastic.
Cut the divots out of the wood where you marked your cuts. Set a table saw or circular saw to cut through roughly ½ of the wood’s thickness (if you have 1 in (2.5 cm) thick wood, set the saw to a depth of ⁄2 in (1.3 cm). Cut directly through each of the lines you’ve marked. Be careful. If the kerfs are too deep, you may break the wood.
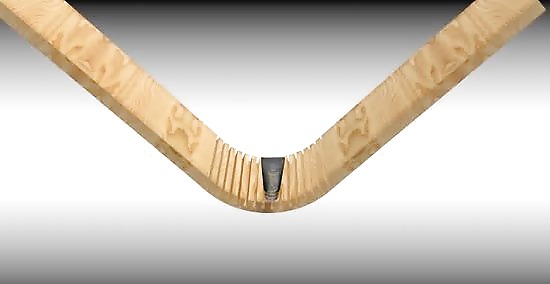
Compress the ends gently and slowly to bend the wood. Be patient and take your time. Grab each end of the wood and slowly bend the wood inward. Use as little pressure as you find necessary to avoid snapping the wood with an abrupt burst of excessive pressure. If the piece will not bend, your kerfs were too shallow. Grab a chisel and slowly dig layers out of the cuts until you’re able to bend the wood.
Disguise the cuts with wood filler or veneer. Once your wood is bent to your liking, you can leave it as is or fill in the gaps you cut. If you want to disguise the kerfs, mix wood glue and sawdust (or an appropriate wood filler) and fill the spaces left in the bent wood. You can also use a thick epoxy or veneer to cover the gaps.
Bending Wood with a Steam Box
Set up a steam box to hold the wood and steam it. You can use a wooden box with an opening for a PVC pipe or steamer hose. Alternatively, you can just buy a pre-built steam box. The box cannot be airtight at the top, so if it’s a closed box, drill a few holes into the top so steam can escape. For best results, hang a few dowels inside of the chamber of the box so the wood you’re bending doesn’t sit right on the floor of the box.
Soak the wood in water and heat it in the box. Dip the wood you’re going to bend in water and set it in the box. Then, set up a steamer at the opening of the box and turn on the heat. Leave the wood to steam for at least one hour for each inch of thickness (so, steam a 2.5 in (6.4 cm) thick plank for 2 hours and 30 minutes). If you have a pre-built steam box, just turn the power on.

Set up the template you’re going to use to bend the wood. You can cut out the shape you want to bend out of a larger block of wood or use a plank-forming jig. Alternatively, you can use C-clamps and two tables or sawhorses to bend the wood manually. You can do this before you start steaming the wood if you’re not planning to steam it for very long.
Remove the wood and dry it inside of the template. Put on some heat-resistant gloves and remove the wood from the steam box. Set it in the template immediately and secure the wood in the shape you want it to bend. Let the wood sit in the template for at least 2-3 hours until the wood is completely dry. Bend the wood gently and carefully. Different kinds of wood are springier than others and different cuts can withstand more force. It would be a shame to break your wood while you're trying to bend it.


Comments
0 comment