
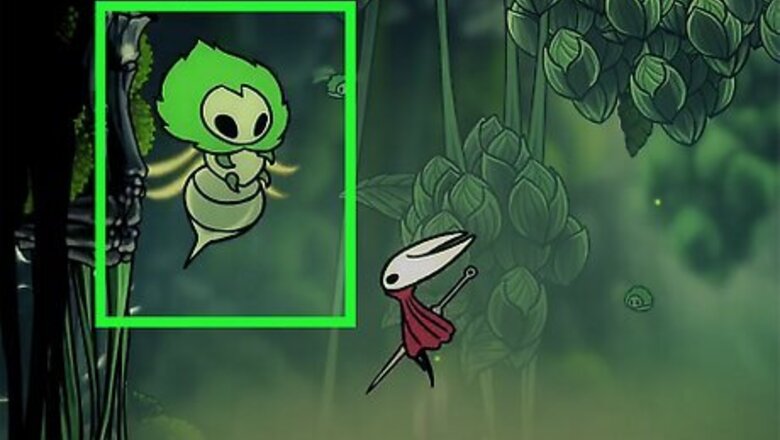
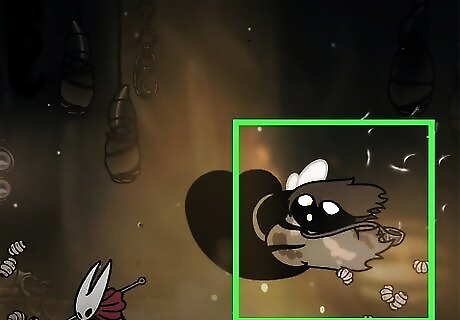
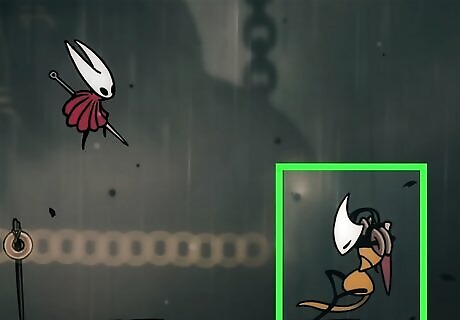
Moss Mother
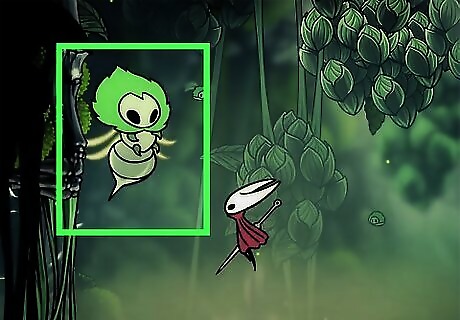
Strategy for winning the fight: Moss Mother is the tutorial boss, so you won’t need very much help once you get a few shots at learning her skillset. Just get hits in on the ground when she slams to the floor, jump up to hit her when she immediately ascends, and look out for the animations in the ceiling to avoid getting hit by the falling rocks. Required or optional? Required. Location: In the Ruined Chapel, which is at the top of Moss Grotto. Reward: None Tips if you’re struggling: Kill her little minions as soon as she summons them to keep things from getting really out of control.
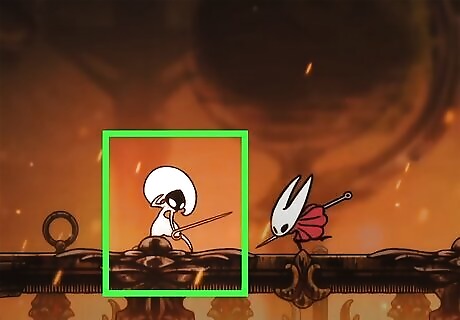
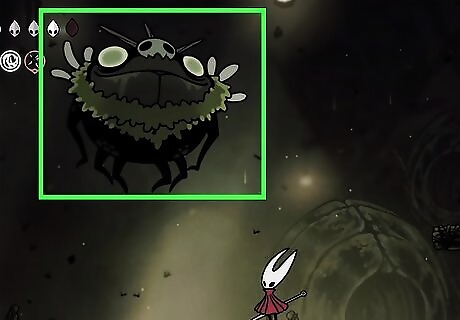
Bell Beast
Strategy for winning the fight: Bell Beast basically has two attacks: a jump and a dash. When he jumps, sit in the middle of the room and strike above you without jumping to get a hit in. When he dashes, just jump over him. You can pogo hit him from above if you’d like, but it’s also just fine to whittle him away using the jump move opportunity. In the second phase of the fight, just get out of the way when he’s bursting out of the ground. Required or optional? Optional (but you won’t be able to use the Bellway fast travel system if you don’t fight this guy, so it’s functionally required). Location: The Marrow, in the Bellway. You must unlock the area using the Silkspear ability. Reward: Access to the bellway. Tips if you’re struggling: Don’t panic. Bell Beast looks really scary at first, but Bell Beast is actually a very simple and predictable boss. Just relax, look for the animation hints, and you’ll be fine.
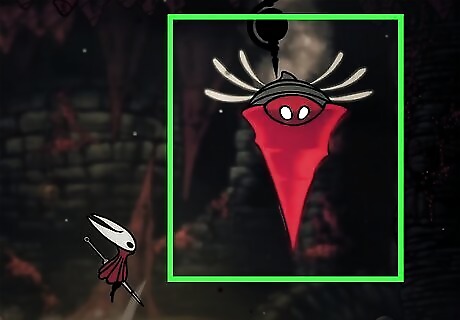
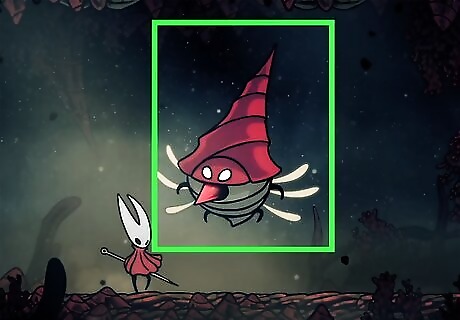
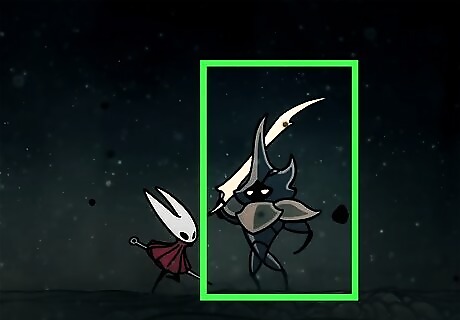
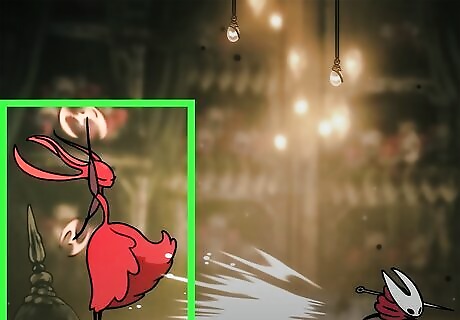
Lace (#1)
Strategy for winning the fight: Beating Lace is all about patience. Her moves are mainly dashes with strikes on them, but her flurry of blows move (where she punches a bunch) will zap you for two life, so it’s especially important to dodge that one. Just take your time and only try to hit her once when you get your openings before repositioning. Required or optional? Required. Location: On the path to the Far Fields from the Deep Docks. You’ll find her automatically. Reward: A Silk Heart. Tips if you’re struggling: Don’t get greedy. Lace is a skill-check against your dodging, not your ability to attack.
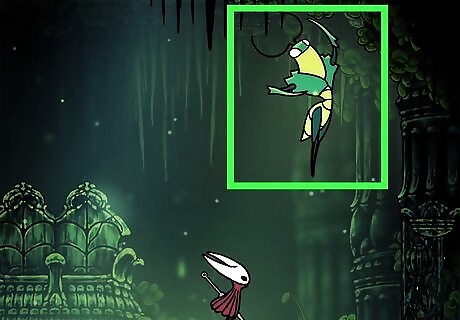
Fourth Chorus
Strategy for winning the fight: Fourth Chorus is also a skill check on dodging. One of his abilities slams down and destroys part of the platform. The other swipes horizontally across every portion of the platform. Get far away when he swipes down, jump up, and float when he swipes across. In between moves, jump up and hit his head. Required or optional? Required. Location: In the empty lava room in Far Fields. This fight unlocks once you get Drifer’s Cloak. Reward: You get to leave the area and unlock a new part of Greymoor. Tips if you’re struggling: Look at his hands! If the palm faces inwards, he’s going to swipe horizontally. If the palm faces down, he’s going to slam on a platform.
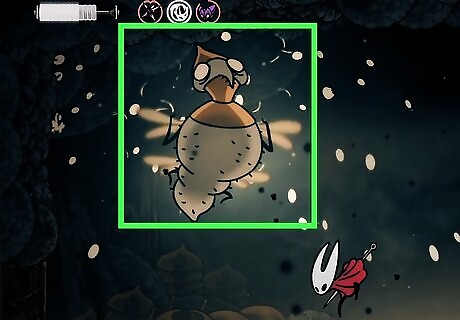
Savage Beastfly (#1)
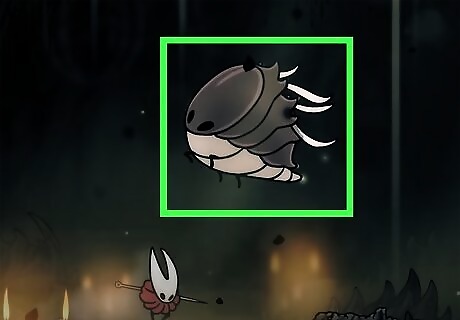
Strategy for winning the fight: Beastly #1 is the first fight where each time you’re hit, you lose two lives. It’s pretty punishing at first. Get hits in when it dashes above or below you horizontally. When it’s jumping up and down, you likely want to get out of the way. You can get 1-2 hits in when it hovers and calls for backup, but don’t overdo it. Required or optional? Optional. Location: In Hunter’s March, at the end of the platforming challenge inside the Chapel of the Beast. Reward: Beast Crest. Tips if you’re struggling: The Beastfly spawns helpers on a timer, so the faster you finish this fight, the fewer spawnlings you’ll have to deal with. Also, wait for the Beastfly to start flying horizontally before jumping. It will change its trajectory based on your height if you jump too early. Lastly, dash away and heal during the up-down slamming, if you need to recoup any health.
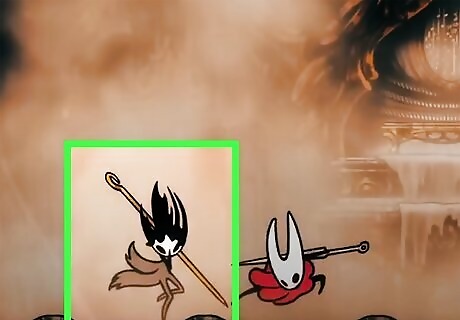
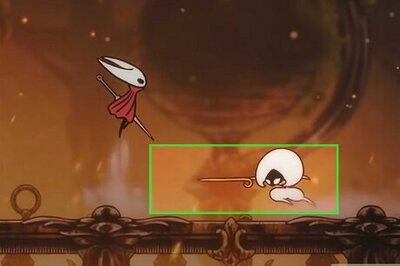
Sister Splinter
Strategy for winning the fight: Sister Splinter has a very simple trick for beating her: you jump, hit once, and dash away. Just follow this pattern and you’ll win pretty easily. The hardest part of this fight is probably her minions, but luckily, they die to one Silk Spear attack if you just want to get it over with. Required or optional? Required. Location: Shellwood, near the very top of the map. Reward: The Cling Grip ability. Tips if you’re struggling: The vines she shoots out of the floor are breakable!
Skull Tyrant (#1)

Strategy for winning the fight: Get multiple hits in when the Skull Tyrant does his head nod move that summons falling rocks, and avoid him basically the entire rest of the time. This fight is a skill-check against your ability to follow things falling out of the sky (only half-joking), so watch out for the rocks! Required or optional? Optional. Location: The Marrow. It’s in a secret area you can only access with Cling Grip, so you have to unlock that first. Reward: Crown Fragment. Tips if you’re struggling: You can’t pogo on his head, so don’t even bother trying. Also, there’s a second platform on the right half of the map. If you need a breather, jump up there and heal.
Skull Tyrant (#2)
Strategy for winning the fight: The rematch is more or less identical to the first fight. The main difference is that he jumps a lot more. You can also get multiple hits in on the Tyrant in between each hop this time, which kind of makes the fight easier than the first one. Required or optional? Optional. Location: Bone Bottom. It only appears after you defeat Skull Tyrant the first time. Reward: Heavy Rosary necklace. Tips if you’re struggling: You’ve got tons of lateral room to move. Dash multiple times to get a break if you need one.
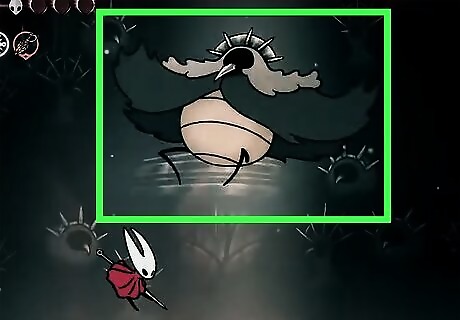
Moorwing

Strategy for winning the fight: Moorwing pauses in between each of her individual moves, so you always have an opportunity to hit her once after she finishes an animation. The only move we’d recommend not trying to get offensive on is her swooping move where she dives down at you. It’s just too small of a window. In phase two of the fight, keep an extra eye on her talons. She throws the projectiles from there, and they’re easier to dodge if you see them coming. Required or optional? Optional. Location: Greymoor, east of Bellhart (if you’re in Act 1). If you’ve made it to Act 2 already, you can still fight Moorwing, but they’re outside of the Bellway now. Reward: Access to Bellhart. Tips if you’re struggling: Moorwing is a pretty irritating boss, so you’re not alone if you’re having trouble. Just take it slow and try to avoid running all the way to the edge of the map. She’s even deadlier if you’re near a wall and don’t have room to maneuver.
Widow
Strategy for winning the fight: The Widow fight is pretty frustrating because you can’t realistically hit her except for the move where she summons bells. At least you can hit her 3+ times when she does, but the rest of the time, you must be dodging. Do not get aggressive or try to attack her while she’s moving. She’s just too fast for the risk. Required or optional? Required. Location: Bellhart, but you have to go through the top path in Shellwood to access the part of Bellhart where you’ll find Widow. Reward: The Needolin. Tips if you’re struggling: A lot of players will die in this fight because they jump too much. Widow is very good at getting to you when you’re in the air, so try to avoid staying aerial the whole fight.
Moss Mother Duo

Strategy for winning the fight: Use. Your. Tripmines. Any kind of projectiles are good, too. This fight is such a chaos factory that any strategy outside of “just dodge a lot and drop traps” is going to be unproductive. The fight isn’t hard, it’s just madness. Required or optional? Optional. Location: The far western edge of Weavenest Atla. Reward: Weavelight Tool Tips if you’re struggling: There’s only one real window to heal, and it’s when both Moss Mothers attack at once.
Savage Beastfly (#2)
Strategy for winning the fight: This fight is identical to the first Beastfly fight, except you’re on lava. The Beastfly’s moves are literally the same. Use the same strategy you used last time. Pogo when he rushes you from below, strike up when the Beastfly flies above you, and avoid the lava. Required or optional? Optional. Location: In the lava room of Far Fields, which is where you fought Fourth Chorus. Reward: Mask Shard and Horn Fragment. Tips if you’re struggling: Every time Beastfly summons a minion, kill it immediately. This fight is just unbeatable if you let all of the minions live.
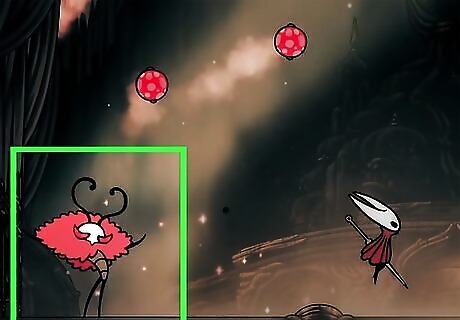
Great Conchflies
Strategy for winning the fight: The Conchflies fight feels a lot harder than it is. The trick is not to get distracted by the Conchflies themselves—you really only need to look out for the rock animation and the projectile they throw. Staying out of their way is easy because the rock animation tells you where they’ll be. Just take your time getting hits in on each fly whenever they end up conveniently hanging out nearby while you dodge. Required or optional? Optional. Location: Blasted Steps, in the western path under the Bellway. Reward: Access to the area where you’ll get the Needle Strike ability. Tips if you’re struggling: Traps are nuts in this fight. Take some Sting Shards or Tacks and just leave them wherever you want. They’re free damage.
Last Judge
Strategy for winning the fight: This is a skill-check against your ability to read animations. Each of Last Judge’s moves is heavily telegraphed, so spend the first few attempts learning the movesets. The leap and bell swing attacks are really the two you need to be able to spot, since those are your best shot at getting some damage in. Required or optional? Required. Location: Blasted Steps, to the top right, kind of near the Grand Gate. Reward: Access to the Citadel. Tips if you’re struggling: Hunter’s Crest or Reaper’s Crest are uniquely good in this fight.
Phantom
Strategy for winning the fight: Phantom has a lot in common with Lace, so a lot of the strategies you used there will apply here. The trick is to really track Phantom’s location with your peripheral vision while maintaining your position at a safe distance. Phantom is fast, so dodging quickly is essential. Be patient and get a single hit in whenever you see a safe window. Required or optional? Required. Location: At the top of the Exhaust Organ, which you can only access after The Mist. Reward: The Cross Stitch parry technique and Grey Ghost. Tips if you’re struggling: The Reaper Crest can make it a lot easier to hit Phantom. Ranged attacks are good, too.
Cogwork Dancers
Strategy for winning the fight: This is a really beautiful fight where the trick is to turn the sound up. The Dancers literally “dance” to the beat of the soundtrack, and they telegraph each move they make. All you have to do is stay out of the way of their path, dodge on the beat of the song, and whittle them down slowly over time. Required or optional? Required. Location: There’s an area separating the east and the west portions of Choral Chambers. It’s called the Cogwork Core, which is where you’ll find this boss. Reward: Rosary beads. Tips if you’re struggling: You really shouldn’t struggle here given all of the practice you’ve had up to this point, but if you do, try using traps! The Dancers let you know where they’re going, so they’re pretty easy to hit with the traps.
Trobbio
Strategy for winning the fight: Don’t get tricked by Trobbio’s animations. His whole thing is that he’s a flamboyant showman, and that is reflected in the way he attacks. Don’t let the bright lights fool you. Avoid the glimmering particles, stay calm, and don’t overdo it on the dodging. Keep moving and be aggressive in between his attacks. Required or optional? Optional. Location: Whispering Vaults, on the stage in the southwestern portion of the map. Reward: Claw Mirror. Tips if you’re struggling: Architect Crest shines here if you’ve unlocked it.
Garmond and Zaza
Strategy for winning the fight: This fight is a bit of a meme. It’s a joke about Garmond claiming to be a great warrior, but he basically just runs back and forth. Jump over him when he dashes at you and hit him. It’s a breeze. Required or optional? Optional. Location: In a secret area in Songclave. You need to complete a bunch of objectives before they’re unlocked, but after defeating Trobbio, you should have checked everything off the list. If you find the secret room and nobody’s in there, mark it on the map and come back later. Note, you cannot fight Garmond and Zaza if you complete the Conductor’s Melody quest. Reward: None. Tips if you’re struggling: If you release a few cogflies, they can win the fight for you, if you’re looking for a fun way to make the fight challenging.
Forebrothers Signis and Gron
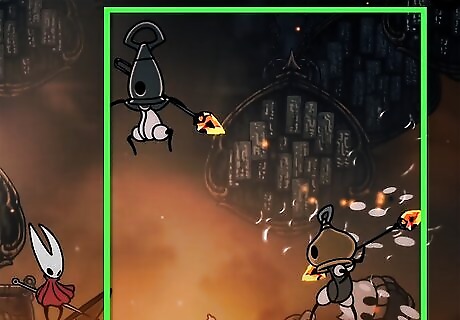
Strategy for winning the fight: This fight is a certified projectile chaos factory. You are very likely to die a few times learning the ropes here, so try not to get frustrated. You basically always have to be jumping here. The trick is to dash in and out after each jump to get a lot of damage in. Once the brother appears in the third phase, spam your tools and kill the spears that Gron throws. Required or optional? It’s technically optional, but you can’t unlock the Abyss without defeating this boss. If you want to complete all endings in the game, you need to access the Abyss, so Signis and Gron are kind of required if you’re trying to 100% the game. Location: Deep Docks, in the southern part of the map. You can only reach them using the Clawline. Reward: Access to a new part of the map, a bench, a Memory Locket, and a Silkeater. Tips if you’re struggling: Thread Storm is very good here. It can kill any enemies on spawn if you jump up immediately and use it when they appear. As a general guideline, use lots of tools here. Signis and Gron are susceptible to basically all of the tools.
The Unravelled
Strategy for winning the fight: Tacks and ranged attacks are absolutely nuts here. Unravelled does a lot of back-and-forth movement, and they’ll run over any tacks pretty quickly. The ranged attacks are great for when the little flying minions come out. In terms of whittling Unravelled down, be very patient. Attack during their ranged attack 2-3 times if you can get close enough. Required or optional? Optional. Location: At the bottom of Whiteward. You need the Surgeon’s Key and the Clawline to access this area. Reward: Silk Heart. Tips if you’re struggling: This is going to sound kind of funny, but try turning the brightness up. This fight is so dark. A little extra visibility will actually make this a lot easier. Also, use the walls! Wall jumping multiple times when The Unravelled is attacking can save you a lot of life.
Disgraced Chef Lugoli
Strategy for winning the fight: This fight resembles the Beastfly fight quite a bit. Dodge the projectiles, dash away when the Chef does his big slam move, and dash back in to hit them on the ground. This isn’t the toughest fight in the game, so you should be able to handle this one after a few tries at most. Required or optional? Optional. Location: Sinner’s Road. You need to use the Faydown Cloak at the end of the bottom path to reach the area where Chef Lugoli is waiting for you. Reward: Pickled Muckmaggot Tips if you’re struggling: Poison and Cogflies are really good here. The spike trap is also really helpful.
Father of the Flame
Strategy for winning the fight: You can only hit this boss if you attack the 4 lanterns on his arms first. This makes the strategy for this fight very straightforward. Pogo on the lanterns, then hit Father of the Flame as much as you can before the lanterns come back. The dodging component is relatively straightforward in between opportunities. Required or optional? Optional. Location: Wisp Thicket, in the far west. You need the Faydown Cloak to reach it. Reward: Wispfire Lantern. Tips if you’re struggling: If you struggle to pogo, swap over to the Reaper crest. It’s probably got the easiest down-slash animation for pogoing.
Groal The Great
Strategy for winning the fight: Put tacks on all of the platforms and dash between the different platforms to wipe out the minions. When it comes to the main boss fight, it’s probably not even worth it to try avoiding the maggot water. Instead, use the pools to dodge Groal’s platform-focused attacks and get in hits when you can. Required or optional? Optional. Location: Outside of Bilehaven, at the very top of Bilewater. Reward: Seeker’s Soul. Tips if you’re struggling: This is widely considered one of the most frustrating fights in the game, so you’re not alone if you’re getting ticked off with this one. As for tips, Polyp Pouch is really helpful. You’ll also likely want Crest of the Architect, if you have it. This is just a brutal fight, so don’t stress too much.
Voltvyrm
Strategy for winning the fight: Voltvyrm is a kind of odd boss because they never actually leave the ceiling, so the best method here is just to jump up, hit them, and then dash out of the way of the energy pillars that appear. This is basically the same strategy as the Splinter Sister fight, if you remember that one. Required or optional? Optional. Location: Inside the Voltnest at the top of the Sands of Karak. Getting to Voltvyrm might actually be harder than beating them. Reward: Volt Filament. Tips if you’re struggling: There aren’t any real ways to improve your strategy here. This is a very straightforward boss fight with very little diversity in the strategy or build options.
Raging Conchfly
Strategy for winning the fight: Aim to hit Raging Conchfly whenever they drill into the ground. Beyond that, you can pogo off the Conchfly when they fly horizontally past you. That’s sort of it for this one. You have to track the projectiles that the Conchfly fires, but it’s nothing you can’t handle. Required or optional? Optional. However, this fight really does open up a variety of other fights and quests later on, so it’s as close to “required” as you can get without actually being mandatory. Location: In the northwestern corner of the Sands of Karak, right outside of the Coral Tower. Reward: The Conchcutter. It also opens up a series of areas for later fights and quests. Tips if you’re struggling: This fight may be easier than the Conchfly duo fight. Just take your time and watch your positioning. You’ll be fine.
First Sinner
Strategy for winning the fight: A favorite among Silksong players, this fight really rewards aggression and creativity. There are a lot of different ways to play this one, but you’ll get a lot of mileage out of dashing in, hitting, and dashing out. The run-attack is also a good move to employ here. There are also two big keys here. First, the fight will take forever if you let First Sinner get their heal off, so interrupt it! Also, the harpoons are kind of a hint. Clawline is really good here! Required or optional? Optional. Location: The last Heretic door in The Slab. Reward: Rune Rage. Tips if you’re struggling: The fireball ability is really terrible here. Ditch it if you’re using it. On the other side, cogflies and poison are phenomenal.
Broodmother
Strategy for winning the fight: Resilience is the name of the game here. You will have multiple waves of minions, multiple sequences in the fight, and multiple confusing moments where it feels like the boss just won’t stop. Kill her minions as fast as they come out, and track Broodmother’s head. When she faces you on the ground, she’s going to jump at you. Required or optional? Optional. Location: The Slab, in the top left of the map. Broodmother only appears once you’ve started “The Wailing Mother” quest. Reward: A heavy rosary necklace. Tips if you’re struggling: Players find this fight quite punishing, so you aren’t alone here. We recommend using the newly-acquired Rune Rage and Voltvessels here. Reaper, Witch, and Architect are all great Crest options, but really, this fight is just about patience and resilience.
Second Sentinel
Strategy for winning the fight: Pogo on the Sentinel whenever he dashes towards you, and then get out of the way for basically everything else. This fight is really a skill check on your ability to jump in a timely fashion, so it makes sense that you’d need to pogo your way into a win here. Required or optional? Optional. Location: High Halls. You’ll fight Second Sentinel as part of the Final Audience wish. Reward: Reserve Bind. Tips if you’re struggling: Sentinel actually telegraphs his “big” attacks. Look at the shape of the little X that appears on his body right before he does his exploding attack. The bars on the X correspond to the direction of the attack’s different legs.
Shakra
Strategy for winning the fight: Pogo twice on Shakra when she dashes toward you. If you miss her, you can hit her once but you must dash away immediately. Shakra moves quickly, and she moves a lot. There really aren’t any windows here to reliably hit her outside of that dash, so just be patient. Required or optional? Optional. Location: Greymoor. After you complete Shakra’s wish, ring the bell east of Bellhart to initiate the fight. Reward: An entry in the Hunter’s Journal. This fight is really more of an “I proved I can do it” situation. It’s also mandatory if you want to 100% the game, but if you don’t care about either of those things, don’t do this fight for the money or cool items. You won’t get any. Tips if you’re struggling: Keep Shakra on the screen—don’t run out of frame. She can throw the rings from multiple screens away. Also, you can hit her gold rings! It’s hard, but you can deflect them if you time it right.
Lace (#2)
Strategy for winning the fight: The second Lace fight is functionally identical to the first one in terms of the strategy. Do not be the aggressor here. Be patient, wait for her to dash towards you, and get 1-2 hits in before you dash out of the way. Required or optional? Required. Location: You’ll run into her automatically after you enter The Cradle. Reward: Access to the next area of the game. Tips if you’re struggling: You can jump off the sides of the platform! There’s a wall on each end of the map, and you can wall jump off it to avoid attacks.
Grand Mother Silk
Strategy for winning the fight: Track all of Silk’s needles in the air as they follow you. They’re on a delay, so you have plenty of time to get hits in while you dodge. In the second phase of the fight, jump and hover whenever the Silk appears so you have more room to dodge. Do not fight Grand Mother Silk right now if you plan on trying to acquire every single ending of the game. Beating Grand Mother Silk will also initiate Act 3, just FYI. Required or optional? Required. Location: You challenge her at the top of the cradle. Reward: Beating the game! Tips if you’re struggling: Cogfly and flintslate are really good here.
Bell Eater
Strategy for winning the fight: Avoid the bright red blobs and then hit the thing. That’s sort of it. A lot of players find this fight really difficult, but they don’t realize a few things we’re going to share now. First, you can jump on the walls. It looks like you can’t because they’re part of the Bell Eater’s body, but you won’t get hurt. Second, you can pogo on the bug’s body when it does the tunneling attack thing. Last, Required or optional? Optional. Location: Choral Chambers. The first time you try to use the bellway in Act 3, Bell Eater will appear and try to fight you. Don’t worry! Bell Beast isn’t gone. Reward: The Beastling Call Needolin music, which lets you call a tiny Bell Beast. Tips if you’re struggling: during the second phase, where the head and butt are attacking at the same time, just hit the butt. The head’s attack is much harder to dodge with the projectiles running around.
Miniature Moss Mother
Strategy for winning the fight: This is a replay of the Moss Mother duo fight. The fight is exactly the same as the Moss Mothers, except they now spew black goo at you in between their attacks. The strategy remains the same, though. Just dodge their dash moves and hit them whenever they stop moving. Required or optional? Optional. Location: Bottom of the Moss Grotto. Reward: Weavelight Tool. Tips if you’re struggling: Cogflies make this fight extremely free if you’re having trouble getting out of the way of their attacks.
Lost Garmond
Strategy for winning the fight: Tacks, cogflies, and harpoons. Lost Garmond is not an easy boss, and his void projectiles are super hard to spawn. You’re probably best off trying to do passive damage and range attack your way through this fight. You can pogo on top of Garmond when he does his horizontal dash thing, but that’s kind of it when it comes to melee damage. Required or optional? Optional. Location: Remember where Lumble The Lucky was in the Blasted Steps? That’s where you’ll find Lost Garmond, but only once you start the Hero’s Call wish. Reward: Hero’s Memento. Tips if you’re struggling: Pop a few cogflies before sitting on the nearest bench. Then, pop a few more to double your count.
Crawfather
Strategy for winning the fight: We strongly recommend Beast Crest for this fight. It’s normally one of the worst crests, but it’s kind of nuts here. The attacks are so wide and there are so many minions to steal life from that you won’t actually struggle to top your health off with it. You can really force through this fight and take as much damage as you want if you keep reliably using your bind to turn the life steal on. Required or optional? Optional. Location: Greymoor, behind the Craw Door, which you unlock with the Craw Summons. After you beat the Craw Court, Crawfather will appear. It’s a lot of Craw, we know… Reward: Craw Memento. Tips if you’re struggling: Be careful using cogflies or traps. They’re okay here, but they can really make this fight very hard to parse visually, and you may end up doing more harm than good with them.
Plasmified Zango
Strategy for winning the fight: This fight is a damage check. It’s testing you to make sure you can put out as much damage as possible. Zango will heal periodically if you leave him alone, so you cannot stop hitting him for a moment or two. That means you need a lot of upfront damage, and you must hit Zango when he’s doing the blue “crying” attack. Just dodge his projectiles using small steps and keep attacking! Required or optional? Optional. Location: The lower-left room in Wormways. It’s behind a hidden wall. Reward: Plasmified Blood, which you need for the Alchemist's Wish. Tips if you’re struggling: Beast or Watcher Crest are probably best here.
Watcher At The Edge
Strategy for winning the fight: This fight is a skill-check on your spacing. You’ll win this fight by dashing in and out at the opportune times. It’s all about reaction timing, so try to stay in the middle of the map and dash in and out between their attacks. Required or optional? Optional. Location: Above the entrance to the Sands of Karak. You need Silk Soar to reach the area, though. Also, you must play the Needolin to activate the fight. Reward: Grey Memento. Tips if you’re struggling: You can dash under the Watcher’s uppercut. It’s easier to dodge below him than try and dash away.
Palestag
Strategy for winning the fight: Do you like dodging glowing boomerangs? Because that’s really the only element of this fight. Just keep dodging the boomerangs, dash at the stag, and hit it. Keep going until the Palestag is dead. Required or optional? Optional. Location: The top of Lost Verdania. You must have Elegy of the Deep to unlock this fight. Reward: The glowing orbs you need to unlock the Clover Dancers fight. Tips if you’re struggling: You can duck underwater in the pool on the right to avoid projectiles.
Clover Dancers
Strategy for winning the fight: This fight is identical to the Cogwork Dancers fight. They telegraph their moves the exact same way, so you really just have to dodge in the pattern based on their attack moves and get hits in when you can. Required or optional? Optional. Location: The top of Lost Verdania. You must have Elegy of the Deep to unlock this fight. Reward: Conjoined Heart. Tips if you’re struggling: Get to the ground ASAP when they start doing the twister hurricane thing. Dash to the right, jump up the wall, and float to the left, and you should buy yourself enough time to avoid getting hit.
Gurr the Outcast
Strategy for winning the fight: Get as many hits in as you can when Gurr jumps up in the air to throw those spike traps. Once all of his spike traps are out, it’s dodging time. Forget about attacking and just stay alive. Keep working the fight in this offensive/defensive pattern until you whittle him down. Required or optional? Optional. Location: This is part of the Hidden Hunter wish. Gurr is in the upper portion of the Far Fields. Reward: Mask Shard. Tips if you’re struggling: Don’t dash too much. Dashing with the spikes out on the field is tricky, and you mainly only have to jump when Gurr is in attack mode.
Tormented Trobbio
Strategy for winning the fight: The strategy here is basically identical to the first Trobbio fight. Stay aggressive, don’t stand still, and don’t get distracted by the bright animations. Required or optional? Optional. Location: The Stage of Whispering Vaults. You have to have already defeated Trobbio for Tormented Trobbio to appear. Reward: Dark Mirror. Tips if you’re struggling: You can hit the orbs he throws to knock them away! Wanderer Crest is ideal here, by the way.
Pinstress
Strategy for winning the fight: Dodge her first attack, then pogo on her follow-up attack. That’s sort of the pattern here for the entire fight. Pinstress likes to float around a lot, but you’re best off being patient and letting her come to you. Your ranged abilities are also key to winning here, since you won’t always be in melee range with all of her floating around. Required or optional? Optional. Location: Mount Fay, on the platform about the bench in the middle of the map. Reward: Pin Badge. Tips if you’re struggling: As is so often the case, cogflies are really good here.
Shrine Guardian Seth
Strategy for winning the fight: Seth is relatively hard to hit, so just take your time and don’t get too aggressive. You can pogo off Seth when they do their triple slashing attack, and when he throws his shield, you can dash underneath him to hit him when he teleports. This fight is a lot like the Lace fights, so just be patient and don’t overcommit when you attack. Required or optional? Required. Location: Shellwood, via Grand Gate. You have to use Silk Soar to get there. Reward: Guardian’s Memento. Tips if you’re struggling: Tacks are good here, but cogflies are likely to lag behind too often to be super helpful.
Nyleth
Strategy for winning the fight: Ranged attacks win this fight, so gear up before starting this boss. Nyleth is a pretty brutal fight because the attacks are nonstop, and the platforming challenges are pretty harsh. For the first phase, we recommend spamming ranged attacks until you get to the second phase where the platforming is actually easier. It won’t seem like it (the floor basically disappears), but you can wall jump and dash between sides. Required or optional? Required. Location: Right past Shrine Guardian Seth on the other side. Reward: Pollen Heart. Tips if you’re struggling: Passive damage takes a lot longer to work here than ranged projectiles, but if you’re struggling with the ranged attacks, try a passive approach!
Skarrsinger Karmelita
Strategy for winning the fight: Clear the waves and preserve as many resources as you can. When the real fight starts, keep a half-screen space between you and Karmelita. When she attacks, dash in and go to town with your melee weapon. This fight is really more of a dance between you two, so go in and out the same way she does when she’s attacking you. Required or optional? Required. Location: At the very top of the Far Fields. You need Elegy of the Deep to start the fight. Reward: Hunter’s Heart. Tips if you’re struggling: If you’re struggling to get through the waves at the beginning, try the Reaper Crest. It’s normally not very good, but it’ll help you stay at full health for the main fight.
Crust King Khann
Strategy for winning the fight: Throw some tacks in the very middle of the room and jump around a bunch. The Crust King seems obsessed with positioning himself in the very middle of the platform, so throw down some traps and jump around a bunch. You’ll kill him in no time. Required or optional? Required. Location: The Sands of Karak, in the top left. You need Elegy of the Deep. Reward: Encrusted Heart Tips if you’re struggling: Throwing daggers is also a great way to get some ranged damage in whenever Crust King is channeling the pillars he shoots out.
Summoned Saviour

Strategy for winning the fight: Summoned Savior is a very weird boss. You think it’d have a second phase or some kind of environmental move, but it really does kind of float around and let you hit it repeatedly. This boss is probably more about the narrative completion than anything else. Required or optional? Optional. Location: Moss Grotto, in the far west. This fight only appears in Steel Soul Mode when you’re completing the Vassal Lost wish. Reward: Growstone, and a very fascinating conversation with the bug who summoned it. Tips if you’re struggling: The only really threatening move is the dash, so just run away after hitting it 3-4 times if you’re worried about taking damage.
Lost Lace
Strategy for winning the fight: The Lost Lace fight is identical to the second Lace fight, except now she has tentacles and void attacks. Your strategy remains the same: be patient and get one hit in when you can before dashing away. This fight is all about taking your time and repositioning correctly, so don’t get too aggressive! Required or optional? Required. Location: At the very bottom of the Abyss. Reward: Congrats on beating the game! Tips if you’re struggling: Use the walls on the side of the map to avoid the really big attacks she throws at you from the floor.


Comments
0 comment