

Designing a Studio
Find a good location. The best recording studios are in windowless, well-insulated rooms. Depending on the size of the group you want to record, the room should at least be able to hold a small table for your computer and interface. There should also be room for the performers. Avoid rooms with lots of outside noise. Aim for the quietest space possible. You don’t want a great take interrupted by your neighbor’s lawnmower. In general, bigger is better. Try to find a room that won’t be too cramped and that has space for several musicians and all your gear. Pay attention to the room’s floor. Ideal rooms will have hardwood, concrete, or tile flooring, which is better for acoustics. Carpeting will absorb high-frequency sounds, but not low ones. It may also get worn down by high foot traffic. Pick a room with good overall acoustics. This usually means a larger room with fairly high ceilings, asymmetrical walls, and irregular surfaces for sound dispersion.
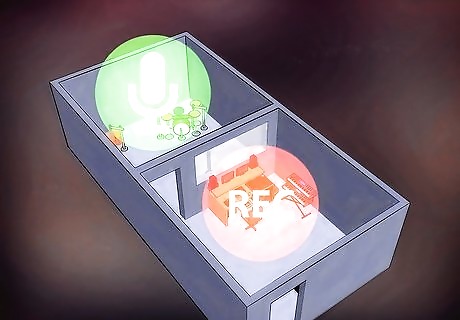
Consider a suite of rooms, if possible. Full-scale recording studios usually have at least two rooms for production. One of these is called the “live room” and another is the control room. There may also be one or more small rooms called booths or “isolation booths.” In professional studios, the "live room" is where musicians perform. It is usually separate from the "booth," where single musicians or vocalists can be acoustically isolated for very clean takes. The engineer does the recording, editing, and mixing of the takes in the control room. In many homes a suite set-ups won't be possible. You may only have space for a live room. At most, you may be limited to a small live room and control room. Closets can be often be converted into small isolation booths, as well.
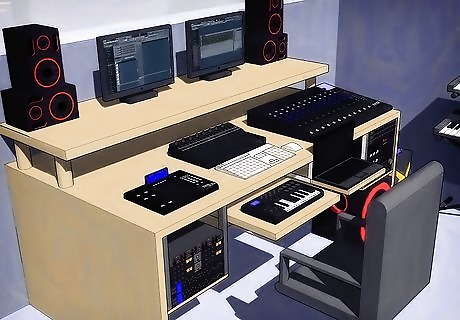
Map out the basic set-up. There's more to a recording studio than just microphones and musicians. In most studios there are two major systems. You’ll need to understand and organize these according to your interests and the projects you intend to record. The first setup is the recording system. This takes in audio from instruments and microphones and records it either digitally (using a computer or digital recorder) or to tape. The second system is called the monitor system. This includes an amplifier and speakers for the recording engineer to listen to the recording as it is being performed, as well as after the recording to do mixing and editing. You can set up a home recording studio with a pretty small budget. At the very least, you’ll need a computer, a DAW/Audio interface combo, studio monitors, one set of headphones, one mic, a few cables, and one mic stand. It is possible to put together a basic setup for around $400. You probably don’t want to go much lower, though, or the music quality will suffer.
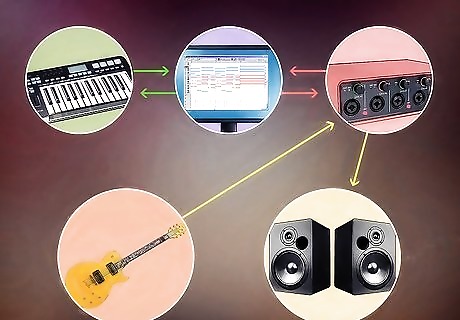
Design a signal pathway. In the professional world, audio systems of any kind can be illustrated by drawing a signal path. This follows the audio signal from beginning to end to show the user exactly what is being done to the sound in a particular system. For a typical beginner’s studio, the signal path follows a basic plan. The signal starts at the “input source,” i.e. the instruments and microphones. From there it goes to a recording interface – a device that plugs into a computer and converts the analog sound waves into digital data. From the computer interface, the signal will go into Digital Audio Workstation (DAW) software. It is here that the recorded sound can be edited or mixed. The signal next goes into an audio or recording interface to be returned into an analog signal. The analog signal lastly comes out through the monitor system.
Getting Gear
Get a computer with plenty of RAM. The more powerful your computer, the easier the producing of music will be. By power, that means lots of storage space and lots of RAM. Upgrading RAM and storage is the most important thing because this will give the computer faster and smoother running speeds. For most audio software you’ll want a computer with at least a dual-core processor. If you intend to mix lots of tracks, however, consider a quad or multi-dual core. It's important to have a separate computer for recording. Don't use your personal computer with all of your pictures, games, and music on it. Pro Tools and other recording software will require a lot of operating space. Apple MacBook Pro is a popular model for many do-it-yourself musicians. This is because the model has lots of storage space, lasts for years, and is very portable. Apple also offers upgrades for RAM, memory, graphics chip, and other options. The computer costs between $1200 and $2500.
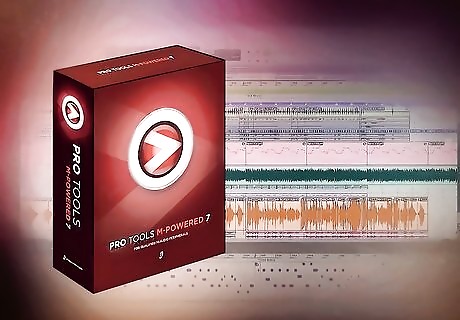
Choose recording software. All modern recording studios use computer software to save audio and allow for careful editing. Digital Audio Workstations (DAWs) vary greatly from one maker to the next, but one is usually included with the purchase of a recording interface. Mac users benefit from the inclusion of Garage Band on modern Macs, while PC users can use one of many free alternatives like the free version of Pro Tools 12. Pro Tools M-Powered is another common DAW. It is a basic home recording program with limited features. Pro Tools LE offers limited features, again, but is a step up from M-Powered. Pro Tools HD is professional-grade recording software and has become something of the standard for commercial studios. Other DAWs include Apple Logic (a Mac-only program), Audacity (an open-source program compatible with Windows, OS X, and Linux systems), and Ableton Live.
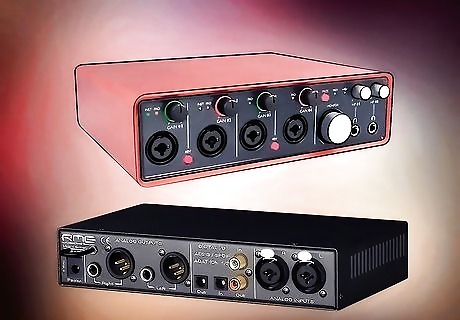
Select an appropriate interface for your studio. Audio interfaces are also called AD/DA Converters, which stands for “Analog to Digital/Digital to Analog.” These interfaces convert analog sound into a digital signal to be processed by your computer and also turn the digital audio back into analog sound on the monitors. They are an essential part of any good recording studio. Some entry-level interfaces include Emu’s 1212M, ESI’s Julia, and M-Audio’s Audiofile 192. These models offer quality sound for a modest price. A good quality recording interface typically costs around $150. Monitors (such as the immensely popular KRK Rokit series) start at roughly $300 for a pair. Higher-grade interfaces like the Focusrite and Audiofire series, Fireface 400 and 800, and Lynx models will cost more, up to a couple of thousand dollars.
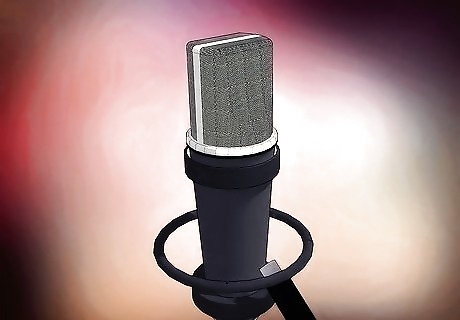
Get some high-quality microphones. Typically, most recording studios have some combo of dynamic and condenser microphones for performers to use. Dynamic mics are better for louder sounds and are more durable. They are used for guitar amps, drums, and other loud sources. Condensers are more delicate and expensive but also more detailed, bright, and clear than similarly priced dynamics. A good dynamic or condenser microphone costs $80-$200. Be sure that your recording interface has Phantom power when using a condenser mic. This is usually a button or switch labeled "+48," and powers the electronics inside the microphone. If this feature is not available, most microphone preamplifiers can supply power and will be more affordable than buying a new interface. Dynamic mics do not require power, so they can simply be plugged into an interface and used with no preamplifier. In some cases they sound better with a preamp, however. Some mics also have USB outputs. While these can be plugged straight into a computer, they tend to be of lower quality. Electric instruments will also plug straight into a DI unit or Direct box, which connects to the computer via USB.
Be frugal when buying gear. Like music itself, music production is an art and not a science. The price tag on your gear does always not lead to better quality. Low-end equipment in today's amateur home studios would have been unthinkable to top studio engineers just a few decades ago. It's possible to record radio bangers on a home studio setup. Expensive gear is great and can lead to great recordings, but don't let that hold you back from making great music. Take advantage of free software. Native Instruments, Ohmforce, Camel Audio, SSL, and other respected audio companies offer free virtual instruments and effects. Consider using old analog gear. Most studios are digital these days, but the really good ones still have analog gear you can work into your rig. If you want to put your studio on the map, consider adding a plate reverb unit or a reel-to-reel tape machine. You can record on one of these and bounce the audio into your DAW when you're done. These kinds of sound can't be replicated digitally.
Have some musical instruments on hand. Most studios assume musicians want to play their own gear to get a more accurate recording. This makes the engineer’s job more difficult, because she’s got to spend a lot of time setting up unfamiliar instruments. Some studios, however, will have gear in place that the engineer knows and can use to achieve a particular sound. Try having a variety of gear around. Amps, effects pedals, and guitars are good. If you have more money, also consider keyboards and synthesizers, drums, or even a piano. If you are going to be creating music in a purely software instrument environment, it is advantageous to have a USB MIDI keyboard or controller, as these will give you the tactile feel of a musical instrument such as a piano, which can greatly aid creativity.
Setting Up the Studio
Soundproof the live room. Soundproofing really does two things. It makes the room quieter by blocking out outside noise. It also makes the sound quality better on recording by absorbing excess acoustic ambience. Professional soundproofing can be expensive. Acoustic foam or panels work if you have money to spend, but may run you significant costs for a large studio. One inexpensive way to reduce sound is in the selection of the studio space. Try to select a live room without windows and with heavy, thick walls or thick insulation. If you are on a budget, get some blankets and cover up any windows and doors to reduce background noise. Added mass to the walls, like foam, also helps to increase the room’s sound absorption. This should reduce echoes.
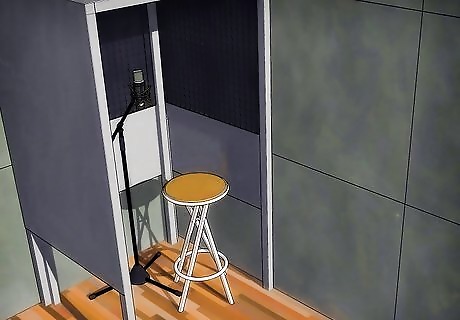
Prepare a vocal booth. Most studios set aside space specifically for vocals. Vocals can be hard to record. They should be recorded standing up, which makes it easier for the singer to sustain a good sound. The mic should also be at a comfortable height. The vocal booth is an isolation booth, so it should be acoustically isolated. Make sure to soundproof it as best you can. The mic itself should have a pop filter to protect it from saliva and to filter out sharp sounds, like t's and s's. If you don't have a pop filter, you can buy one for $10 or $20. If your mic is directional, so that only one side picks up sound, turn it so the side of the mic is facing the vocalist. His mouth should be about 10-15 cm away from the mic when singing. This distance shouldn't be altered too much, as it will cause the recording to sound off.
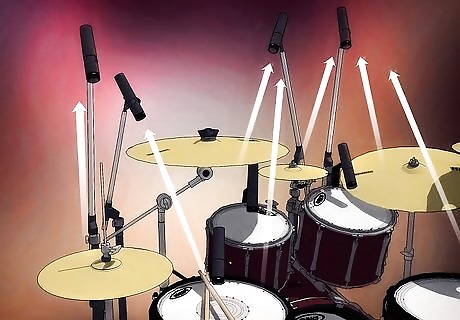
Set up the instrumentalists in the live room. You'll want mics to be just far enough from the sound source (i.e. acoustic instruments or amplifiers) so that they don't hinder the musicians. This typically doesn't involve a pop filter of any kind. If you have a small instrumental mic, use that. Instructions are usually included with the user manual. Use component mics or a single mic above the drums. Recording drums will vary according to the type of sound you want and what kind of gear the musicians come with. The best drum sound comes from single mics that clip onto individual components. You can then put these on the same channel in the DAW. If you don't feel like outfitting each component with a separate mic, take one mic and position it a few feet above the center of the kit. No pop filter is needed but make sure to face the mic’s recording side down. Doing so will add more "room sound" to the mix.


Comments
0 comment