views

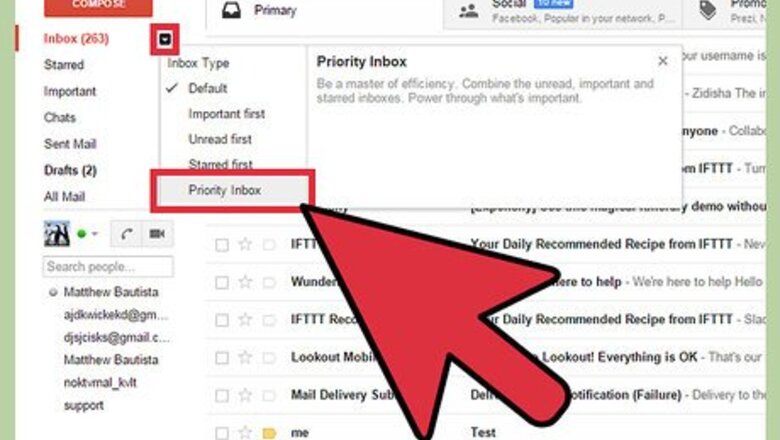
Hover your cursor over Inbox in the menu found on the left side of your Gmail screen. Click on the side arrow and select Priority Inbox

Wait while Gmail activates Priority Inbox. This shouldn't take long. You will now see that your inbox looks a little different: Important and unread are now listed first. Starred items are listed below in a second list. All other emails are listed after the starred emails as the final list. If you don't want to see the actual emails, you can collapse each set of headers using the tiny black arrows located in each header. The end result will appear very neat.

Train your Priority Inbox. You can rectify mistakes Gmail makes in highlighting or demoting the importance of your emails by pressing the tabs and stars at the start of each email line. These tabs or stars represent increasing or lowering the email's importance. In this way, Gmail's Priority Inbox quickly learns your preferences.

Customize the Priority Inbox. You can customize the Priority Inbox as follows: Click on the headers, or go to "Settings". A drop-down menu will appear allowing you to add or change a number of things, including labels, importance status, number of emails shown, hiding when empty, removal of the section and other options.

Change back to the ways things used to be. If you discover that you don't like using Priority Inbox, simply change it back. Do this by selecting the old inbox type in Settings


Comments
0 comment