views
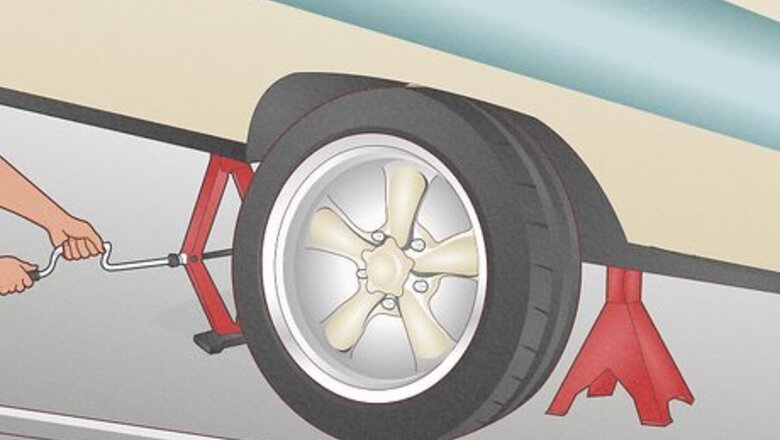
- Adjust your trailer brakes by prying up the star wheel adjuster with a brake spoon or flathead screwdriver.
- Push up on the star wheel adjuster to tighten the brake pads, or press it down to loosen the pads.
- Rotate the tire slowly until it drags, as this signifies a tight, well-adjusted brake.
- Make sure to adjust each tire on your trailer evenly so the brakes work and stop cohesively.
Jack up your trailer.
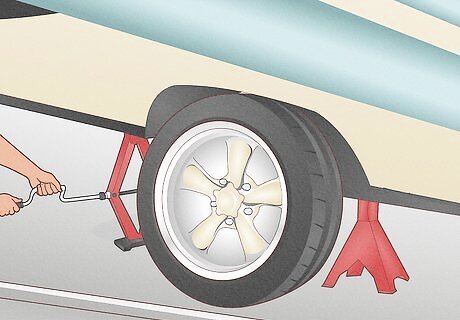
Elevating your trailer provides access to the brakes. Place trailer jack stands on the trailer’s frame (not the axle) and crank it up. Keep lifting it until the wheel can spin freely. Leave the jack stands in place while you adjust the brakes. Stabilize the tires by placing chock blocks under them. Keep in mind that an automobile jack may not be strong enough to lift a trailer.
Take off the brake access cover.
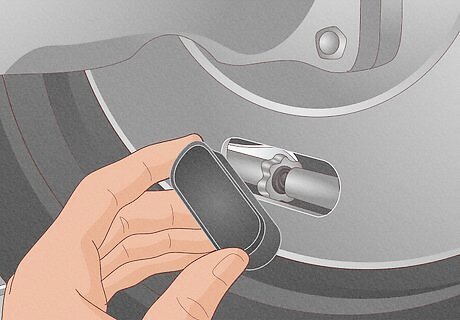
To get to the trailer’s brakes, remove the small cap on the inside of the tire. Most trailers (including RVs) have a cover that must be removed to get to the brakes. Some have 1 cover per wheel, while others have multiple. Look for a circular or oval plastic or rubber plug on the tire near the axle, then take it off with a flathead screwdriver. If you’re unsure where your trailer or RV’s brake access covers are, check the user manual. The access cover or protection cap is usually the same width as your thumb. Every wheel has at least 1 brake access cover.
Pry up the star wheel adjuster.
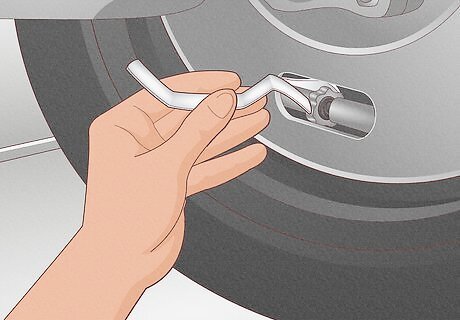
A star wheel adjuster loosens or tightens the brake line against the drum. Once the brake access cover is off, locate the star wheel adjuster—a spikey gear wrapped around a long, cylinder spool—inside the brake chamber (the area under the access cover). Use a brake spoon, brake adjustment tool, or flathead screwdriver to pry up the adjuster by lifting the teeth of the gear. Pry the gear up at least 5 times. Don’t be alarmed if you hear a clicking noise—this is completely normal and means you’re doing it right. Prying up the wheel’s adjuster and pressing down on the brake spoon tightens the brake pads or shoes, while pressing up on the spoon and down on the adjuster loosens the pads.
Turn the wheel until the tire drags.
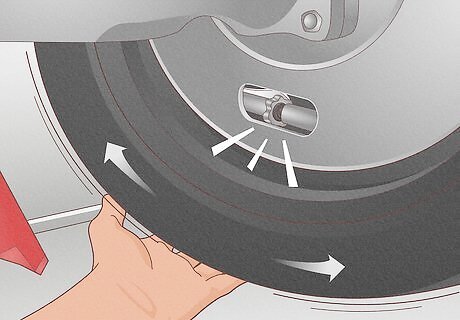
A well-adjusted tire should have resistance when pulled back. While the star wheel adjuster is pried up, turn the wheel slowly, 1 click at a time (you can hear and feel this). Pry up the adjuster until the tire is difficult to turn. Then, turn the wheel in the opposite direction and back it off until you feel drag. This means the brakes are tightened. Depending on your trailer’s manufacturer, it may take around 10 notches to back the tire off; however, it’s best to go by feel rather than an exact number as each trailer is different. If the wheel gets too tight, simply back it off by rotating the tire the other way.
Recover the brakes and repeat on the opposite tire.
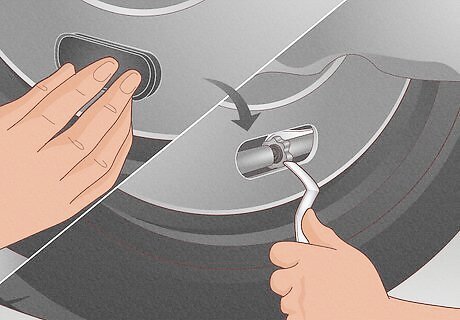
Adjust all of the brakes the same way. After the first tire is tightened to your liking, let go of the star wheel adjuster. Put the brake access cover back on, release the jack on that side, and move to the other side. Repeat the adjustment process on the other tire, and you’re good to go. Make sure you adjust all of your tires the same way; otherwise, your trailer won’t stop evenly. In other words, ensure that each tire has the same amount of drag by feel or by counting the number of notches. If your trailer has more than 2 tires, adjust all of them while the trailer is jacked up.


Comments
0 comment