

Folding a Simple Flower

Get 3 crisp dollar bills. They can be any denomination you want, but they need to be crisp. If your bills are wrinkled or very old, you won't be able to see the creases that you will be making.

Make a crease down the width of the bill, then unfold it. Take 1 of your bills and orient it horizontally, with the portrait facing right-way-up. Fold the bill in half widthwise by bringing the narrow ends together. Run your fingernail along the folded edge to make a crease, then unfold the bill. This crease will now be referred to as the "vertical crease." If your bill does not have a portrait on it, choose 1 side to be the front.

Fold the side edges a third of the way towards the vertical crease. Bring 1 of the narrow side edges towards the center of the bill, stopping about a third of the way. Run your fingernail along the fold to sharpen the crease, then repeat this step for the other narrow side edge. Do not unfold the bill. You can fold the edges closer to the center to make shorter petals, and further from the center to make longer petals.

Make a crease down the length of the bill, then unfold it. Fold the bill in half lengthwise by bringing the top and bottom long edges together. Run your fingernail along the crease to sharpen it, then unfold the bill. Keep the narrow side edges folded, however. This crease will now be referred to as the "horizontal crease."

Bring each of the corners towards the horizontal crease. Fold each of the top and bottom corners down so that they touch the crease running across the center of the bill. Sharpen the folded edges by running your fingernail across them.
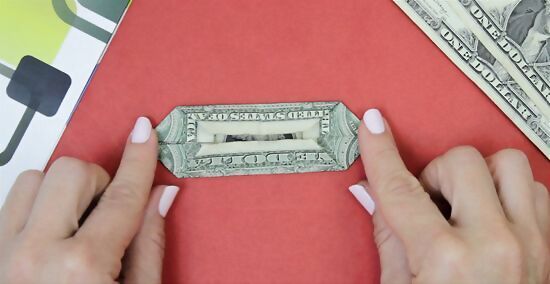
Fold the top and bottom edges towards the horizontal crease. Bring the long, top edge of the bill down towards the crease running across the center of the bill. Sharpen the fold with your fingernail, then repeat the process for the long, bottom edge.

Fold the strip in half lengthwise to make it narrower. Bring the 2 long edges together, then run your fingernail along the folded edge to sharpen it. Make sure that all of the folded edges and corners are sandwiched inside the bill. This completes your first petal.

Repeat the whole process with the remaining 2 bills. Make sure that the bills are all facing in the same direction. For example, if you are using American money, you would want to have the president's face on the front of each petal.
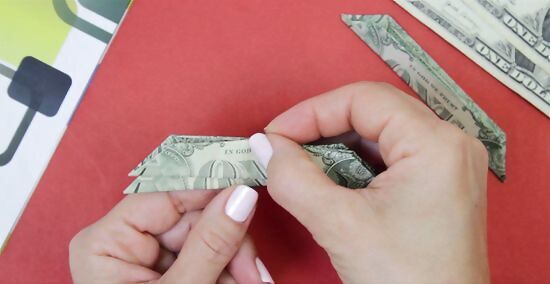
Stack the petals together, making sure that they're all facing the same way. Keeping the petals folded, stack them 1 on top of the other. Make sure that the folded edges are all aligned, and the pointed ends match up.
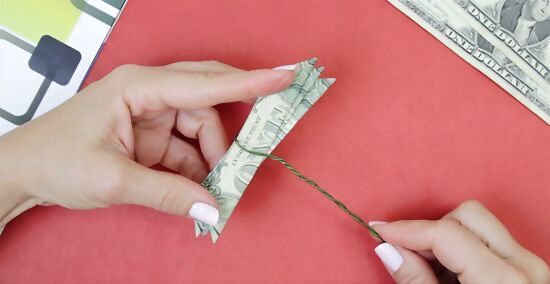
Wrap and twist the floral wire around the middle of the stacked petals. Cut a 12 in (30 cm) piece of floral wire. Find the center, then wrap it 2 to 3 times around the middle of the stacked petals. Twist the ends of the wire together to form a stem, making sure that it is next to the folded edge of the stacked petals. You should still see the crease from the very first step on the stacked petals. Use that as a placement guide for the wire. If you can't find floral wire, you can use thin beading wire, string, or even a pipe cleaner. The twisted wire must be sticking out of the folded edge of the petals. If it is sticking out of the open edge or the flat side edge, the flower won't turn out.

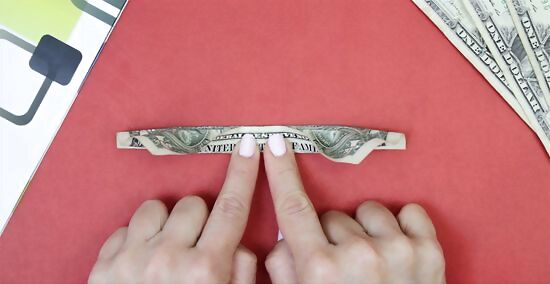
Open up the petals and flatten them to create a flower shape. Separate the petals to form a star or asterisk shape. Turn the flower so that the side with the stem and folded edges is on the bottom. Open up the petals and flatten them to create wedge-like petal shapes.

Use the flower or give it away as a gift. You can trim the excess wire down to the length you want with wire cutters. You can hot glue the flower to a pin to turn it into a corsage or attach it to a birthday card with tape. The possibilities are endless!
Creating a Rose

Find 3 crisp dollar bills. They can be any denomination you want—they can even be different denominations. They must be crisp, however, with as little creases and wrinkles as possible. If the bills are mangled, you won't be able to see the creases that you'll be making for guides.
Fan fold the center of the bill 5 times to create a bow-tie. Starting from the center of the bottom edge, fan-fold the bill 5 times until you reach the top edge. Sharpen the creases in the center of the bill to create a bow-tie shape, not a fan. It does not matter which side of the bill is facing you: front or back. Make sure that the portrait or number are facing the right way, however.

Pinch the center of the bill so that it holds its shape. Once you have the bow-tie, give the center a slight pinch. This will allow the bow-tie to hold its shape while you move on to make the other petals.

Repeat the process for the other 2 bills. Make sure that all of the bills are facing the same way as the first bill. For example, if you make your first bow-tie with the front of the bill, then make the other rest of the bow-ties with the front of the bill as well.

Stack the bills on top of each other. Orient the bills in different ways so that you form a star or asterisk shape when looking down on them. For example, you could have a horizontal, vertical, and diagonal bill.

Wrap a short piece of green floral wire around the center of the stack. Cut a 12 in (30 cm) piece of green floral wire. Wrap it a few times around the middle of the stack, making sure to go between a different set of petals with each wrap. Leave the rest of the wire sticking out of the bottom of the stack.

Shape the bills into petals. By now, you have something that looks a little like a pom-pom. Rotate the little flaps of paper until they are all pointing upwards and away from the green stem. Use your fingers to push out the bottom of each "petal" to form a cup shape, just like on a real rose.

Curl the edges of the innermost petal to form a tube. Find the bill on the top of your stack; it should be on the inside of your rose. Choose 1 of the petals from that bill, and curl the left and right side edges to form a tube. This makes the center of the rose.

Place the rose on top of a skewer and wrap the excess wire around it. Set the rose down on top of the pointed end of a thick, wooden skewer. Wrap the rest of the wire that is sticking out of the bottom of the rose around the skewer to secure it.

Add some wired silk leaves to the skewer if desired. Purchase a pack of silk wired leaves from the bridal or floral section of a craft store. They are shaped like rose leaves, with thin, wire stems. Secure the leaves to the skewer by wrapping the wire stem around it. Plan on using 2 to 3 leaves. How far apart you space them is up to you. Bend the leaves down and away from the skewer so that they look more realistic.
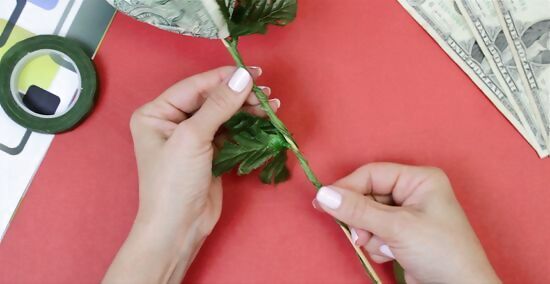
Wrap green florist's tape around the skewer, starting from the bottom. Overlap the tape slightly with each wrap so that you cover the skewer up completely. When you reach the top of the skewer/base of the rose, wrap the tape back down for 1 inch (2.5 cm), then cut or tear the rest off. Repeat this step if you feel that the tape layer is too thin. For a more realistic touch, use florist's tape to secure 2 to 3 more petals right under the rose blossom. If you can't find any green florist's tape, you can use green washi tape instead.

Curl the corners of the petals downward to create a realistic rose. Each petal has 2 corners, creating a boxy shape. You can make your rose look more real by curling those under. Hold a skewer under a petal, then wrap a corner around the skewer a few times to curl it. Do this for all of the corners on all of the petals, except for the center rosebud tube. Make sure that you are curling the corners downwards, not upwards. Curl the petals tighter the closer you get to the center, and looser towards the outside. If the curls are too tight, you can gently pull on them to loosen them.

Make more roses, if desired, then give them away as a gift. For a fancier touch, you can even wrap the bouquet in tulle, tissue paper, or cellophane, then tie a matching ribbon around the stems in a bow.


Comments
0 comment