
views
- Log into the iCloud website. Click the "Photos" option to see your iCloud photos.
- Download photos by clicking the "download" button. They will typically save to your computer's download folder.
- Download and install the iCloud for Windows desktop app from the Microsoft Store to sync photos to your Windows computer.
Using the iCloud Website

Log into https://www.icloud.com/ using your Apple ID. You can access your iCloud Photo Library from any computer by using the iCloud website. Make sure to log in with the same Apple ID that you use for your iCloud Photo Library. You can reset your iCloud password or change your iCloud email if needed.
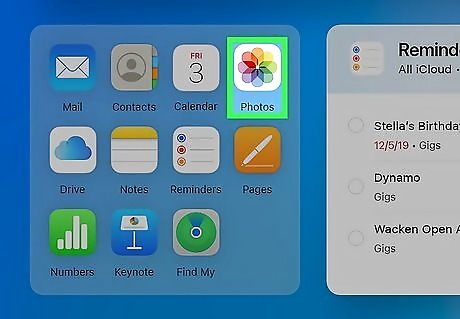
Click the Photos option. This will load your iCloud Photo Library. It may take a while to load the first time.
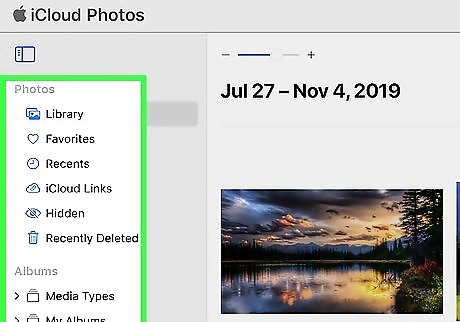
Browse the photos in your iCloud Photo Library. You'll be able to find photos from all of your iCloud-enabled devices once the Photos section loads. Photos that you have just taken with a device may not appear until that device uploads the photos, which usually happens within a few minutes. The Albums section allows you to see your various iCloud photo albums.
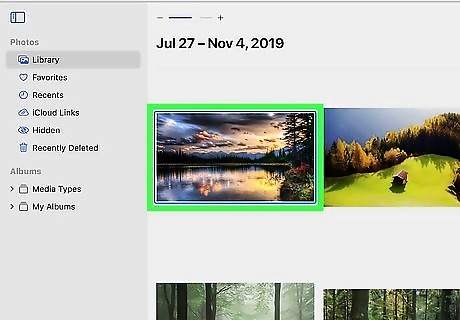
Double-click a photo to view it full-size. This will open it and allow you to view it in its actual size. Use the photo gallery list at the bottom of the screen to move between different photos.
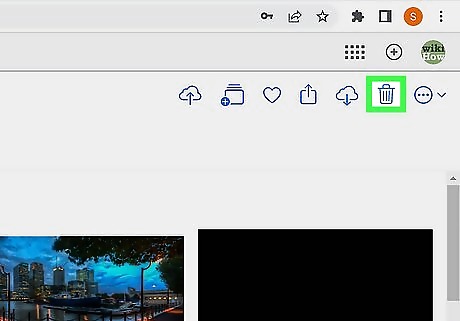
Delete a photo by clicking the Trash button. You'll see this in the upper-right corner when you have a photo open. Deleting the photo will delete it from all of your synced devices.
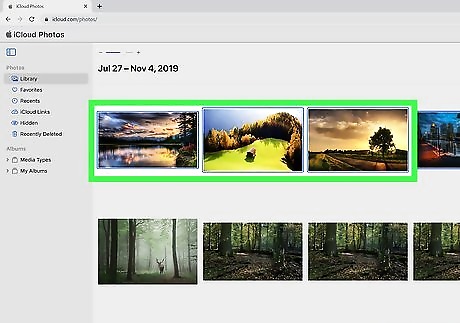
Hold the Ctrl key and click photos to select multiple. This will allow you to download or delete multiple photos at once.
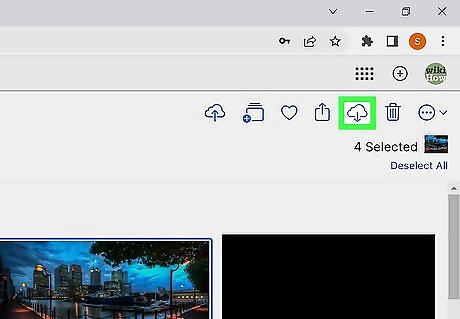
Click "Download" to download your selected images. This is the cloud icon with a downward-facing arrow. They will be downloaded to your browser's default download folder, usually "Downloads."

Click the "Delete" button to delete the selected photos. This is the trashcan icon in the top right of the screen. All of the photos you've selected will be deleted from all of your synced devices.
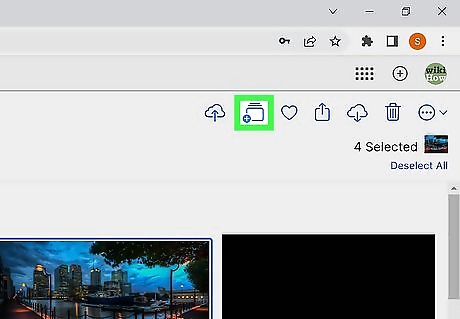
Click the "Add To" button to add selected photos to an album. This is the multiple-rectangles icon with a plus button in the top right of the screen. You can select from any of your existing albums or create a new one in the pop-up menu that appears.
Using iCloud for Windows
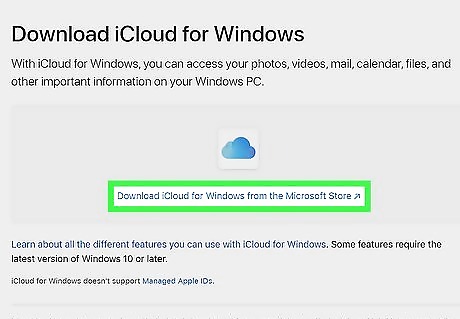
Download the iCloud for Windows installer. This method allows you to access iCloud on your device by installing iCloud for Windows. Your iCloud photos will be synced with a special folder on your computer. This will allow you to easily access your photos like you would any file on your computer. You can find the installer in this Apple Support page: https://support.apple.com/en-us/HT204283. The link in the support article will take you to the iCloud installer in the Microsoft Store. Downloading iCloud for Windows also allows you to use iCloud storage on your PC!
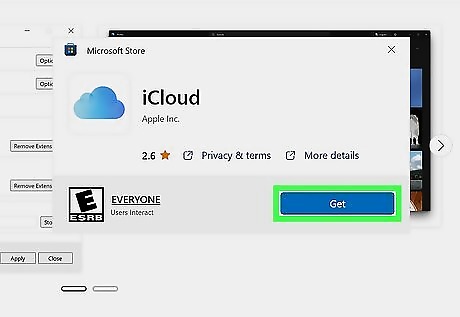
Click Get to install iCloud from the Microsoft Store.
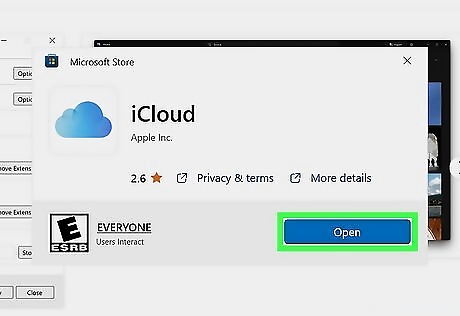
Click Open. This will replace the Get button when iCloud is done installing.
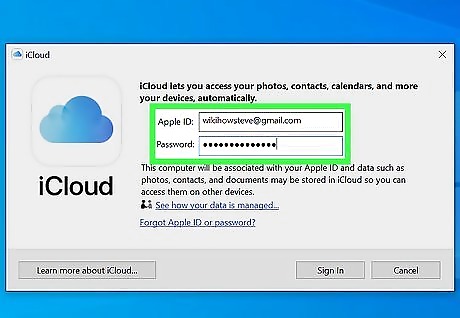
Sign in with your Apple ID. This should be the Apple ID you use for iCloud Photos.
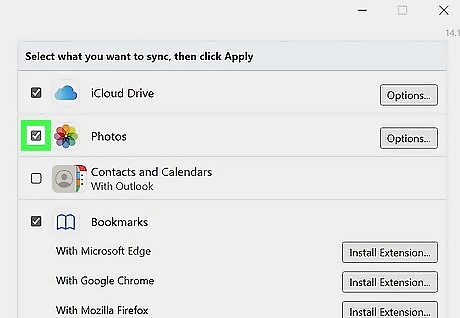
Check the "Photos" box. This will tell iCloud to sync your iCloud Photo Library with your Windows computer. iCloud will create a special folder for your iCloud Photos that you'll be able to easily access in Windows Explorer. You can check the boxes for other iCloud content that you want to sync with your Windows computer as well.
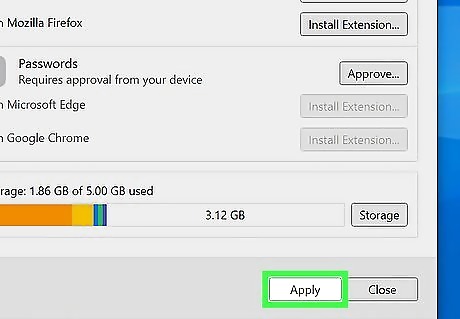
Click Apply to save your changes. iCloud will create the iCloud Photos folder on your computer and begin downloading your iCloud Photo Library to it. This may take a while for larger libraries.
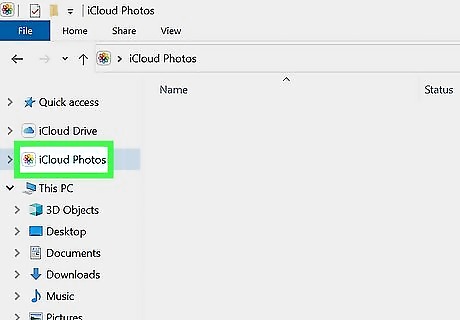
Find your "iCloud Photos" folder. The location varies depending on your version of Windows: Windows 11: Open the Microsoft Photos app and click iCloud Photos in the left menu. Windows 10: Open File explorer with ⊞ Win+E and click iCloud Photo in the left menu. Windows 8: Open the Start menu and click iCloud Photos.
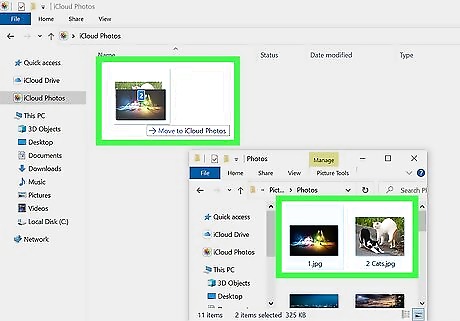
Add photos to your iCloud Photo Library to view on other devices. Any photos that you add to your iCloud Photos folder on your Windows PC will be uploaded to your iCloud Photo Library and will be accessible from any of your iCloud-connected devices. To add photos: Open File Explorer and click iCloud Photos in the left navigation menu. Open another FIle Explorer window and go to the photos you want to add to iCloud. Select the photos and drag them to the iCloud Photos folder. You're done! It may take a few minutes for new photos to appear on other devices.
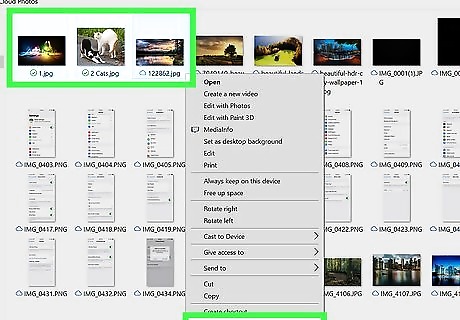
Delete photos from your iCloud Photos folder to remove them on all devices. Any photos deleted from the "iCloud Photos" folder will be permanently removed from your iCloud Photo Library on all of your devices. To delete photos: Open File Explorer and click iCloud Photos in the left navigation menu. Locate the photos you want to delete. Select the photos and right-click one of the selected photos. Click Delete in the right-click menu to delete the selected photos.
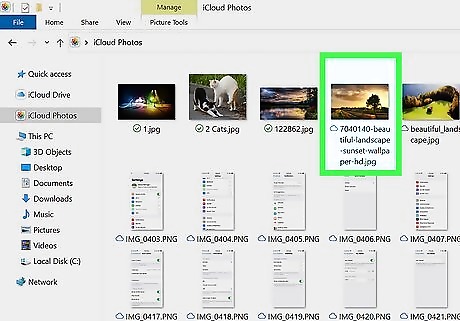
Download photos from iCloud onto your PC. You can download a local copy of a photo to edit it. To download a photo: Open File Explorer and click iCloud Photos in the left navigation menu. Locate the photo you want to download. Double-click the photo's thumbnail to download it to your computer. Now you can open the photo in a photo editing software like Microsoft Paint or Photoshop to edit the image. When you save the edited image in the iCloud Photos folder, it will update the image on all of your iCloud devices.









Comments
0 comment