views
Crafting a Model Castle

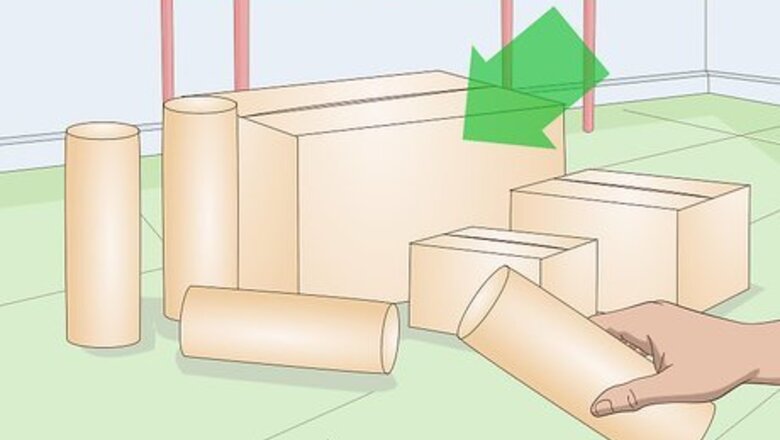
Find suitable cardboard boxes. A sturdy, nicely shaped box would be best. A good example is a box used for printer paper. Cereal boxes, tissue boxes, or shoe boxes would work as well. Also collect four cardboard rolls, these can either be toilet paper or paper towel rolls depending on the size of your castle. The cardboard rolls will make the turrets on your castle, so make sure that the other boxes you choose are shorter. If you can't find any cardboard rolls, make your own using poster paper. You can make them whatever height you want.
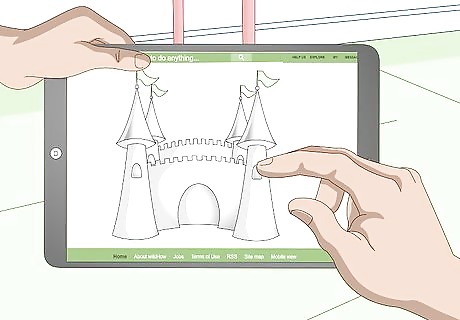
Plan your castle design. Look at photos or illustrations of real castles for inspiration and create a design on paper. In the case of this article, it's going to be kept simple with just four walls with a traditional rampart design, and four rolls to act as turrets. Then a moat will be added surrounding the castle. If you do design the castle with more complexity, consider: Creating turrets which are cut out separately and can stand alone. Making one central tall tower for the prince or princess to be stuck in, with a window for the unfortunate royal to stare through.
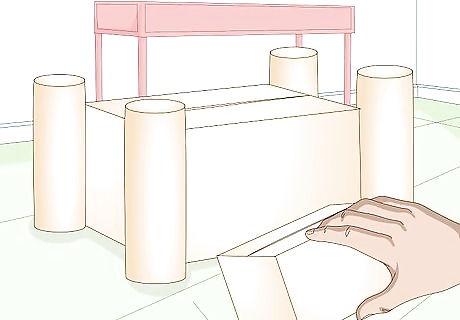
Set the cardboard pieces in place to get an idea of the shape of the castle. With the box on your working surface, set the four long rolls to each corner of the photocopy paper box (don't physically attach them yet––this gets done later.) Assess the size of the turrets to the main castle box. Adjust the turret size if needed. If you would like the turrets to be taller, you can switch to a longer roll, like a paper towel or wrapping paper roll. To make the turrets shorter, simply cut the current rolls down to size. Be sure that you measure and cut all four rolls to the same height.

Cut the ramparts design into the top of the box. Ramparts are the surrounding walls of the castle and commonly have alternating squares and open square spaces. Use a ruler to measure and trace evenly spaced squares on the top of your box. Using scissors, cut out every other square to create the rampart walls of the castle. Another option is cutting a square template from a piece of cardboard and tracing that square all the way around the box. Attempt to measure the square to a size which will fit all the way around the box in even spacing.

Draw a stone design on a large sheet of tin foil. Measure out enough tin foil to cover a wall of the castle. Lay this sheet of foil on your working surface and draw an alternating stone pattern using a permanent black marker. To do this, start at the bottom and draw rectangles of approximately the same size, one connected to the other, all the way across the bottom of the tin foil. To create the next row of stones above this one, start at the center point of the first rectangle on the bottom row and draw a rectangle which covers the left half of the top of the first brick and the right half of the top of the second brick. Continue following this pattern until you have reached the top. If you prefer a more muted look to your castle, you can opt to use gray or tan Bristol Board or craft paper.

Cover the entire castle in the decorated foil. This will get rid of the cardboard look and it will create the smooth, shiny surface. Apply a decent coverage of craft glue to the cardboard and press the foil in place on each wall and wrapped around the turrets. The walls should be covered on both the front and back. Wrap the excess foil around the tops of the walls to cover any exposed cardboard. Gather the foil together at the top of the turrets to cover the hole in the top of the roll.
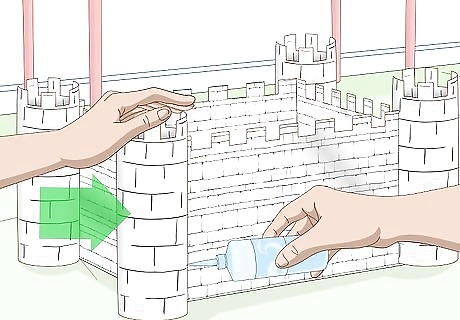
Attach the turrets to the corners of your castle wall. Measure the height of the corner of your castle wall. Draw a line in pencil up the side of the turret which matches the length of the corner of the castle wall. Start at the bottom and continue drawing up toward the top of the turret. Using scissors, cut slits in the turrets along this line. Place glue along the cut edges. Wedge each turret onto a corner of the box. Press and hold the glued edges to the corner of the castle wall until it feels secure. Alternatively, you can hot glue the turrets to the corners of the castle.
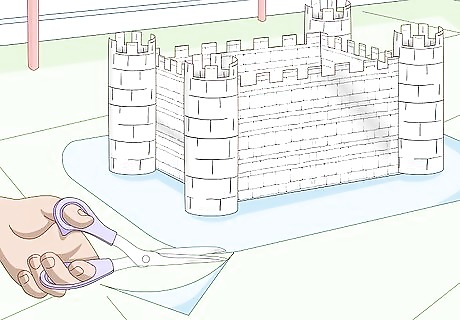
Create a moat around the castle. Cut a piece of blue Bristol Board or craft into a square shape with rounded edges, that is larger than the castle and gives the appearance of a lake or moat surrounding the castle. The reflection on the foil makes for a nice water effect.
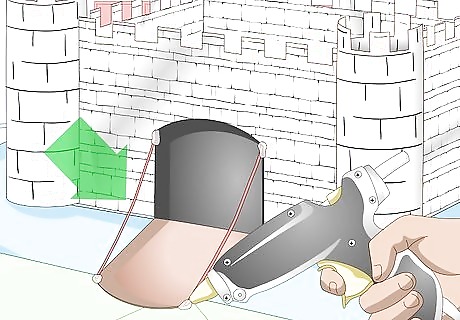
Build the castle bridge. Cut a small piece of black craft paper into a rectangle with a rounded top for the appearance of space going into the castle. Then trace around that black doorway onto a piece of brown paper or cardboard and cut that brown shape out to form the bridge. Glue the black piece to the front wall of the castle to create the door space. Place the brown piece flat down in front of the door space and glue it to the moat. Measure to be sure the bridge will be long enough to cross the moat. To create a drawbridge effect, glue a piece of string to each side of the top of the black doorway. Glue the other end of the strings to top of the bridge on each side. This will create the effect of the chains used to draw up the bridge.
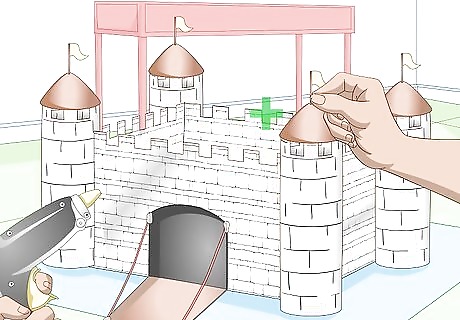
Add anything else that you think completes the castle's overall appearance. In this case, the turrets have been finished with roofs and flags and some banners have been hung from the ramparts. To make turret roofs, simply make cones from paper in the correct width and glue into place over the top of each turret tube. Cut medieval flag and banner shapes from craft paper and glue them to toothpicks to create flags which you can glue into the tops of your turret roofs. You can also glue banners on the front, top end of your rampart wall over the doorway.
Building a Play Castle

Start with a large cardboard box. Some of your best options would be a wardrobe box or a refrigerator box. You want something large enough that your child can crawl inside and play. You can purchase wardrobe boxes from a moving company. Try getting free boxes from a local store which sells appliances. For multiple sections and levels to your castle, choose boxes of different shapes and sizes. Washer and dryer boxes would work well for this.
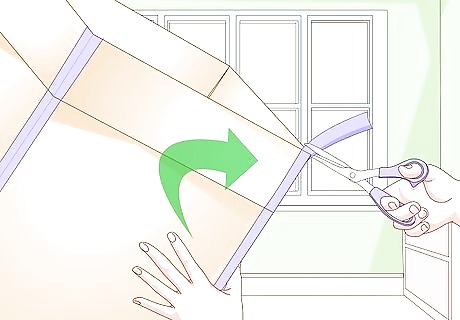
Reinforce the box with tape. Set up the box with the top flaps reaching upward. Tape the corners of the flaps together on the inside of the box using packaging tape. This creates more height with an opening on top of the box. If you would like to add some fun color to your box, you can use a colored tape, like painters tape on the outside of the corners instead. Consider also using this tape to create the stone effect all around the outside.
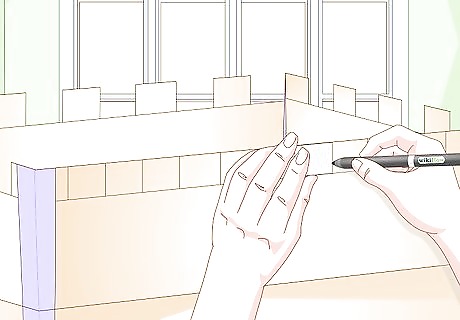
Create a rampart wall effect along the top of the box. Measure the top of one side of the box from corner to corner. Divide that length by an even number such as 12 or 8. Using a ruler, and starting in the corner of one side of the top of the box, measure out and draw a square with sides the length of one section according to your calculations. Using a box-cutter, cut out this square. You will use this as a template. If your box is 24x24x24, and you divide by 12, your template would be a 2-inch square. Place the template next to the cut square hole in the top of the box. Line the edge of the square to one side of the cut. Trace the other side of the template onto the top of the box, then move the template, lining an edge on this line. Finish tracing the rest of the square and cut it out of the top of the box. Repeat this process all the way around the top of the box, creating an alternating square and cut section to make the rampart effect.
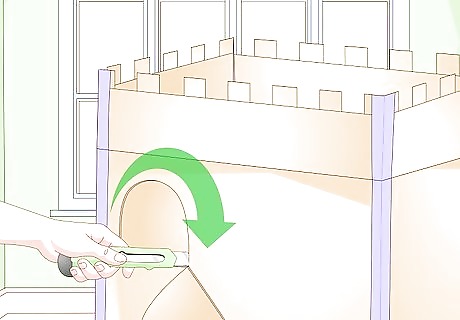
Create a window. Draw a window on the top, left corner of your castle. This should be a thin rectangle with a rounded top. You want it to be just large enough for your child to be able to peek through. Cut the window out using a box cutting knife. For a Gothic castle make the windows peaked on top, like an ^.

Make a doorway. On the bottom, left of the box, draw a rectangle with a rounded top. This should be larger than your window and wide enough for your child to crawl through. Cut this door out with your box cutting knife. Only cut the two sides and the top, leaving the bottom section attached to the box. Be careful when cutting out the doorway that you do not damage the piece which is being cut to make the space. This will become your drawbridge.
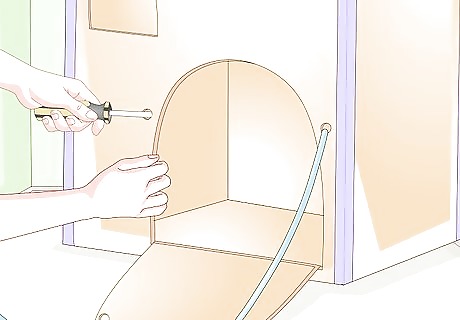
Attach a drawbridge. Using a drill or screwdriver, puncture two holes in the box, one on each side of the top of the doorway. Thread a piece of nylon rope through these holes from front to back, then tie a knot on the inside of the box. Puncture two more holes one each side of the top of the drawbridge section you have cut out. Push the other end of each rope through these holes and tie knots on the section that is touching the ground to secure the rope in place. It is helpful to reinforce these holes by taping around the cut edges with packaging tape. This will make the area more durable. Your child can raise and lower the drawbridge by pulling on the knots in the rope from the inside the box.
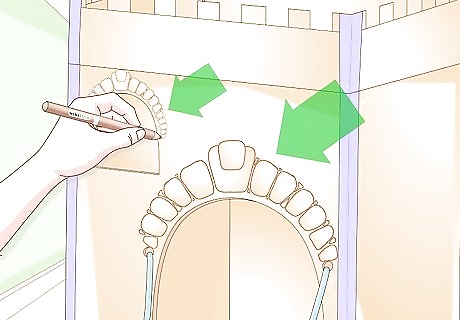
Draw details around your window and doorway. Using a large marker or paint, draw a keystone at the top of the arch of the doorway. This is a quadrilateral slightly larger than a square, with the two sides expanding at a slight angle. The top side will, consequently, be slightly larger than the bottom. You can make this top side slightly rounded. Using the keystone as your starting point, draw similar quadrilaterals from the top of the arch, all the way to the bottom of the doorway. Repeat this on the other side. Use this same technique to create detail around the window. Also draw squares along the bottom of the window. These should be roughly the same size as your quadrilaterals.

Draw your castle walls. Using paint or a thick, permanent marker, draw a stone design onto your box. Start by drawing a horizontal rectangle along the bottom of your box and connecting equally-sized rectangles all the way around the bottom. To draw the second layer, Start at the center point of one of the rectangles and draw a line upward from there to create the side of the rectangle to begin your second layer of stones. The other side should rise up from the center of the next stone on the bottom layer. Connect these sides with a line on the top. Repeat this system until you have covered the walls of your castle in stones. This step is great for getting your child involved. You can also draw the lines in pencil and have your child trace them with a marker or paint.
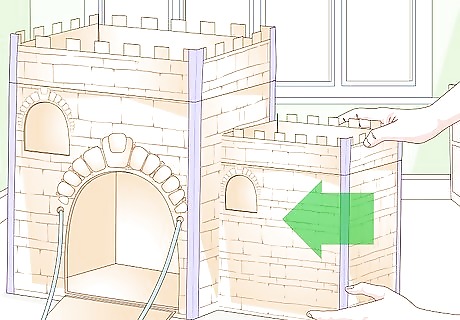
Expand your castle. If you would like to make a larger castle, attach another box to this main one. Using a smaller box than the original, line it up to the side of the main box and trace the square where it will fit. Cut this square out of the main box. Slide one set of flaps from the new box through the square and tape them to the inside of the main box to hold it in place. Proceed with adding windows, details, and drawing stones on each new section which is added to the castle.





Comments
0 comment