views
Drawing a Puzzle Piece Freehand
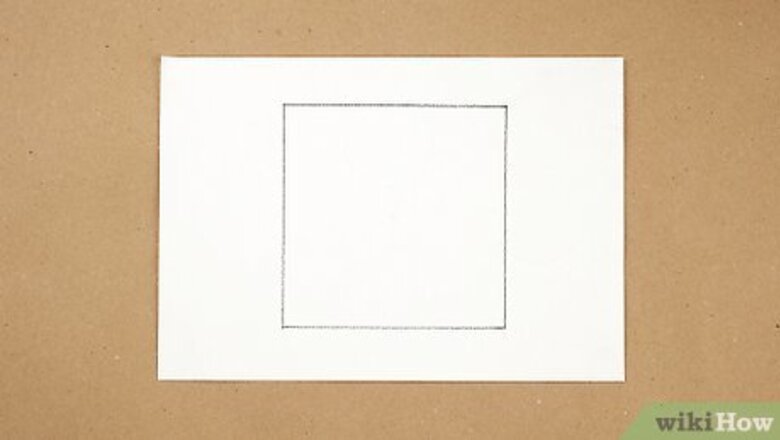
Sketch a square outline using a pencil. Press your pencil lightly into the paper so your lines won’t be very dark. Then, slowly draw each side of your square. If you want precise lines, trace a ruler. However, there’s no need for your lines to be totally straight.
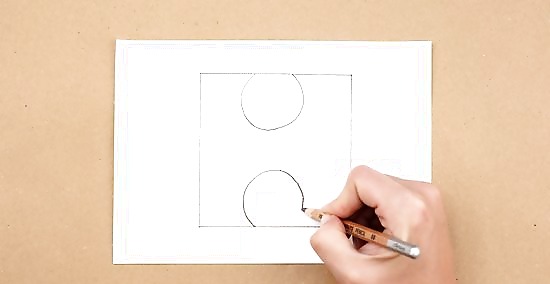
Draw a loop on the inside of each side of the square. Place the edge of your pencil about 1/3 of the way down the left side of the square. Then, draw a loop on the inside of the square. Repeat on the right side to create a second loop. These loops should look like the sides of a puzzle piece where it connects with another piece.
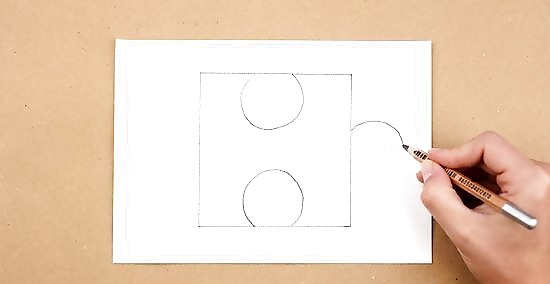
Add a big loop at the top of the square. Put your pencil along the edge of the top about 1/3 of the way from the left corner. Then, draw a loop that ends about 1/3 of the way to the right corner. Adjust the loop as needed to make it look like a connector on a puzzle piece. Just leave the bottom line flat.
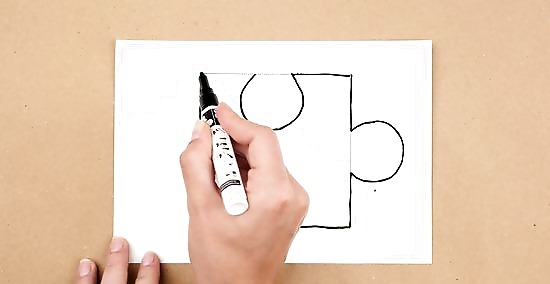
Outline your puzzle piece with a black marker. Start by slightly rounding the edges on the left and right side of the piece to refine the shape. Then, outline the straight edges. Finish your shape by tracing along the looped edges. Go slowly so you don’t smear the marker or accidentally veer off the line.
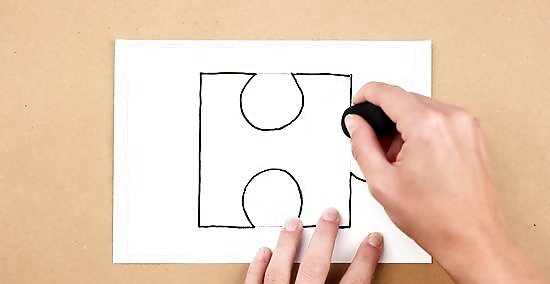
Erase your guidelines after the marker dries. When the marker line no longer looks shiny, take your eraser and scrub away the pencil lines. This will leave your dark outline.
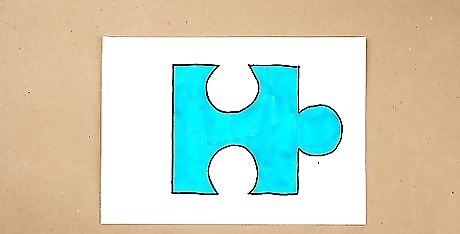
Color your puzzle piece with markers, colored pencils, or crayons. For a simple design, just color your piece. You can use several colors, or just one. If you want to get creative, draw a picture on your puzzle piece. You could even glue stuff to your puzzle pieces. For instance, add some glitter or sequins to your drawing. Stickers are also a great way to decorate a puzzle piece.
Drawing a Puzzle
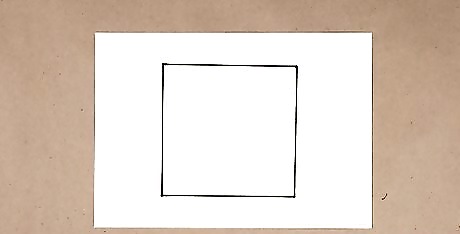
Draw a square on a sheet of paper using a marker and a ruler. Place the ruler slightly toward the left of your page and draw a straight line using your maker. Next, lay the ruler below the line to trace the bottom of the box. Then, position the ruler so it’s even with the bottom line and draw the right side of the square. Finish by adding a line at the top. Use the markings on your ruler as a guide. For instance, you might make each side exactly 4 in (10 cm) long.
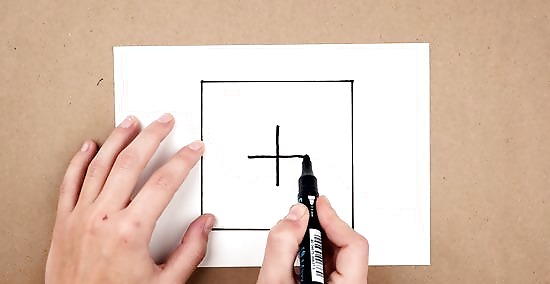
Use your marker to draw a plus sign in the middle of the box. Estimate where the center of the box is. Start by drawing a vertical line that’s about 1 in (2.5 cm) long. Then, draw a horizontal line across it that’s about the same length. This will be where all of your puzzle pieces connect.
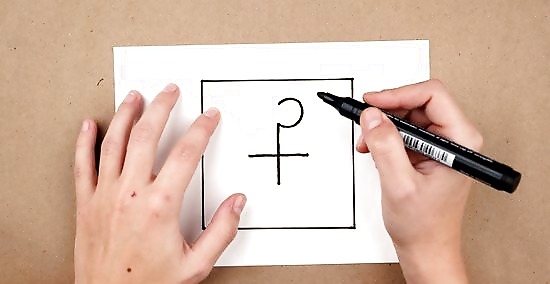
Add a puzzle piece loop to the top of the plus sign. With your marker, draw a loop that points toward the right side of your square. Then, draw a straight line connecting the loop to the top of your box to finish that side of the puzzle piece. This is where your top puzzle pieces connect. Your loop doesn’t have to be perfect because the puzzle pieces will still connect together.
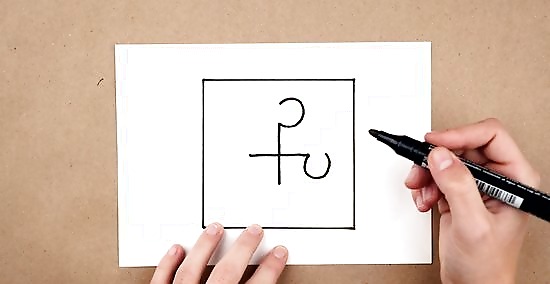
Draw a downward loop on the right end of the plus sign. Like before, draw a line connecting the loop to the side of the square. This forms the connection between your top left and bottom left puzzle pieces.
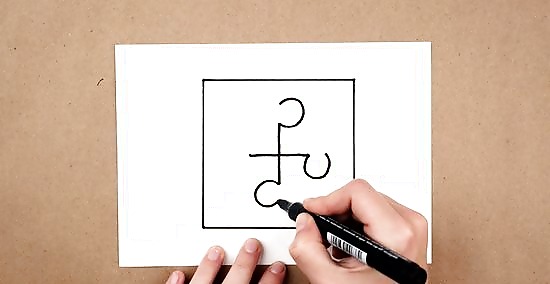
Add a puzzle piece loop to the bottom of the plus sign. Point this loop toward the left side of your square. After you draw the loop, continue the line to connect the loop to the bottom of the square. This connects your bottom pieces.
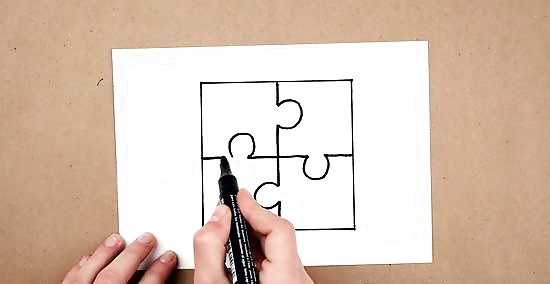
Draw a loop on the left side of the plus sign. This loop should point up toward the top of the square. Once again, connect the loop to the left side of the square to finish the puzzle pieces. Your square should now be divided into 4 puzzle pieces.
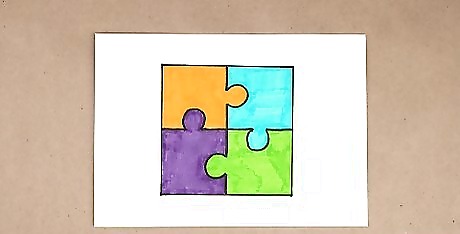
Color or decorate your puzzle pieces if you like. Use different color markers to fill in your puzzle pieces. Pick a different marker to use on each piece. Alternatively, you might draw a picture in each puzzle piece. Get creative!
Tracing a Puzzle Piece
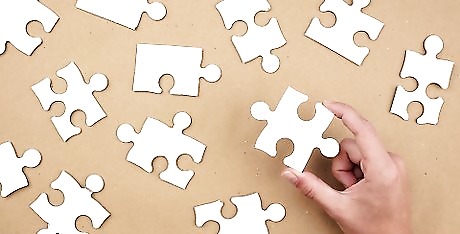
Get a puzzle piece if you have one handy. Look for a puzzle that has the size pieces you want to draw. Then, pick out a piece to trace. Place the piece on a sheet of paper. If you want to trace several interlocking pieces, you may need to put together the puzzle first. Then, you can pick out pieces that fit together to trace.
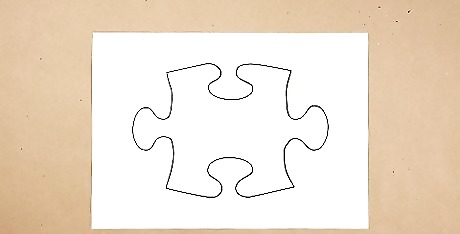
Print out a puzzle piece template from online as an alternative. Do a quick Internet search for “puzzle piece template.” Choose a design that you like and print it out. Cut out the template so it's ready to use. Choose a larger template if you want to draw a big puzzle piece. Pick a template for smaller pieces if you want to draw several interlocking puzzle pieces.
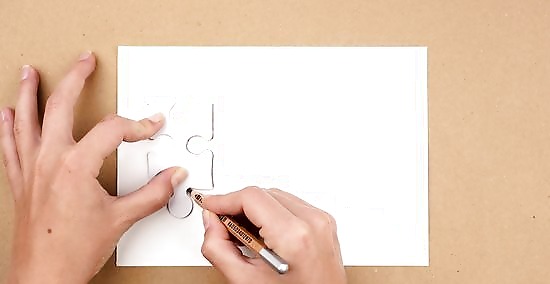
Guide your pencil along the outline of the puzzle piece. Place the puzzle piece or template onto your piece of paper. Then, use your pencil to trace around the edges. Follow the edges carefully so your lines are even. Go slowly so you’re less likely to make a mistake. If your pencil slips, just erase the mistake. Then, go back to tracing.
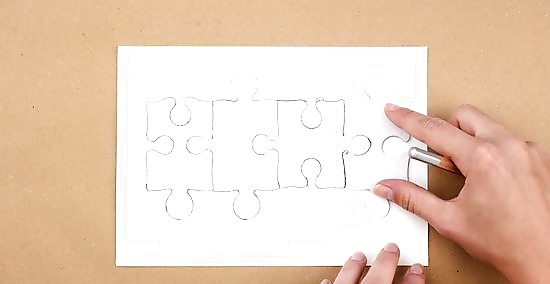
Trace several pieces that connect together to create a mini puzzle. Place the next puzzle piece or template on the sheet of paper so that it interlocks with the first puzzle piece. Then, trace it. Keep doing this until you’ve traced all of your puzzle pieces or templates. You want the pieces to interlock on your tracing so it’s easier to decorate them. If you want to draw a picture on your puzzle pieces, it’ll be harder to do that if you’ve traced each piece or template far apart.
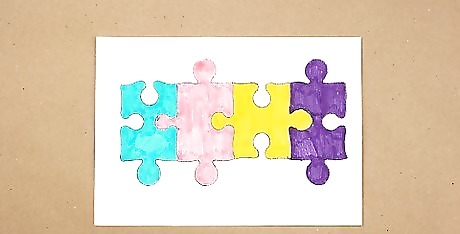
Decorate your puzzle pieces with markers, colored pencils, or crayons. For a simple design, just add some color by shading your puzzle pieces. You could also make each puzzle piece look different. As an alternative, draw a picture that connects all of the puzzle pieces together. If you’re making a puzzle with friends or siblings, each of you could decorate a puzzle piece. If you’re drawing puzzle pieces for autism awareness, color each puzzle piece a different color.
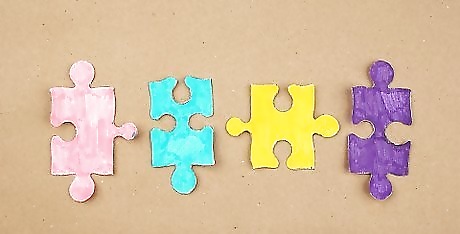
Cut out your pieces if you want to use them as a puzzle. Once your design is complete, use your safety scissors to cut out the puzzle. Make sure you follow the lines perfectly so your pieces match up. Keep your finished puzzle in a plastic zipper bag.
Turning an Image into a Puzzle
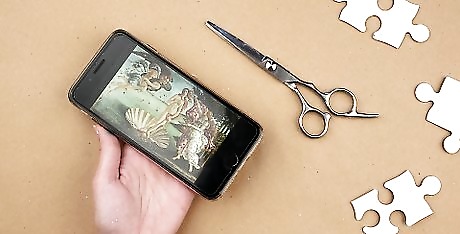
Choose a photo or drawing to make into a puzzle. Any image will work, so pick something you like. Just make sure it’s okay for you to cut it up! Here are some ideas: A family photo A favorite drawing you made An image printed from the internet A poster A greeting card
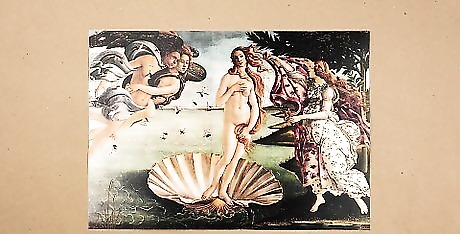
Make a copy of your design if you want a reference photo for the puzzle. This is totally optional. However, it’s easy to forget what your picture looks like after you cut up the puzzle. If you want a reference photo to use when you put the puzzle back together, copy the image before you turn it into a puzzle. You may be able to use your home printer to make a copy. If you print your image, make two copies! If you don’t have a way to print a copy, try taking a photo of the image on your phone to use as a reference.
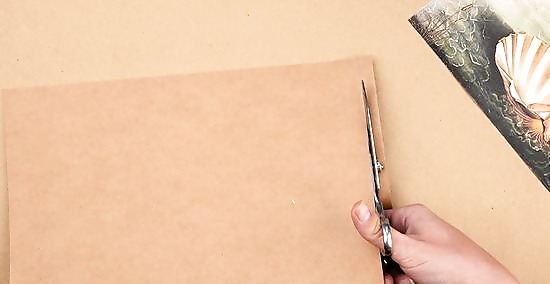
Trim a piece of cardstock or cardboard to fit your image. Use cardstock paper, cardboard from a cereal box, or cardboard from a shipping box. Place the image you’re using onto the cardstock or cardboard. Then, use your pencil to trace it. Use scissors to cut away the excess cardstock or cardboard. A hard backing will make your puzzle easier to put together.
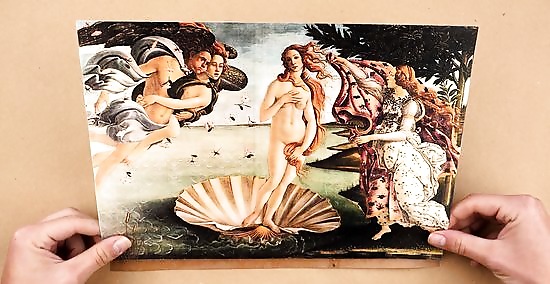
Glue your image to the cardstock or cardboard if it’s flimsy. Swipe a glue stick or white school glue onto it, then apply your image. Smooth out any bumps or air bubbles. Wait for the glue to dry. You can skip this step if you’re using a greeting card because it’s already made out of cardstock.
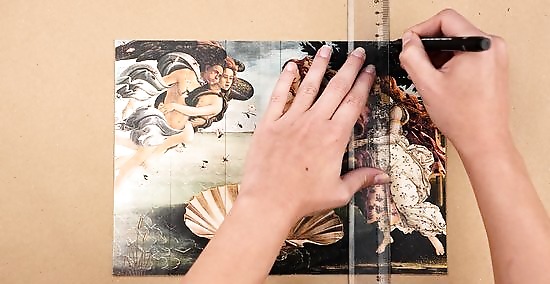
Use a pencil and ruler to draw vertical gridlines on your image. Position your ruler evenly with the left side of your image. Then, trace a line. Move the ruler over so it’s even with your first line, and trace another line. Keep doing this until you’ve drawn vertical lines across the entire image. As an alternative, draw your lines freehand to make unique puzzle piece shapes.
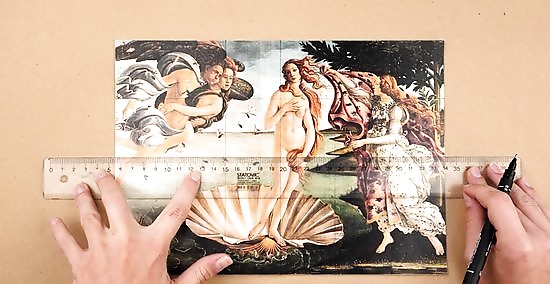
Draw horizontal gridlines to complete the puzzle grid. Place your ruler so that it’s even with the top edge of the image. Then, trace the other side of the ruler to create the first gridline. Move the ruler so it’s even with the first line, then trace the second gridline. Keep going until you reach the bottom of the image. When you're finished, your image will be covered in small squares. It’s okay to do this freehand if you’re making unique puzzle piece shapes.
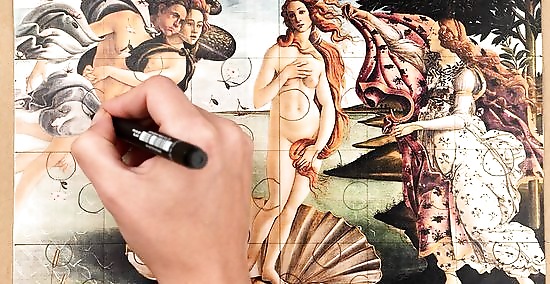
Add loops along the gridlines if you’re making a jigsaw puzzle. Start by adding loops along the vertical lines. Then, go back and add loops to the horizontal lines. Visually check your puzzle to make sure your pieces look correct before you cut them out. If you make a mistake, just erase it and re-draw the loop. It’s okay to skip this step if you want to keep your puzzle simple.
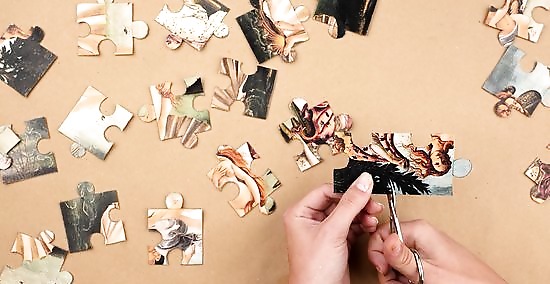
Cut out your puzzle pieces using scissors. Follow the lines as you cut out each piece. Work piece-by-piece so you’re less likely to make a mistake. Make sure to follow the edges exactly so your pieces look correct. Ask an adult to help if you’re not allowed to use scissors on your own.
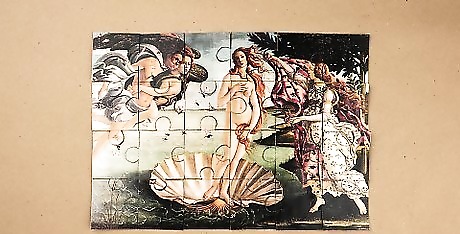
Put the puzzle back together. Mix up the pieces to make things more interesting. Then, start putting the pieces back together. Check your reference photo if you made one. Store your puzzle in a plastic zipper bag.





Comments
0 comment