
Getting the Bricks Ready
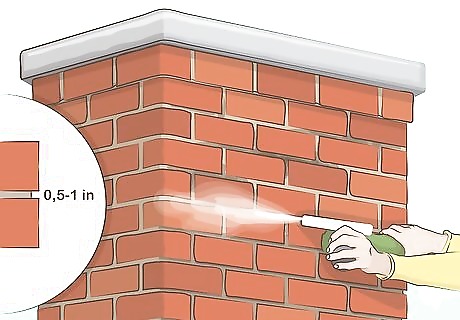
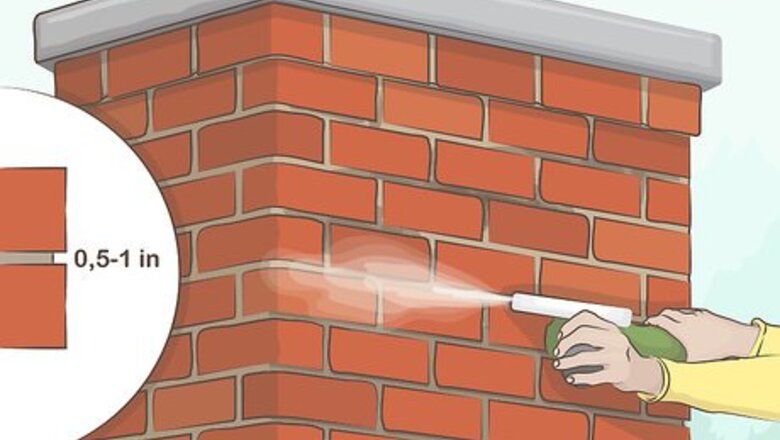
Grind the mortar down to 0.5 to 1 in (1.3 to 2.5 cm) using a mortar raking tool. Set the mortar raking tool to a depth of 0.5 to 1 in (1.3 to 2.5 cm) to achieve a consistent depth. Pull back the safety guard from the tool and turn the machine on. Guide the blade along the horizontal lines of the mortar. Continue pushing the blade back and forth until you have removed the mortar to a depth of 15 millimetres (0.59 in). Repeat the process with all of the mortar lines you need to repair. Wear safety goggles to protect your eyes. Rent a mortar raking tool or pneumatic chisel from a tool rental company, if necessary. A small chisel and hammer can be used. The smaller the chisel, the less damage you will do to the bricks. Use water and a mask to cut down on the dust that you breathe. Try your best to avoid grinding the brick when you are removing the mortar.
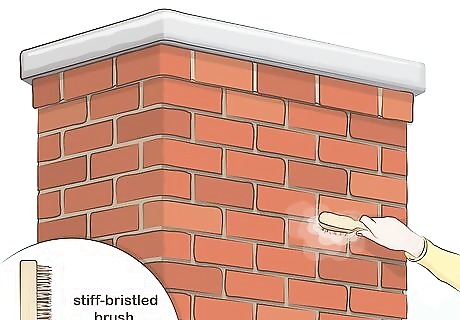
Brush the dust off the bricks using a stiff-bristled brush. Use a stiff-bristled brush to remove as much dust as possible first. Then, sweep a soft-bristled brush through the ground out gaps in the bricks to remove the dust, or you can also use an air compressor with a blow nozzle for quicker removal. Start at the top of the chimney and work your way down to the bottom. Finish by brushing or blowing over the faces of the bricks to remove any surface dust. If your brush is getting quite dusty, bang the back of the brush on the ground to shake the excess dust off. Purchase stiff and soft-bristled brushes at a hardware or homeware store.
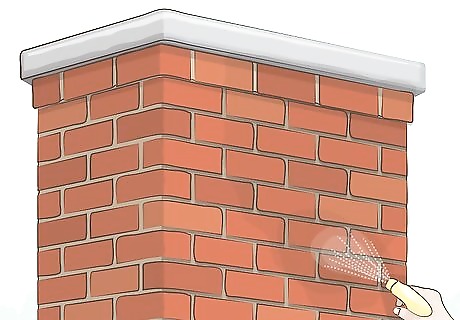
Spray the brick joints with water. Pour some water into a spray bottle and liberally spray the water into the gaps between the bricks. This will stop the mortar from drying quickly and weakening the chimney structure. If it’s a hot day the water may dry before you apply the mortar. If so, you will need to re-spray water to the gaps before applying the mortar.
Making the Mortar Mixture

Choose a builders sand that matches the color of the existing mortar. If you are unsure of which color to use, purchase a small amount of a few colors of sand. Make small test batches of mortar, scrape a small amount of them onto a piece of white paper, and allow them to dry for a few days. Compare the colors to the original match and choose the one that is the closest match. If none of the sands are the right color, try mixing the different sands to get closer to the original mortar color.

Mix 3 parts sand to 1 part cement powder in a bucket. Measure 3 parts sand and 1 part cement powder and pour them into a bucket. Mix the sand and cement powder, using a bricklayer trowel, until they are well combined. Slowly turn the bucket as you are mixing to help agitate the sand and cement. To make 1 bucket of mortar mixture, use 3 heaped trowels of sand and 1 heaped trowel of cement powder. This ratio applies to volume rather than weight. Always mix cement outdoors and wear a mask and gloves. If you buy pre-mixed type "M" mortar for foundations or pre-mixed type "S" mortar for load bearing walls, they will have 1/4 inch rocks in them that will prevent you from using a mortar bag to apply to the joints. In that case, you can use a pointer tool to push the mortar into the joints. Using a pointer tool is a lot easier than people think.
Cover the sand and cement mix with water. Pour water into the bucket until you have covered the whole mixture with water. It is best to start with a small amount and add more later if necessary.
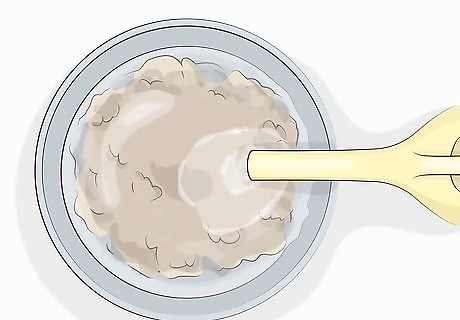
Mix the sand, cement, and water together. Turn the sand, cement, and water using a bricklayers trowel. Slowly turn the bucket as you mix the mortar, this will help to further mix the ingredients. Keep mixing until the mortar is well combined. Ideally the mortar should be the consistency of porridge. If the mortar is too thick, add a little bit more water until it is the right consistency. Keep the mixture thick enough so that it can stick to the trowel. Scrape any sand or cement from the sides of the buckets into the mixture.
Filling the Gaps
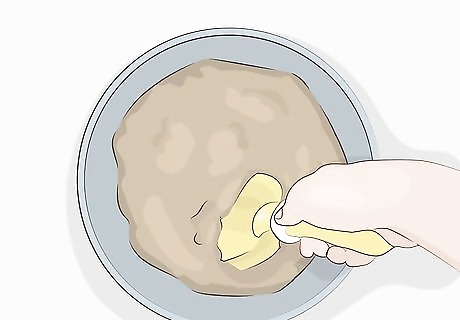
Fill the bottom ⅓ of a tuckpointing or grout bag with mortar. Use a trowel to transfer mortar from the bucket into the tuckpointing or grout bag. When you are transferring the mortar, try to drop the mortar into the middle of the bag rather than scraping it onto the sides. This will make the bag easier to use. Tuckpointing or grout bags can be purchased from DIY or hardware stores.
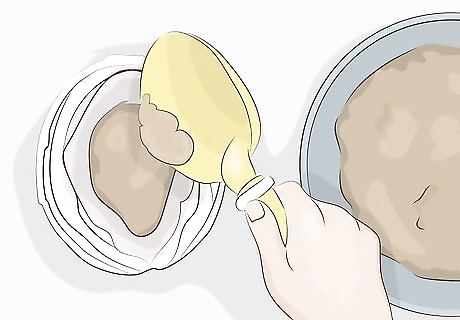
Squeeze the mortar into the gaps between the bricks. Wrap your dominant hand around the bag at the top point of the mortal pile. Use your other hand to guide the nozzle. Squeeze your dominant hand, at the top of the bag, to push the mortar out the nozzle. Start by squeezing the mortar into the vertical gaps, working from the highest point on the chimney down to the lowest point. After this, fill all the horizontal gaps with mortar. Depending on the size of the area you are repairing, you may need to refill your bag with more mortar. Squeeze the bag hard enough so that the gaps are slightly bulging with mortar. Don’t worry if it drips a little, or looks untidy as you can fix this later.
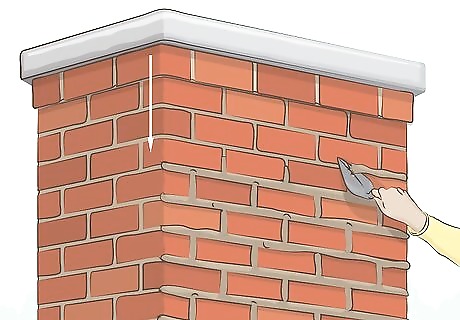
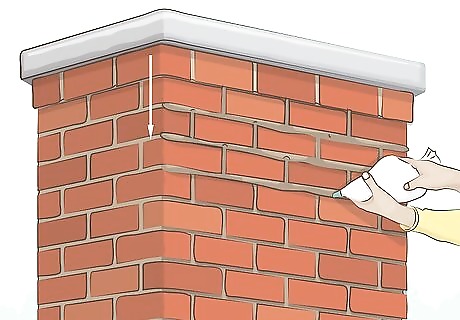
Scrape any unwanted mortar from the bricks using a pointing trowel. Allow the mortar to dry for 5 - 10 minutes before you start scraping. Use the edge of the small pointing trowel to scrape off any extra mortar that is on the faces of the bricks. Start at the top of the chimney and work your way down to the bottom.

Use a striker to smooth out the mortar. A strike is a curved scalper that will smooth out the mortar and help to push out any air bubbles. Hold the striker in your dominant hand and pull the head over the areas that you have applied the mortar on. Start with the horizontal lines and then complete the vertical lines. This. A striker can be purchased from DIY or hardware stores. You can also use a piece of copper pipe or a wooden dowel. If you use a small moist sponge afterwards it will fill in the holes, smooth out the mortar and leave a professional look. You can also carefully clean the bricks with a large sponge to leave a clean finish.
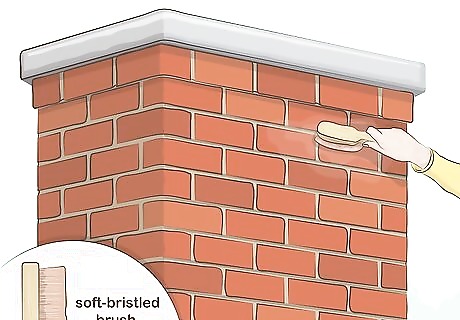
Brush over the entire area with a soft-bristled brush. Sweep over the area with your brush, starting from the top and working your way down to the bottom of the brickwork. Brush the brick and mortar quite firmly as this will help to blend the horizontal and vertical mortar join lines.

Leave the mortar to dry for 24 hours before lighting your fire. The mortar can take up to 1 day to properly bond with bricks. Lighting a fire can compromise the structural integrity of the chimney so use your electric heater for the next 24 hours while the mortar dries.


Comments
0 comment