
X
Research source
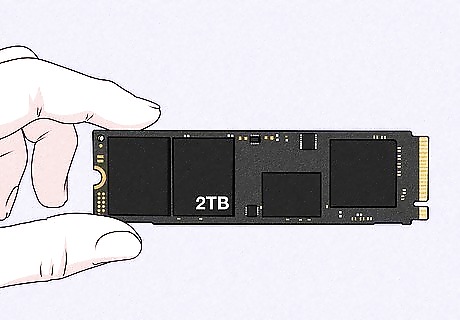
It connects to your PC through the PCI Express slot instead of through the SATA cable, and it can be 50-650% faster than a standard SATA drive.[2]
X
Research source
[3]
X
Research source
To install the new drive, you’re going to need a small flat head screwdriver and an optional anti-static wrist strap. This process should take about 2 hours.
Choosing the Right Drive

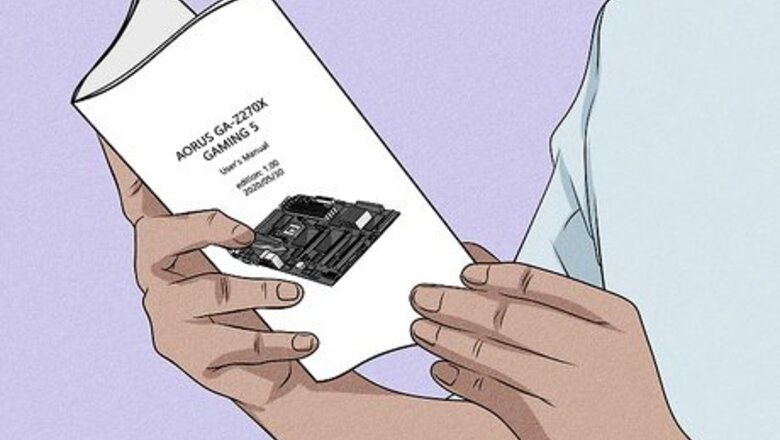
Determine if your PC has an M.2 slot. Before you purchase an M.2 drive you need to make sure that your PC has a compatible slot. If you’re unsure if your PC has a compatible M.2 slot, consult your motherboard's manual. If your not sure where to find your motherboard's manual read How to Find Documentation for Your Motherboard Online.
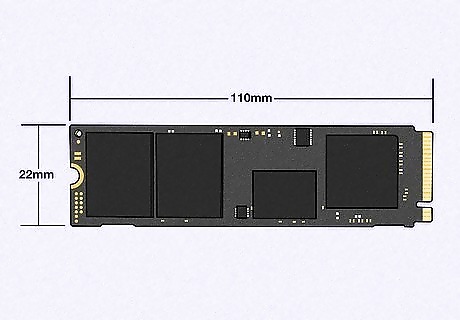
Determine the physical size. Once you have determined that you have an M.2 slot, you need to find out the physical size of the drive that the slot supports. M.2 drives are 22mm wide; however, their length tends to vary from 30 – 110mm long. Consult your motherboard's manual to find the length of the M.2 drive that the slot supports.
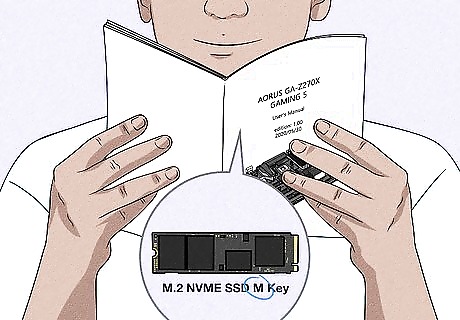
Determine the M.2 key. There are three types of keys that an M.2 drive could have B, M, or B + M key. To determine the type of key that your motherboard supports, consult your motherboard's manual.
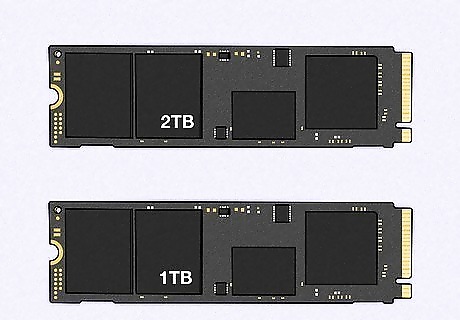
Choose your memory size. There are a variety of memory sizes for M.2 drives, just as there are for traditional drives. However, M.2 drives tend to be more expensive than traditional solid state drives. Depending on your budget, you may want to purchase a lower memory size for your M.2 drive and use your old drive for extra storage.
Purchase the M.2 drive. Once you have figured out the type of M.2 drive you want, it’s time to purchase it. There are many places where you can purchase an M.2 drive. They are sold in computer hardware stores or you can buy one online.
Installing the M.2 Drive
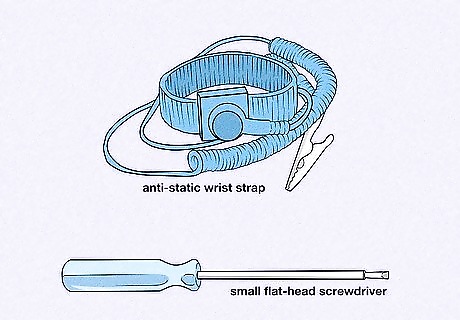
Get all of the necessary tools. You will need a small flat head screwdriver and an optional anti-static wrist strap. If you don’t own an anti-static wrist strap, make sure that you are electrically grounded in some way. Static electricity could damage computer parts.
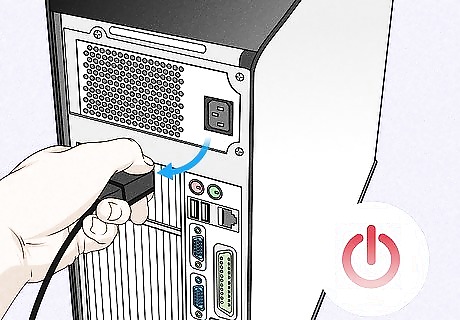
Turn off and unplug the computer. Before installing the drive, make sure you power down your computer and unplug any cables attached to it.
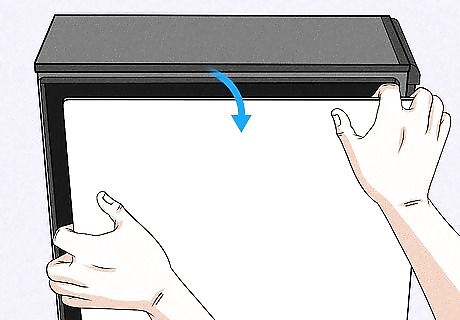
Remove the side panel. On your PC there should be a screw or a latch to remove the side panel of the PC. Unscrew the screw or pull the latch and slide the side panel to detach the side panel of your PC. Then lay your computer on its side.
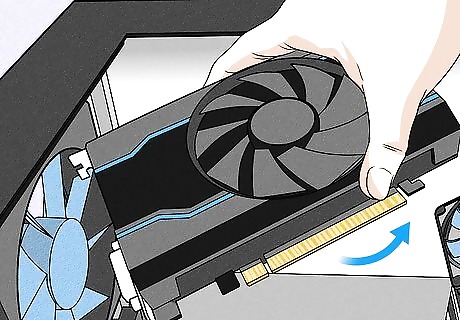
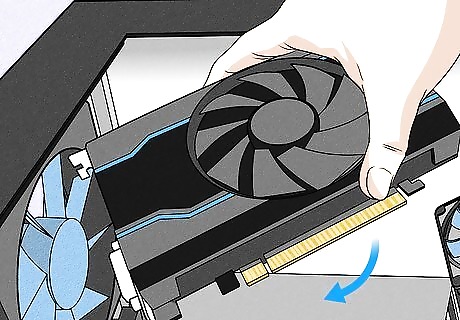
Detach components blocking the slot. If there are any components blocking your M.2 slot such as a graphics card or other bulky PC components, you will need to safely remove them from your PC. To do this use the screwdriver to unscrew the screws holding the component to the case. Unplug the graphics card. Unplug the graphics card by pushing in on the small plastic latch of the power cord labeled P10 and pull up on the cord. Then unplug the second unlabeled power cord next to it as well. Remove the brace. Remove the brace supporting the graphics card by unscrewing the following screws located in the image. Then lift the latch on the brace located near the SATA drive and pull up on the brace. Remove the graphics card. Unscrew the screws located in the image. Then push down on the small plastic latch of the graphics card slot and pull up on the graphics card. The graphics card should come out with minimal force. If you're pulling too hard, make sure you didn’t miss a screw.
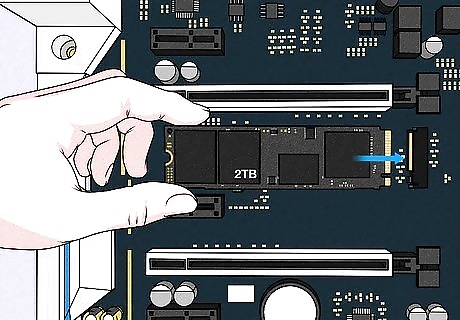
Insert the M.2 drive. Once you have uncovered the M.2 slot, safely insert the drive and screw it in.
Reattach components. Once you have successfully installed the drive reattach any components you took out of the PC.
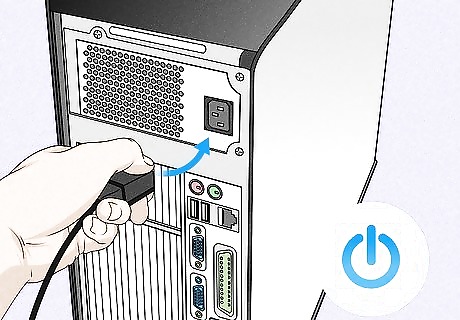
Plug PC in and turn it on. Now that you have installed the drive plug your PC back in and turn it on.
Transferring Your Operating System and Files

Download drive cloning software. To transfer everything from your old drive to the new M.2 drive download a drive cloning program. There are many free and paid programs that allow you to clone a drive. This tutorial will use a free program called Macrium Reflect. Download and install Macrium Reflect.

Open Macrium Reflect. Open the Macrium Reflect program on your computer.

Choose your old drive. Make sure you click the checkmark for your old drive that contains your operating system and all your files. Then click Clone this disk.
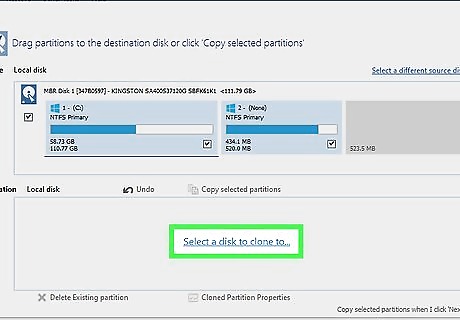
Select your M.2 drive. Click the text labeled Select a disk to clone to…, if you’ve installed the drive correctly it should show up. Click this drive.

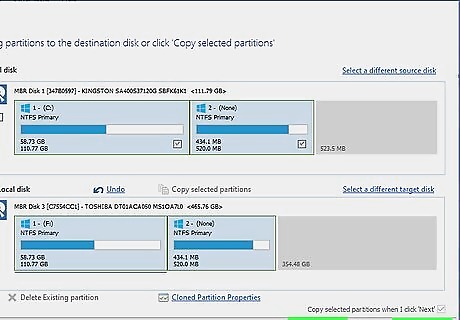
Copy and resize partitions. Click the button labeled Copy selected partitions. If your new drive is bigger or smaller than the last drive, resize the partitions to fit the drive. To do this click the button labeled Cloned Partition Properties and resize the partitions appropriately; then click Next.
Start the cloning process. Skip the page labeled Schedule this Clone by clicking Next. Then click Finish on the next page. Click the OK button. This will start the process of cloning your old drive to the new M.2 drive. The process can take a few hours to complete depending on how much data you’re transferring.
Booting from the New M.2 Drive

Open the BIOS. With the M.2 drive installed, your operating system and files transferred to it the next step is to boot the computer from the new drive. To do this you need to go into the BIOS of your computer. To open the BIOS, first turn off your computer, then turn the computer back on. As soon as you click the power button to start your computer, rapidly click the F10 or F2 button on your keyboard. It is important that you click the button before windows loads on your PC. If you're successful your screen should look something like this:
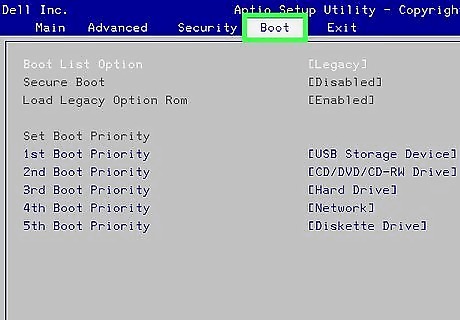
Find the boot settings. With the arrow keys on your keyboard move over to the storage tab. Then move down to where it says "Boot Order" and press ↵ Enter.
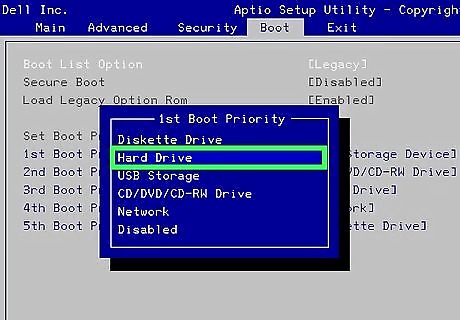
Change the boot order. Use the arrow keys on your keyboard to move the new drive to the top of the boot list. If the drive doesn’t show up it may be labeled Windows Boot Manager. Once you’ve moved the new M.2 drive to the top of the list, press the F10 key to accept.
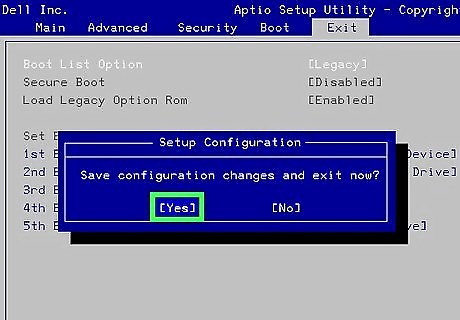
Save your changes. Move over to the file tab with the arrow keys then move down to “Save Changes and Exit” option and press ↵ Enter. You have now successfully installed your new M.2 SSD.


Comments
0 comment