views
X
Research source
[2]
X
Research source
Recently, rope darts have also become popular as a kind of performance art, where the "dart" is set afire or lit with LEDs to create patterns with the light.[3]
X
Research source
Whether for martial arts practice or to develop your flow art skills, a rope dart only takes a few supplies and a little effort to make.
Making a Practice Rope Dart
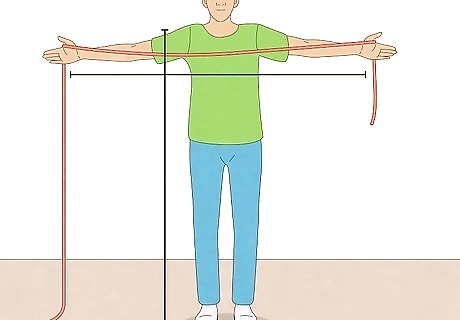
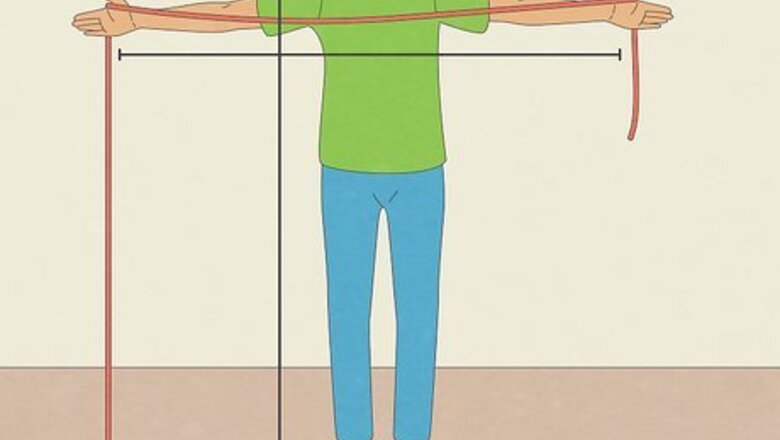
Measure out your rope. There are many different styles that can be adapted to different lengths of rope dart. Generally speaking, to get the most versatility out of your rope dart you should first measure out a distance that spans fingertip to fingertip with your arms outstretched. Hold your rope at this length, and then add to it the distance between your shoulder and the floor. Leave yourself some extra slack, so that you can fashion a loop at the end for easier handling. Extra rope is also important in case you find a long rope style suits you best. Making your rope dart too long can result in damage caused by the head of your dart dragging on the ground. This will decrease the life of your rope dart.
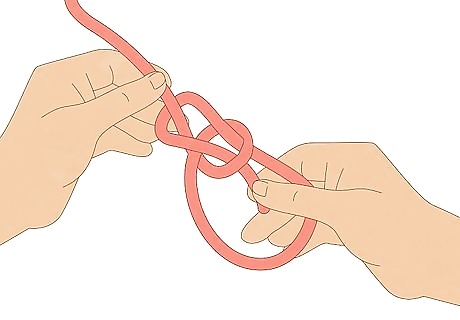
Make a loop at the end. You'll want the loop to be big enough to fit your hand, but not so big that it's clumsy or bulky. A bowline knot will be ideal for making a sturdy loop in the end of your line. To make a bowline knot: Form a loop where you want the base of your loop to be. The length between your loop and the end of your rope will form your handle. Thread the end of your line up through the loop. Bring the end behind the line and back down through the loop. Pull tight to fasten the knot securely.
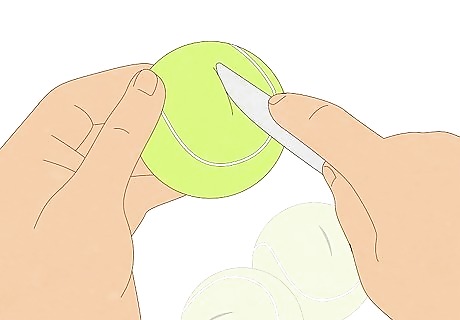
Make opposite side slits in all three tennis balls. Open the blade on your multi-tool or take a sharp knife and slit each ball once on opposing sides with your cutting tool. The slits should be big enough so that, when squeezed, the ball allows enough room for the rope to feed through. Be careful not to make your slit too big. Doing so could result in your tennis ball falling apart.

Connect all three tennis balls and knot the end. One at a time, thread each tennis ball by squeezing the sides to force the slit you have made to gape open. Then, feed the loose end of your rope through to the other side and do the same for your next two tennis balls. Tie off the end of your line with a simple knot to prevent your tennis balls from coming loose. The tennis balls on the end will simulate the weight and drag caused by an actual rope dart head, which is traditionally made of metal.
Making a Realistic Rope Dart
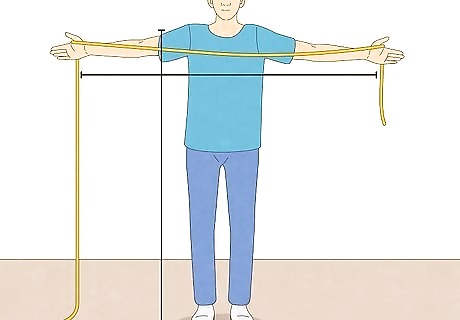
Measure your rope dart's line. Take your rope or fine chain in each hand and stretch out your arms to either side. Hold your rope or chain at the measure of this distance and add to this length the distance between your shoulder and the floor. This is the ideal length for the line of your rope dart. Add a little extra length to your rope dart, six inches (15.25 cm) should be more than enough, if you want to add a handle to the end of your line opposite your dart.
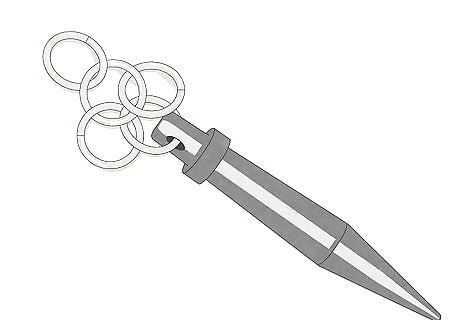
Attach rings to your dart. Your rings can be made of tied cloth, or you could use needle nose pliers to bend metal rings onto your dart. Metal rings can be purchased at your local hardware store and will create a jingling noise when you practice with your rope dart. In either case, take your rings and attach them to the base of the dart. Depending on your dart, you may be able to thread your rings through a gap in the base. You may have to knot/bend your rings onto the base of your dart. Traditionally, four to five rings are attached to the dart.

Tie a short length of ribbon to the last ring. Streamers or ribbons, along with other accents, were tied to the dart is to stop blood from making the rest of the line slippery and create drag as well. Both these allow for better control and manipulation in and out of combat. Six inches (15¼ cm) should be a sufficient length for your ribbon.

Affix a flag or feathers near dart. This practice, in addition to providing the same drag created by ribbon/streamers, historically has also been used to conceal the dart in combat. Bright, colorful flags and feathers would distract adversaries on the battlefield, making the rope dart more effective. By adding a flag or feather to your rope dart, you'll also make your practice more visually pleasing to those observing you. The bright colors will create shapes as you swing the rope dart. If you are using a stake for your dart, it may not penetrate into targets like a real rope dart would. To correct this, you can sharpen your stake with your knife.

Connect your rope to your dart. If the end of your dart has a space where you can thread your rope and tie a simple knot, do so with your line. If no such space exists, you might use another knot, like a pile hitch, which can be tired by: Looping the dart end of your line. Wrapping the loop once around the base of your dart. Crossing the loop over top your line. Sliding the loop over the end of your dart and down to join where the loop wraps.
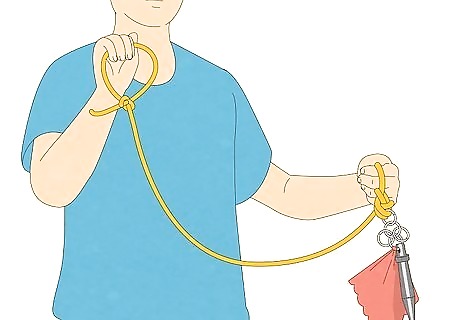
Create a loop in the end or fashion a handle. A simple handle can be made by sliding a thick wooden bead onto the end of your rope dart and adding a simple knot to the end of the line to keep the bead in place. You can also tie off the end of your rope dart in a loop to serve as a handle by tying a bowline knot: Form a loop where you want the base of your loop to be. The length between your loop and the end of your rope will form your handle. Thread the end of your line up through the loop. Bring the end behind the line and back down through the loop. Pull tight to fasten the knot securely.




Comments
0 comment