
Using Game Bar on Windows
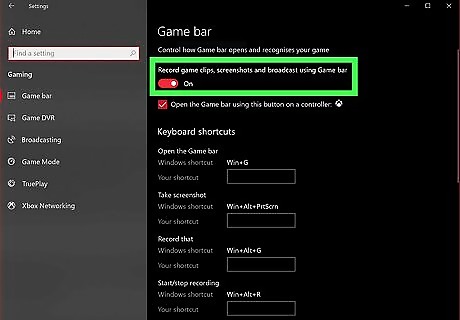
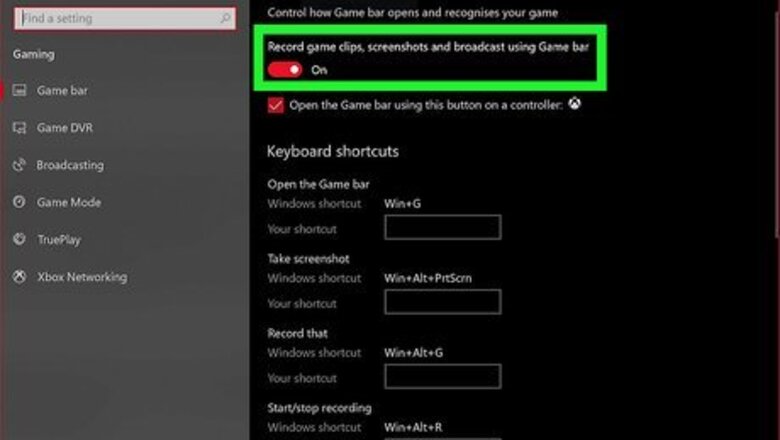
Ensure Game Bar is turned on. Game Bar is Windows' built-in video game recording system. Before you can use it to record games, use the following steps to ensure Game Bar is turned on: Click the Windows Start menu. Click the Gear/Settings Icon. Click Gaming. Ensure the toggle switch below "Xbox Game Bar" is turned on.
Start a new game. Double-click the icon for any game you want to play to launch the game.
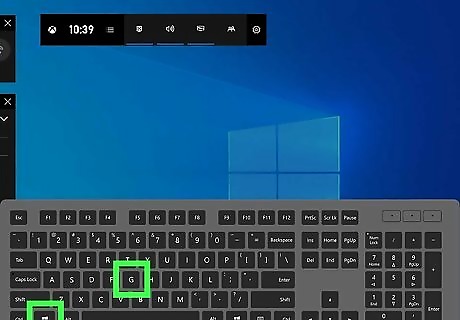
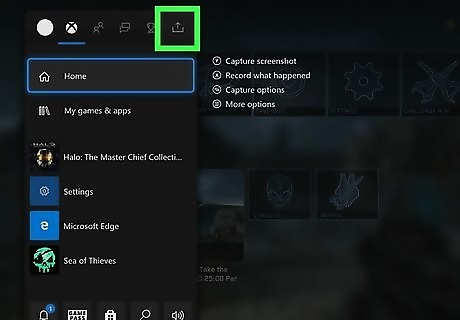
Press ⊞ Win+G. Pressing the Windows Key and "G" at the same time displays the Game Bar options.
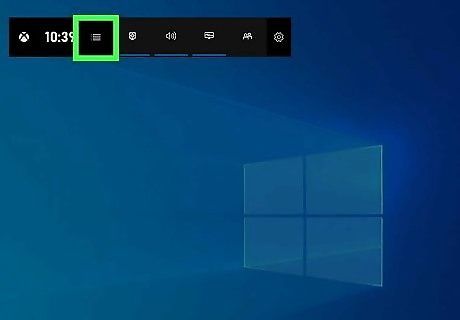
Click the Widgets menu icon. It's the icon that has four horizontal lines with a dot next to each line. You can find it at the top-center of Game Bar. This displays the Widgets menu.

Click Capture. It's in the Widgets menu. This displays a widget with the capture controls.

Click the Record button. It's the button that has a round dot. It's in the Capture widget. This starts recording your gameplay.

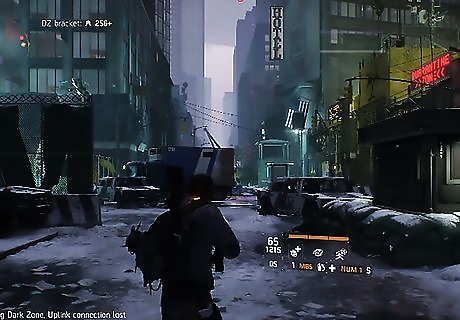
Click your game. You can either click your game's icon in the taskbar or click your game running in the background. This turns control over your mouse and keyboard over to the game. Play for as long as you want to record. You'll see the record time on the right side of the screen for as long as you continue to record.

Press ⊞ Win+G again. This opens the Game Bar again and gives control over your mouse and keyboard to Game Bar.
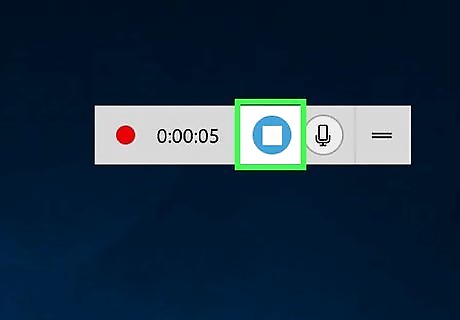
Click the Stop button. It's the button with a square next to the record time to the right. This saves a copy of your video. To find the video recording, open File Explorer and click the "Videos" folder. Then open the "Captures" folder.
Using OBS on Windows, Mac, & Linux
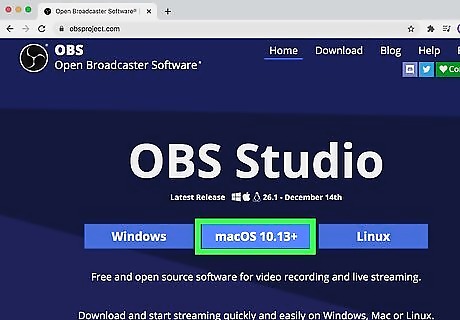
Download and install OBS. OBS is a free and open-source recording and broadcasting software. Unlike Game Bar, it has a few more recording options and can capture directly from your video card at 60 frames-per-second or more. Use the following steps to download and install OBS: Go to https://obsproject.com/. Click Windows, macOS 10.13+ or Linux. Open the install file in your web browser or Downloads folder. Follow the instructions to complete the installation.
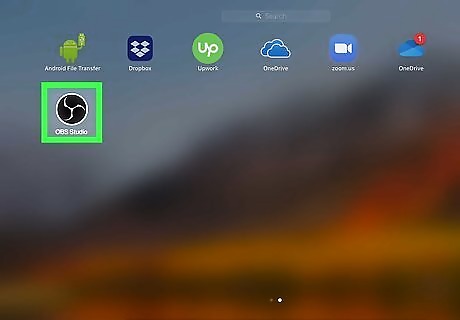
Open OBS. It has a black icon that resembles three blades forming a circle. Click the icon to open OBS. The first time you open OBS, it will walk you through a setup process. If you primarily intend to use OBS for recording, select the options to set it up for recording rather than streaming. You can use it for both.
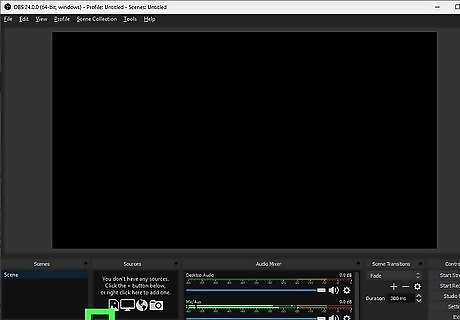
Click + below "Sources." This allows you to add a new source for recording. This displays a pop-up menu.
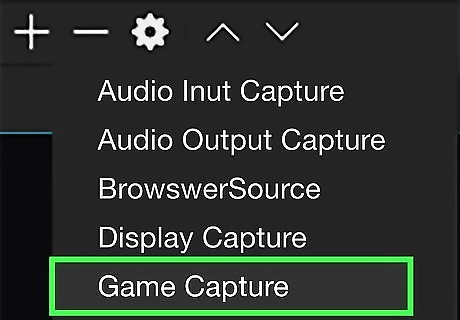
Click Game Capture. It's in the pop-up menu below "Sources." If you want to capture your entire screen instead of just one app, Click "Window Capture" instead of "Game Capture."
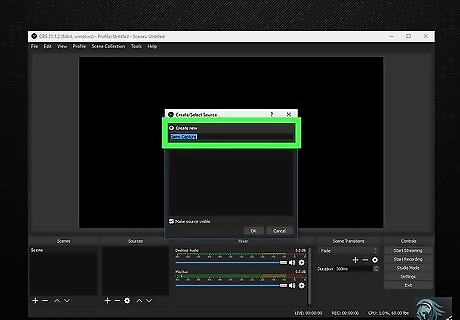
Type a name below "Create New." This can be the name of the game or just a generic name like "Software capture". You can also select "Media Capture Device" to add a webcam stream along with your game capture. Add "Media Source" to capture audio from a microphone.

Use the drop-down menu next to "Mode" to select "Capture any full-screen application." This will allow you to capture any game you have open in full-screen mode. Alternatively, you can select "Capture specific window" and then use the drop-down next to "Window" to select a specific game.

Click Ok. This adds the new capture source to the "Sources" menu.
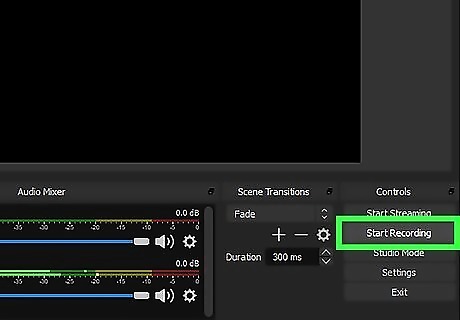
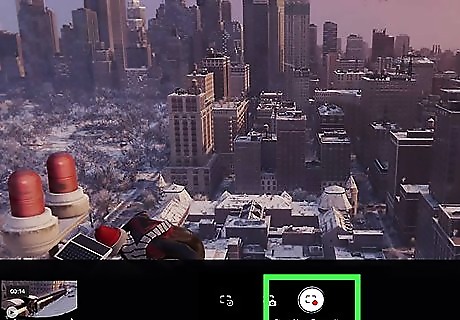
Click Start Recording. It's in the panel to the right. This starts recording your video.
Play your game. You can now start playing your game. OBS will capture your gameplay as you play.

Return to OBS. When you are ready to stop recording, return to OBS.
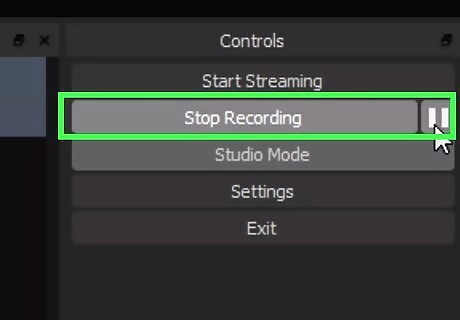
Click Stop Recording. It's the same button you clicked to start recording in the panel to the right. This stops and saves your recording. You can find your recording in your "Videos" folder.
Using Playstation 5

Start playing your game. There are many options to record video on Playstation 5. You can start recording new gameplay footage for as long as you would like, or you can save up to 1 hour of your previous gameplay.

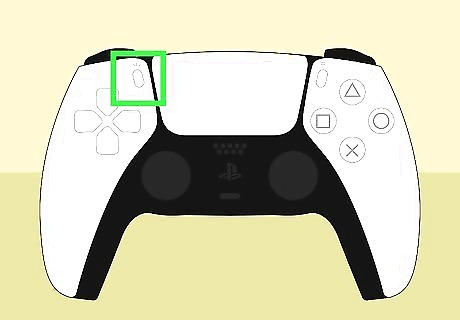
Press the Create button. It's the oval-shaped button to the left of the touchpad in the center of the DualSense controller. This opens the Creative menu.

Select the Save Recent Gameplay icon. It's the icon that resembles a square with a clock in the lower-right corner. You'll find it at the bottom of the screen in the center-left. This option allows you to save a video clip of something that just happened in a game. This is useful is something surprising happens while you play that you want to capture on video.

Select Save Full Video or Save Short Clip. Both of these options appear under the "Save Recent Gameplay" icon in the Create menu. The "Save Full Video" option will save a video clip of your last hour of gameplay. The "Save Short Clip" option will record the previous few minutes of gameplay footage. You can change how long of a clip you want to save using "Save Short Clip" in the Settings menu. Open the Settings menu on the Home screen. It's the icon that resembles a gear at the top of the screen. Select Captures and Broadcasts. Select Captures followed by Shortcuts for the Create button. Select Length of Recent Gameplay Video Clip and select how long you want your recent gameplay clips to be. They can be as few as 30 seconds to as long as an hour.
Select Start New Recording icon in the Create menu. This is the other option for recording gameplay in the Create menu. It's the icon that resembles a square with a red circle in the lower-right corner. You'll find it at the bottom of the screen in the center-right when you press the Create button. This starts a new video recording. You can record as much video as you would like. There will be a black box with the record time at the top of the screen for as long as you record. Alternatively, you can tap the Create button twice to record a short video. You can select how many minutes or seconds you want short videos to record in the Creative menu.
Press the Create button again. When you are ready to stop recording, press the Create button again to bring up the Creative menu.

Select Stop Recording. This stops and saves your video recording. It may take a few minutes to process your video, depending on how long it is.
Using PlayStation 4

Start playing your game. The PlayStation 4 is constantly recording, and will always save up to the last 15 minutes of gameplay for you. The PlayStation 4 will not record any system menus or videos from streaming apps like Netflix or YouTube.

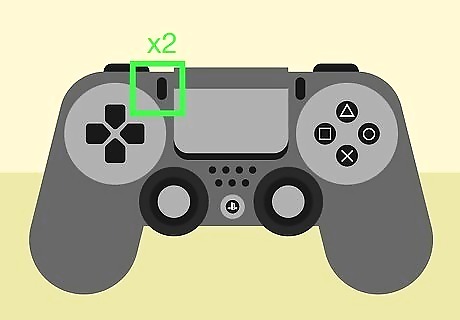
Press the Share button. It's the oval-shaped button on the left side of the touchpad. This opens the Share menu.
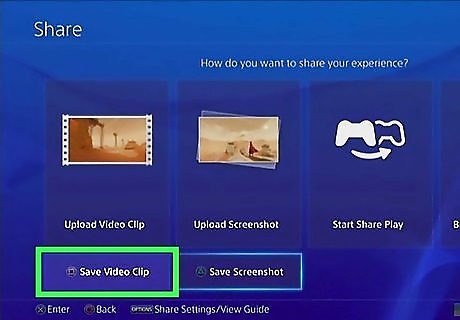
Select Save Video Clip. It's near the bottom of the Share menu. This saves a clip of the last 15 minutes of gameplay. This is useful for when something surprising happens in your gameplay that you want to save a video of. Alternatively, you can press the Square button to save a video clip in the Share menu.

Press the Share button twice. Double-tapping this button during gameplay will start a new video recording. By default, the PS4 will record up to 10 minutes. To change the length and resolution of the video recording, open the Settings menu on the PS4 menu bar. Then select Share and Broadcast and then select Video clip settings. From here you can change the video length to as few as 30 seconds all the way up to 60 minutes. You can also change the video resolution from 720p to 1080p.
Press the Share button twice again. When you are ready to stop recording. double-tap the share button again. Your video will be saved to the capture gallery. You can access your saved videos using the Capture Gallery app on your PS4.
Using Xbox Series X/S

Start playing the game you want to record. The Xbox Series X and Series S have a few options for recording gameplay. You can start a new recording from the Share menu, or you can capture the previous few minutes of gameplay.
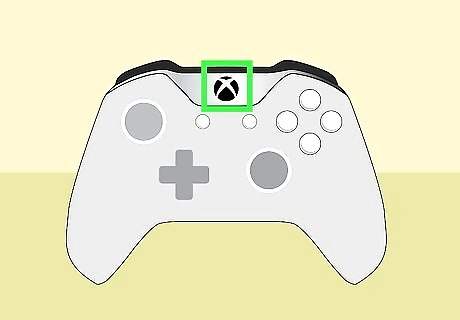
Press the Xbox button. It's the button with the Xbox logo in the top-center of the controller. This opens the menu.

Select the "Capture & Share" tab. Use the "R" and "L" bumper buttons to navigate the tabs at the top of the menu. The Capture & Share tab has an icon that resembles an arrow pointing up over a box. It's the second-from-the-last tab in the Share menu. This displays the Capture & Share menu.
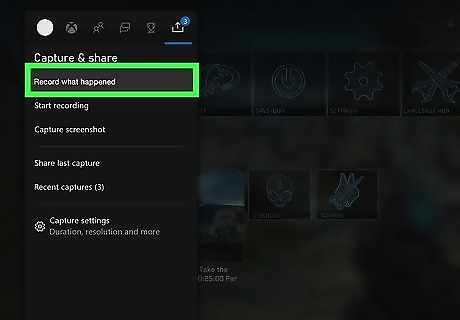
Select Record what happened. It's the first option in the Capture & Share menu. This displays a menu that allows you to select if you want to record the last 15 seconds, 30 seconds, 45 seconds, 1 minute, or 2 minutes. Alternatively, you can press and hold the Share button on your controller to save the last 30 seconds of gameplay. The Share button is in the center of the Xbox Series X controller and has an icon that resembles a box with an arrow pointing up. You can change how much time this saves in the "Capture Settings" menu at the bottom of the Capture & Share menu. By default, you can save 30 seconds of 4K video, 1 minute of HD video, or 3 minutes of video a 720p resolution. If you have an external hard, you can save up to 1 hour of gameplay footage. Your external hard drive must have a USB 3.0 connection and be formatted in NTFS file format. Once your hard drive is connected using a free USB port, select "Capture Settings" at the bottom of the Capture & Share menu. Then select your external hard drive under "Capture Location."

Select Start Recording. It's the second option in the Capture & Share menu. This starts a new recording. Use this option to record what is about to happen instead of what just happened.

Return to your game. The gameplay will start recording when you return to your game.

Press the Xbox button again. When you are ready to stop recording, press the Xbox button to open the menu.
Select the "Capture & Share" tab. Use the "R" and "L" bumper buttons to move all the way over to the tab with the arrow pointing up over a box. This displays the Capture & Share menu.
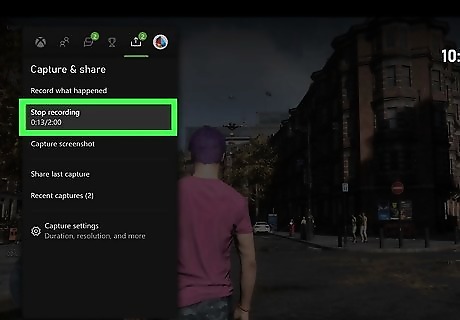
Select Stop recording. This stops recording and saves your video clip. You can access your saved video clips under "Recent captures" in the Capture & Share menu.
Using Xbox One

Start playing the game you want to record. The Xbox One has a few options for recording gameplay. You can start recording a new video and record for up to 10 minutes, or you can capture up to the last 5 minutes of gameplay.
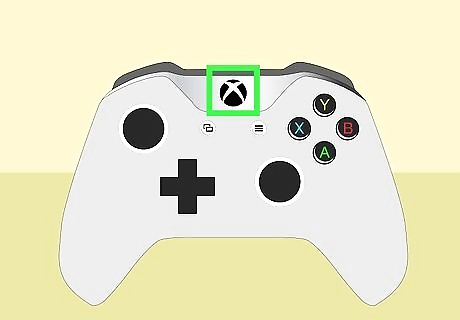
Press the Xbox button. It's the button with the Xbox logo in the top-center of the controller. This opens the menu.
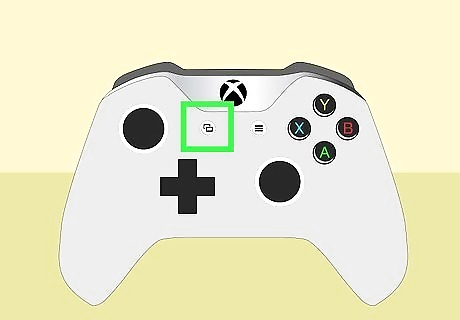
Press the View button. It's the button that has an icon that resembles two overlapping squares. It's in the center-left of the Xbox controller. This displays a capture menu

Select Record from now. It's the first option in the Capture menu. This starts recording a new video. Typically, you can record up to 10 minutes of video, but if you have an external hard drive, you can record up to an hour. The hard drive must have USB 3.0 and be formatted in NTFS file format. Alternatively, you can select Capture what happened to capture up to 5 minutes of the previous gameplay video. This is useful if something surprising happens that you want to save a video clip of.
Return to your game. The gameplay will start recording as soon as you return to your game.

Press the Xbox button again. When you are ready to stop recording, press the Xbox button to open the menu.
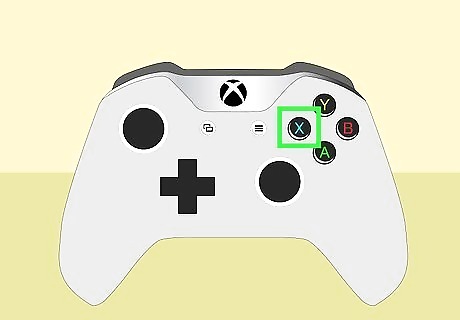
Press X. This will stop recording and save your video clip. To access your saved clips, press the View button on the Xbox controller and select Manage captures.
Using Nintendo Switch
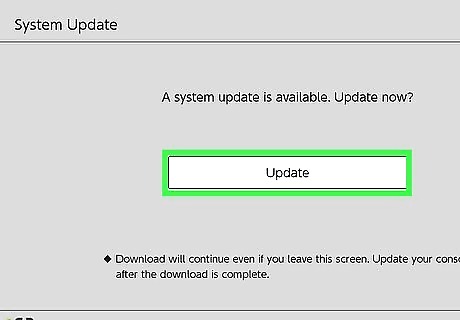
Update to the latest firmware version. You must be using version 4.0.0 or later to record gameplay on the Nintendo Switch. Make sure your Nintendo Switch is connected to the internet and use the following steps to update it to the latest firmware: Select the System Settings icon on the Home screen. It has an icon that resembles a gear. Select System. Select System Update.
Start playing a game. The Nintendo Switch can record up to 30 seconds of gameplay on most games. Some games are not compatible with video capture. If you receive an alert informing you the game you are playing doesn't support video capture, try again at a later date. In the mean time, you may be able to capture a screenshot image by tapping the Share button.
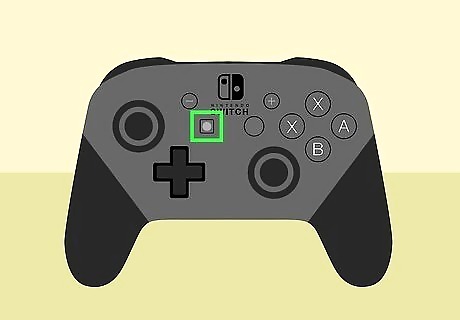
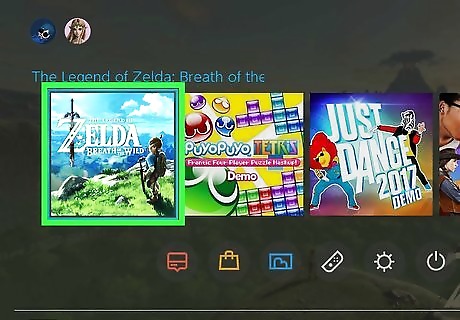
Press and hold the Capture button. It's the square-shaped button with a circle in the middle. It's on the left Joy-Con. This will save up to 30 seconds of the previous gameplay. You can access saved gameplay footage in the Album menu on the Home screen. You can also trim videos and upload them to social media from within the Album.
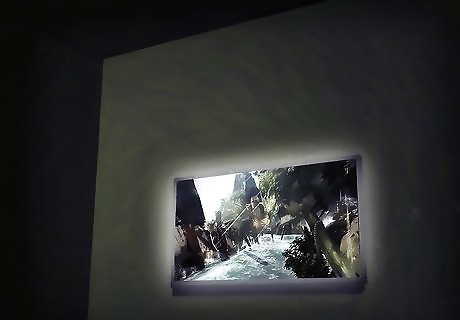
Using a Video Camera or Smartphone

Know when to use this method. If you are trying to record gameplay from an older console without a capture card, your best bet may be using a video camera or your smartphone's camera app. You won't get perfect quality, but you'll still be able to record what you're playing. If you're using a smartphone, you'll have trouble picking up the sound from your TV. If you can, consider purchasing a capture device instead. These are external devices that you simply plug into your computer, making them much easier to install than a capture card. You will be able to record at the best picture and sound quality if you use a capture device. If you're playing a much older system, such as an NES or Sega Genesis, you may want to record with a VCR. This will lead to a better quality recording, and with the right equipment you can transfer it to a computer.
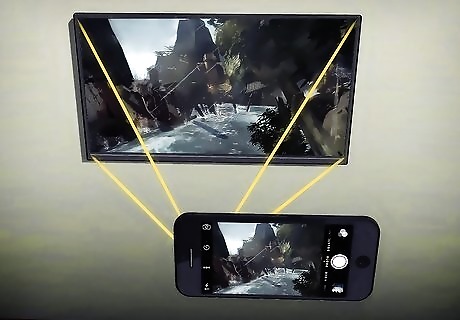
Frame the TV completely in the camera. The key to a good recording is to ensure that the entire frame is filled with the TV image. Try to position the camera in such a way that it is looking directly at the TV, and that the frame is filled by the TV image. Move the camera a little closer so that the edges of the TV are just barely cut off. This will ensure that the entire frame is full. Make sure that you aren't pointed at an angle, or you'll likely pick up some glare.
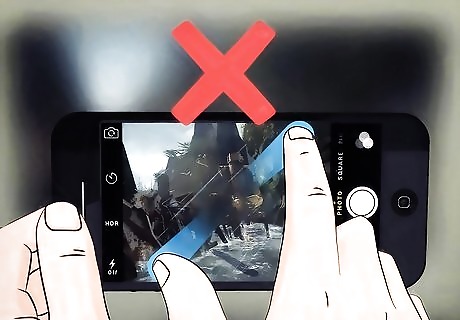
Avoid using the zoom. If your video camera or smartphone uses digital zoom, avoid using it for filming your gameplay. Digital zoom will result in a blurry final video, and you need as much clarity as possible when filming this way.
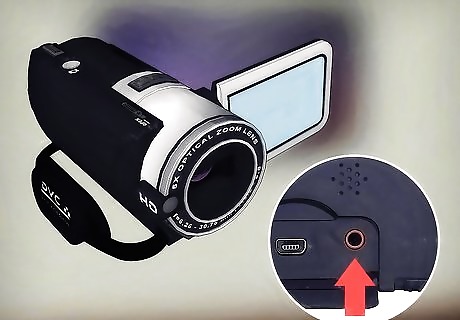
Connect the audio to the camera (if possible). If you're using a camcorder, you may be able to route the game audio through the camcorder's input. You'll need a converter for the console's audio cable so that it can plug into the input or line-in option on the camcorder. This isn't possible on most smartphones. Another possibility with a camcorder is setting up a microphone next to your TV speaker to pick up the game audio more clearly.
Dim the lights. Make sure that no lights are shining directly onto the TV screen. You don't want to make the room completely dark, or the TV image will glow too much. As long as lights aren't pointing directly at the TV screen or camera, you should be good.
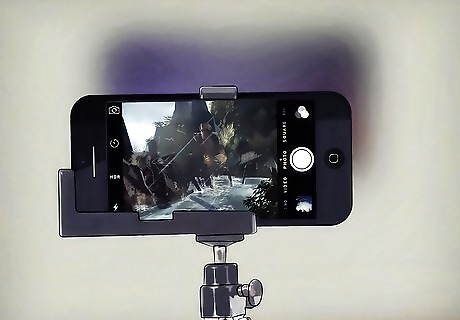
Use a tripod or other stabilizer. The worst thing you can do for clarity is to try to hold the camera while the game plays. Your camera needs to be absolutely steady, or it will be very hard to see the gameplay. Use a tripod if possible. If you don't have a tripod, set the camera or phone on a level surface and stabilize it with books or other heavy objects.
Sit to the side while playing. When the screen is dark, you may appear in the TV reflection if you are sitting directly in front. Sit off to the side while recording so that you don't get caught in the reflection.
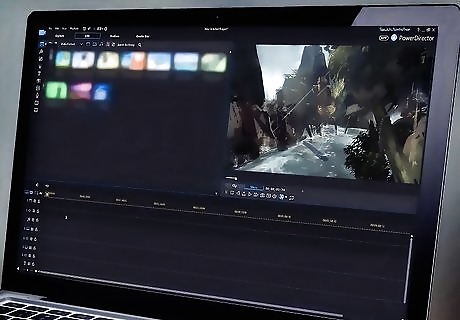
Transfer the finished video to your computer for editing and uploading. Once you're finished recording, transfer the video to your computer so that you can edit anything out that you don't want in the video. This is usually useful to cut out the setup process or to remove boring parts. Since the sound recording probably wasn't very good, you may want to replace the sound completely with a soundtrack. After you're finished making your edits, you can upload the video to YouTube or keep it on your computer


Comments
0 comment