
X
Research source
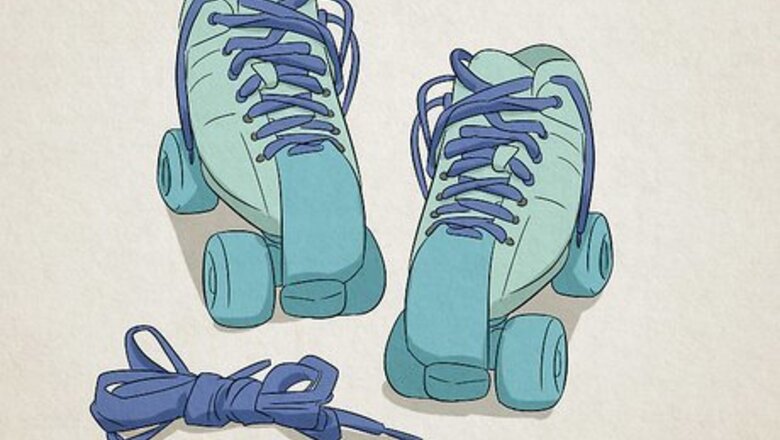
We’re here to walk you through some popular tips and techniques so you can hit the ground rolling!
Traditional Criss-Cross Technique
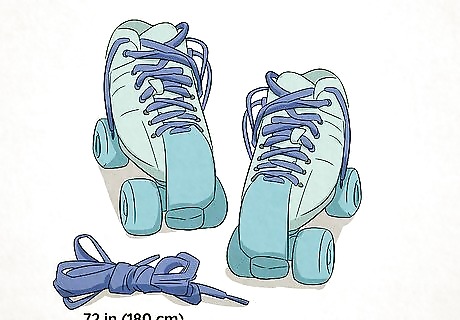
Grab a set of laces that’s at least 72 in (180 cm) long. This may seem a bit extreme, but longer laces actually help you to tie your skates comfortably. If you have high top-style or especially big skates, you may need laces that are at least 96 to 106 in (240 to 270 cm) long.

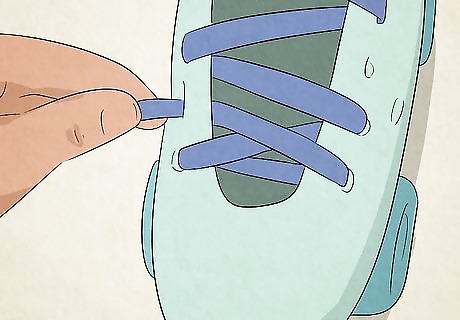
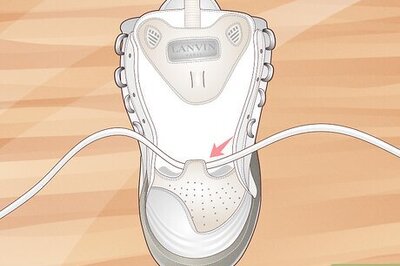
Slide the lace through the pair of eyelets closest to the skate’s toe. Pull one aglet (the end of the lace) through the eyelet on the bottom right side of the skate. Then, pull the other aglet through the left eyelet at the bottom of the skate.
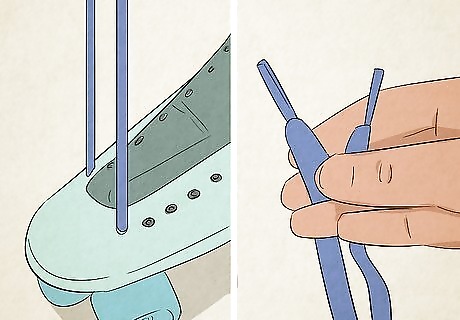
Pull on both sections of lace to make sure they’re even. Hold the pieces of lace next to each other, so you can compare their lengths. Then, tug on either lace as needed until they’re both the same length.
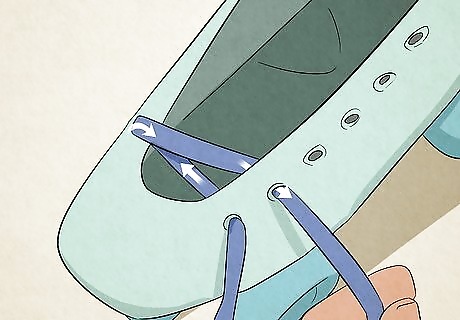
Bring the left section of lace through the second-lowest eyelet on the right side of your shoe. Pull the lace out and over from the leftmost eyelet. Then, tug the same lace under and through the second-lowest eyelet along the right side of the skate.

Thread the lace through the third-lowest eyelet on the left side of your skate. Like you did before, pull the lace out and over the top of the eyelet, and then under and through the third-lowest eyelet along the opposite side of your skate. Turn the lace with your fingers so it looks flat, not twisted.

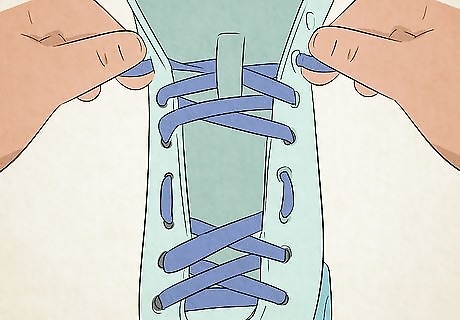
Continue lacing in a zig-zag pattern until you reach the last set of normal eyelets. Follow the same “over/under” pattern that you used on the first eyelets. Continue skipping every other eyelet until you’ve zig-zagged through all the normal, circular sets of eyelets. “Normal” eyelets are circular pieces of metal that go up the majority of your boot. Many skates have “special” eyelets along the ankle area, which look more like metal hooks.
Pull the right piece of lace over the existing lace and through the second-lowest eyelet. Your goal is to create matching, uniform sets of “Xs” going up the tongue of your skate. Get this pattern started by pulling the right, loose section of lace over the existing, zig-zagged lace. Here’s an easy trick: look at the laces on either side of the skate and see which direction they’re going. All of the laces on the left side of the boot should be parallel to one another, while all the laces on the right side of the boot should be parallel to each other.

Slide the same section under the existing lace through the next open eyelet on the right. Each “X” should look exactly the same as the one beneath it. With this in mind, slip your lace under the existing lace, pulling it out through the third-lowest eyelet on the right side of the shoe.

Repeat the “over/under” lacing pattern until you’ve laced all of the normal eyelets. Always pull your lace over the existing lace when going from right to left. Then, tug your lace under the existing lace when you go left to right. Continue creating uniform “Xs” until you finish lacing all the circular sets of eyelets.

Criss-cross your laces over and around the hooked eyelets. Hold the loose laces in both hands, with the rightmost lace crossing over the left one. Loop both laces over and under the first set of hooked eyelets. Then, pull the laces back around so they’re in front of the skate again. Continue looping the laces around the next few sets of hooked eyelets to help secure your skates. You don’t have to loop your laces around every pair of hooked eyelets. Some skaters leave the top set empty and unlaced.
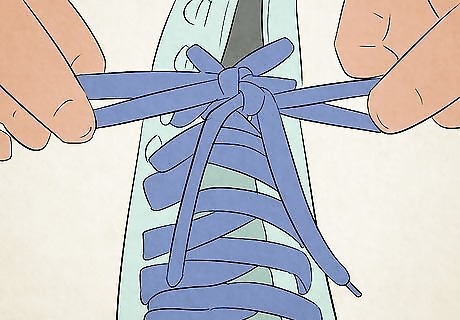
Tie the leftover laces into a bow. This part is super easy—just pretend you’re tying a regular pair of sneakers or lace-up shoes! Simply tie your laces in a bow along the front of the tongue to hold everything in place. You’re now ready to go skating! Your skates should feel snug and secure without your heel slipping or your feet or toes feeling achy. There’s no need to worry if you don’t feel 100% comfortable in your skates—there are still a few adjustments you can make.
Comfort Tips

Secure your laces tightly along the top of your boot if your heel tends to slip. Criss-cross your laces all the way up your skates. Then, tug on the laces to make them as snug and tight as possible before you wrap them around the hooked eyelets. This will help your heels stay firm and secure throughout your ride.

Relieve numb toes by tying your boots with 2 sets of laces. Follow the normal criss-cross pattern, crossing your laces over, under, and through the four lowest pairs of eyelets on your skate. Then, tie off this set of laces into a bow. Switch to a different lace and continue where you left off, crisscrossing all the way up to the top of your boot. This technique keeps your skate snug and secure without putting quite as much pressure on your toes.
Lace the middle of your skates vertically to ease some of your arch pain. Criss-cross your lace through the first 3 sets of eyelets that are closest to your toe. Take the left section of lace (which you pulled through the third-lowest eyelet on the left side of your shoe) and slide it over and into the fourth-lowest eyelet on the left side of your shoe. Then, slip this same lace under and through the fifth-lowest eyelet. Repeat this vertical lacing pattern on the right side of your shoe; then, resume your normal criss-cross pattern along the top half of your skate. There should be a vertical “line” of laces between the fourth- and fifth-lowest eyelets on your skate. This helps take the pressure off your arch, allowing for a more comfortable skate.
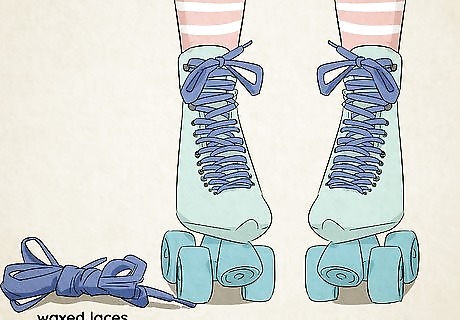
Switch to waxed laces to prevent your skate’s tongue from slipping. Your skate’s tongue should be centered and snug along the middle of your skate boot. Many skate models have a special loop stitched to the center of the tongue that helps hold it in place, but some don’t—this causes the tongue to shift around. In this case, switch out your regular laces for a set of waxed ones, which are more rigid than traditional laces. You can buy waxed roller skate laces online or from specialty skating shops for less than $10.


Comments
0 comment