views
Basic setup
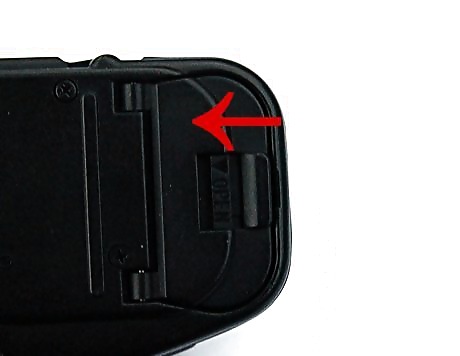
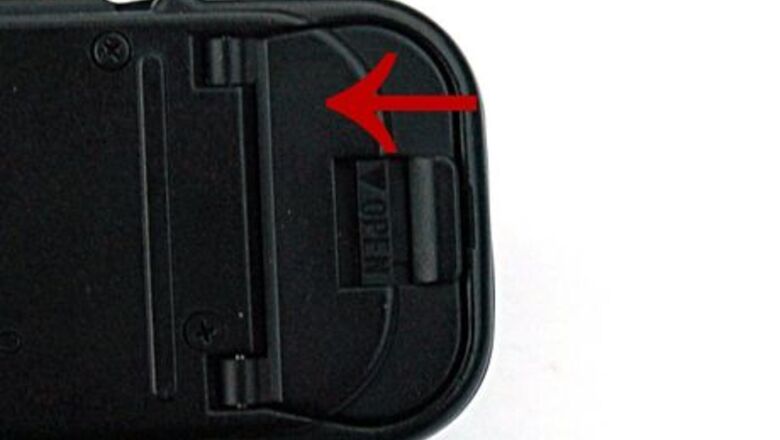
Change the batteries. Even if your camera has batteries in it, change them with fresh ones, because you don't want to run out of battery power while you're out shooting. T50_battery_door_86.JPG Unlatch the battery door and open it. Do this gently because these are horribly flimsy and really easy to break. Drop out any batteries that were in there. Check the battery terminals for corrosion if you just bought the camera. If they are covered in a white residue, spray on some electrical contact cleaner and carefully scrape away any residue with a sharp implement. T50_with_two_AA_batteries_567.JPG Drop in a couple of AA batteries. Never use rechargeable batteries--Canon warns against this (which either means that the metering will be wrong or your camera will explode). Do your part to destroy the environment by dropping in a pair of disposable batteries ("heavy duty" carbon-zinc or alkalines). Close the battery door; again, be as gentle as you can, to avoid breaking it.
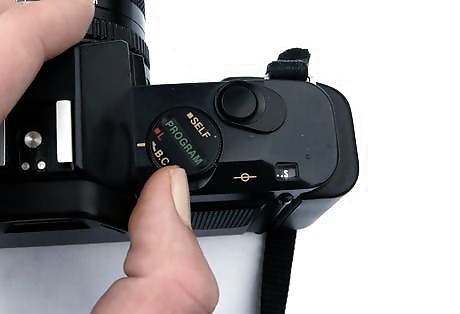
Be paranoid and check your batteries even if they are new. It's good to get in the habit of doing this regularly. Spin the main dial around to "B.C" (for "Battery Check"); if the camera beeps at you, the batteries are good.
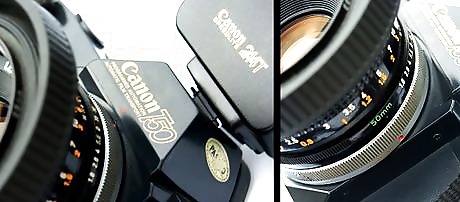
Mount the lens. The lens will be of one of two styles of Canon FD lenses, both of which mount slightly differently: T50_mount_chrome nosed_lens_977.jpg Lenses with chrome locking rings, which is everything before about 1979 - Line up the red dots on the camera body and lens, then twist the chrome locking ring clockwise (looking from the front of the camera), until it's comfortably tight. T50_mounting_New_FD_lens_930.jpg New FD lenses - These don't have a locking ring. Again, line up the two red dots. Then, rotate the body of the lens until it clicks into place, just like the bayonet-mount lenses for other cameras which these lenses pretend to be.
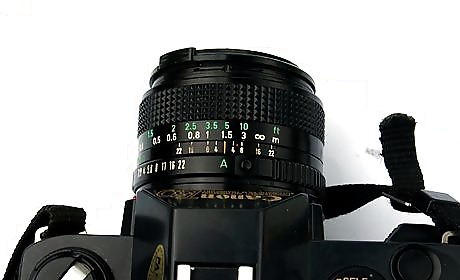
Make sure your aperture ring is set to "A". Press the button to the right of the "A" in order to slide it so that the "A" is just below the vertical orange line. Taking it off "A" will lock the shutter speed to 1/60 second. This is only useful for shooting either manual flashes (if you must nuke subjects with direct flash, use Canon's Speedlite 244T, which works fine in "A") or for use with strobes in a studio. For everything else, you'll want to keep it on "A".Of course, for the serious headbangers out there, this works as a very crude, limiting, unmetered fully-manual mode.
Loading your film
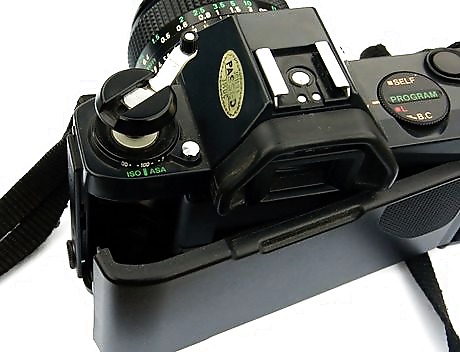
Open the back of the camera. Do this by lifting the rewind crank upwards. This might be a little stiff, so don't be too afraid of using a little force.
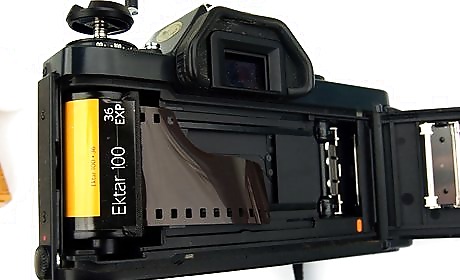
Drop the film into the film chamber.
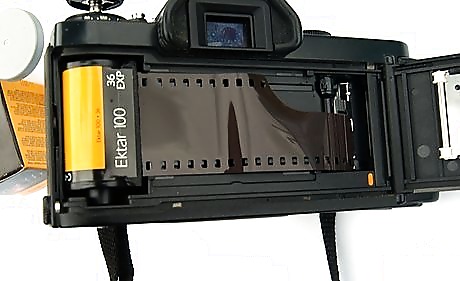
Pull the leader of the film out as far as the red mark on the right next to the take-up chamber. (It may not look like it's as far as the red mark in the picture; that's because film isn't flat.)
Push the rewind crank down into its normal position. You might have to wiggle the rewind crank back or forth a little until it engages the film properly.
Close the back of the camera.
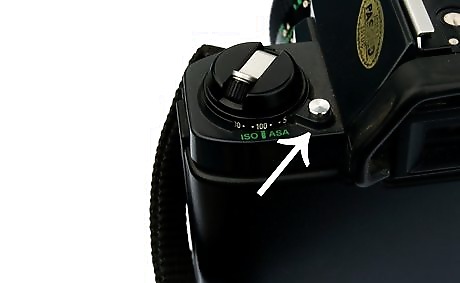
Set the film speed on the ISO/ASA dial. Press the silver button to unlock the dial, then hold it as you turn the dial till the line is parallel with the speed of the film.
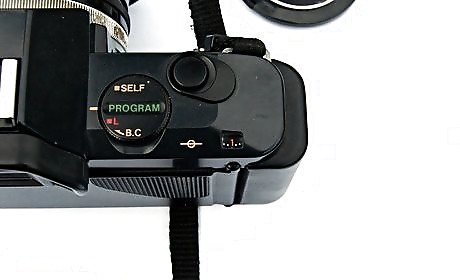
Advance the film to frame 1. Make sure the main dial is set to PROGRAM and press the shutter button; the motor drive will advance the film (if it doesn't, you're in trouble). Press it a few more times until the arrow in the frame counter window is pointing to the 1.
Shooting

Get out there. Get out any time the light is good (which isn't the same thing as bright daylight; early mornings and late evenings are the best).
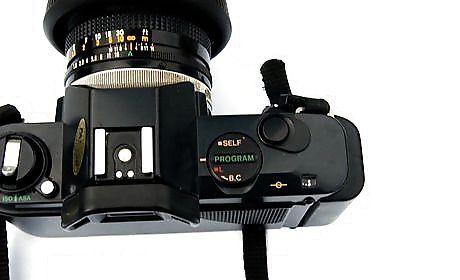
Turn the main dial to PROGRAM. This is the camera's only exposure mode, which is fully automatic. You'll only need to turn this to L to lock the shutter while it's stowed away to prevent accidental shots; keep it around your neck and you won't need to bother doing this.
Look for things to photograph. This is covered in quite some detail in another article.
Look through your viewfinder and focus on whatever you want in focus. Don't worry about this being a manual-focus camera; the T50's viewfinder is so enormous and bright that you'd have to try to get a shot out of focus. You also have two useful focusing aids to ensure that your shots are sharp. One is a split image, the circle right in the center, which splits the images into two pieces, and which are aligned when the image is in focus.The other (more useful) aid is a microprism ring around the outside of the split screen. This will cause any defocus to be far more obvious than it would be otherwise; when it's out of focus, this area will flicker and display a very obvious "cross-hatched"-ish pattern. Turn the focus ring until either the split image is no longer visibly split, or until the image in the microprism ring is visibly sharp.
Gently half-press the shutter button. This will wake the camera up and you'll see a little green P appear.
Check the green P. This actually conveys some useful information: A solid, non-blinking P: green means go! The camera is happy and ready to shoot. A slowly-blinking P: If it blinks about twice a second, it's warning you that your picture might be blurred by camera shake (this happens if the shutter speed is down to 1/30 or slower). Use a tripod or brace yourself against a solid surface. If you find yourself down in this range quite a lot, you might want to consider shooting a faster film. A rapidly-blinking P: You're dead; you're either trying to operate outside the T50's metering range or you're going to need a shutter speed longer than two seconds. The T50 simply cannot operate under extreme low-light conditions.

Press the shutter button all the way down to shoot. The camera's noisy little motor drive will automatically advance the film to the next frame. Keeping it held down will make it shoot again just under a second later. This might be a good idea if you're down in the slowly-blinking-P range (since it increases the chance that one of the shots won't be blurred by camera shake), otherwise you're wasting film by doing this.

Keep moving and shooting until you hit the end of the roll. The camera will beep loudly at you when you're out of film.
Unloading the film

Press the rewind release button on the bottom of the camera.
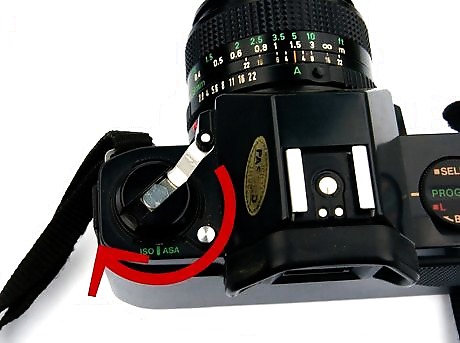
Lift out the rewind crank lever and turn it clockwise. Keep going. You'll feel the crank get stiffer for a bit, then there will be a very obvious release of tension as the camera lets go of the film. Turn it a few more times after that.
Lift up the rewind crank to open the back of the camera. Then drop the film out.

Get the film developed and scanned (don't bother doing the last part yourself). Show the results off to the world. Thanks to its compatibility with some extraordinarily cheap lenses with great optics, the results you get from this camera will be every bit as good as the results from more complicated and expensive cameras like the Canon A-1, or even pro cameras like the F-1. The T50's lack of manual settings is loved by experienced photographers even as they curse it; it forces the photographer to think about nothing but how well they are composing the picture.




Comments
0 comment