views
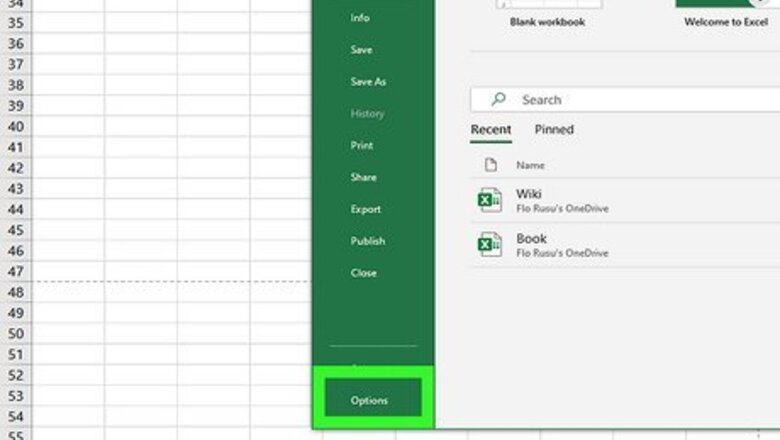
- To remove dotted page break lines, go to "File" → "Options" → "Advanced" → uncheck "Show page breaks".
- To remove border lines, select the cells. Click the "Borders" down-arrow, then "No Border".
- Hide gridlines by clicking the "View" tab, then uncheck "Gridlines".
Removing Page Breaks
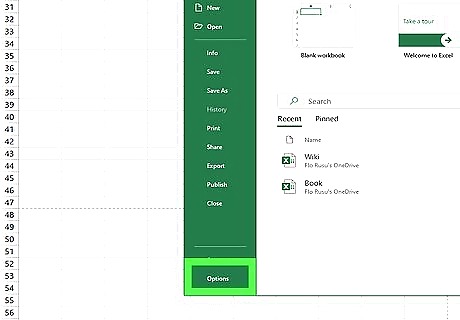
Click the File menu and select Options. After clicking "File," you'll see "Options" on the left panel at the very bottom. Use this method to remove the dotted lines indicating a page break.
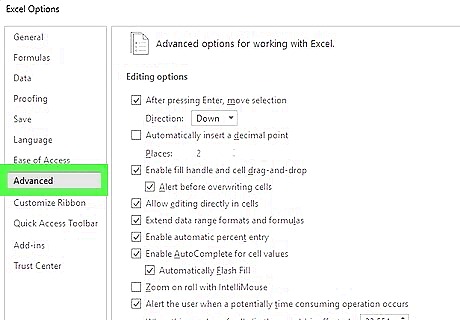
Click Advanced. This is the left tab located between Accessibility and Customize Ribbon.
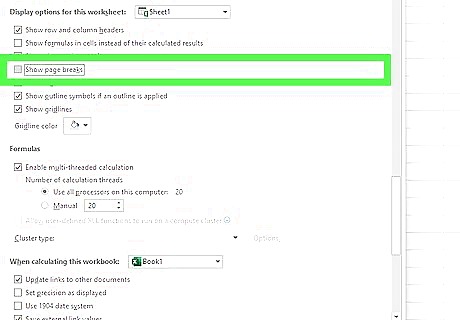
Scroll down and uncheck "Show page breaks." This checkbox is in the "Display options for this worksheet" section.
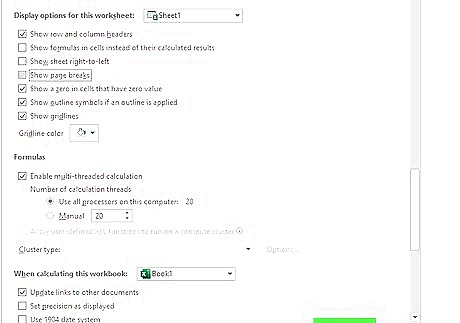
Click OK. This will remove dotted lines from page breaks.
Removing Dotted Borders
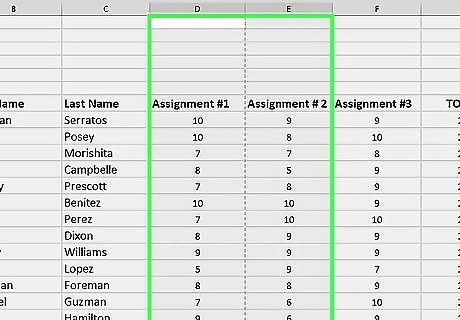
Highlight the affected cells. If there's a dotted line bordering one or more cells, start by selecting the cells with dotted lines. Click and drag the mouse to select the cells, or press CTRL + A (Windows) or Command + A (Mac) to select all cells in the worksheet.
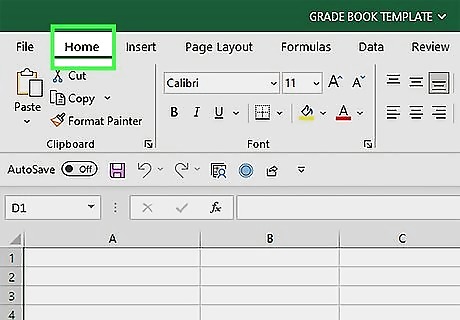
On the Home tab, click the "Borders" drop-down arrow. You can find Borders in the Font section of the Home tab.
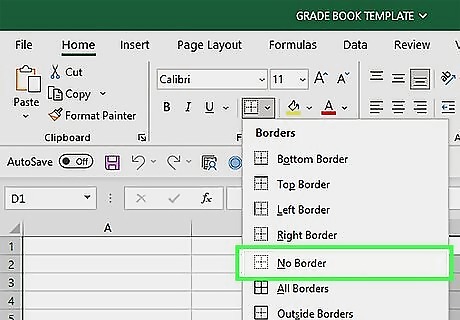
Click No Border on the menu. This will remove existing borders of any style, including dotted line borders. If you used Excel to create a graph, this may make your graph less visible.
Removing Dotted Gridlines
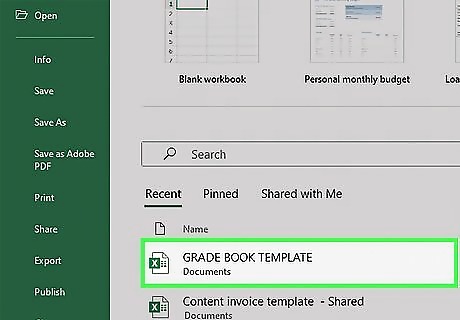
Open a worksheet in Microsoft Excel. You can create a new worksheet or open an existing one. Use this method to remove the faint gridlines that appear between the cells on the worksheet.
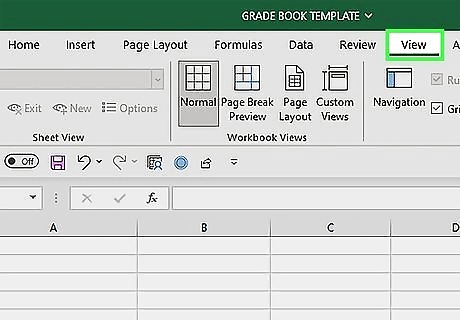
Click View. This is the tab located between Review and Help.
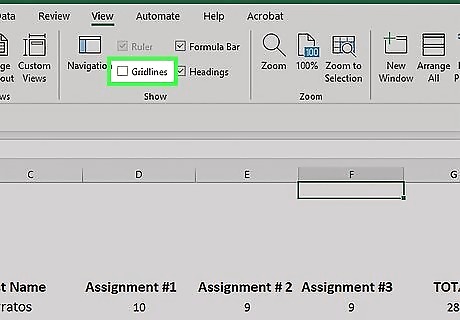
Uncheck "Gridlines." You can find this in the Show section. You can also uncheck the Formula Bar and Headings to remove them if desired. You can now use Excel with gridlines hidden. This could be helpful if you want to use complex formulas.




Comments
0 comment