views
Planning and Preparing

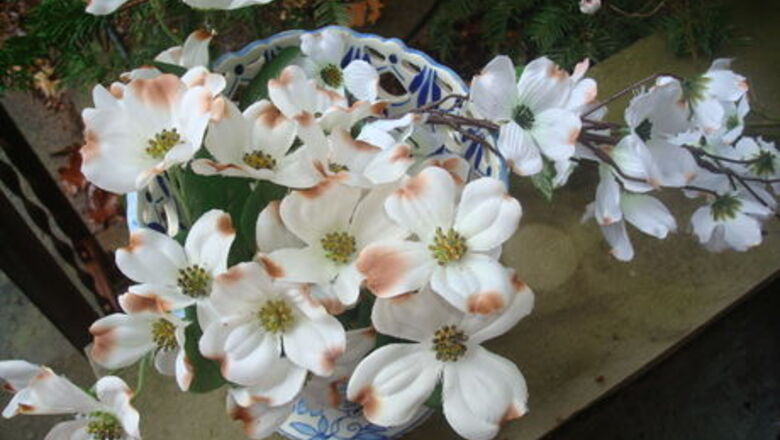
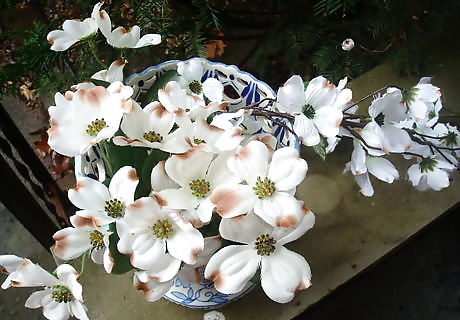
Start by familiarizing yourself with the dogwood blossom. Seeing it in passing is fine, but to paint it, taking a really hard and close look is helpful and necessary.

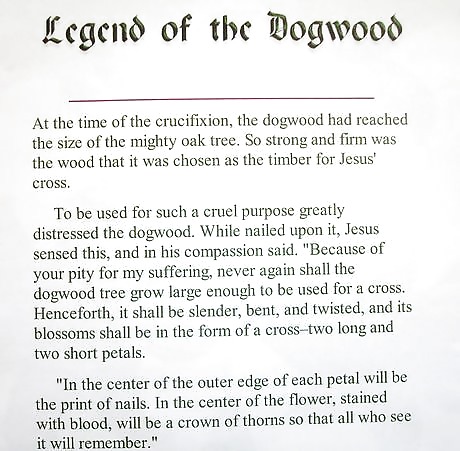
Read up on the legend of the dogwood. Add another dimension to your study of the dogwood by browsing this topic on the internet. There are many stories and poems about the part the dogwood tree played in the crucifixion of Jesus.
See how the shape, markings and colors of the dogwood blossom fit into the legend.Dogwood3.jpg
Look up photographs of the dogwood blossom on the tree's branches. Check out pictures of the whole tree. For inspiration, look at how artists have painted the dogwood. The varieties are endless and lovely.
Notice how the white blossom is often accentuated by dark backgrounds.
Drawing
Begin your own painting of the dogwood. Assemble your supplies; a piece of 11" X 14" watercolor paper torn from a pad and water colors in a range of hues, either dry pans or tube paints squeezed onto a white palette. You will need a selection of watercolor or all purpose brushes, a support board for your paper, a water bucket and tissues for mopping up runs and mistakes.
Sketch a number of circles and ovals on your paper for the blossoms. They can be larger than life, approximately 1 1/2 inches in diameter to clearly show detail and for greater impact.
Turn each circle into a flower with four petals. In legend the symmetry represents the cross. Mark within each circle, a smaller circle for the center. It can fall off center to show various angles of the flower. Divide the circle into four equal sections, on for each petal. Round off the tops of the petals and give them a small dip or indentation at the middle point.Dogwood4.jpg
Indicate the centers as a cluster of small dots. Later, in painting the centers, you can have the shape appear to rise above the petals by having it cast a small shadow.
Draw a branch behind and connecting the blossoms. Give each blossom a small stem connecting it to the branch. Do leaves the same way.
Note that the leaves are dagger shaped. Make the center growth line slightly curved to show the curvature of the leaf.
Painting
Paint your dogwood scene. Start with gray shadows and markings on the petals. Take a close look at a photo of a dogwood flower to see how the shadows are arranged on each one and attempt to copy those shapes. You can draw them in pencil or paint directly. Think of the gray shapes as places where the petal curls, is caught in a cast shadow or as growth lines. A few delicate grays on each flower will bring it to life, you can add more later if needed.
Tint the dogwood pale pink if you wish. They do come in that color. If you want to, this is the time to do it. Remember to keep the rosy wash pale, and sheer.Dogwoodpink.jpg
Use a fat, round, pointed, well charged brush for the branch. Hold the brush half way up the handle for less control. This "shaky hand" will give you a natural looking, gnarly branch. Immediately, follow with a line of darker brown, almost black, along the bottom of the branch to indicate roundness. Pull small lines from the wet branch with a small, pointed brush or a liner brush to make little stems where the blossoms and leaves are attached to the branch.
Tackle the background. On a clean palette, one at a time, pull the three or four colors you want for the background. Make good size puddles of the colors by adding enough clear water to make it apply smoothly and have lots of oomph, but not be watered down too much. Keep a brush for each color so you can work fast.
Paint an area of the background in one color. Vary the strokes' direction and weight. Pick up a second brush loaded with another color and paint some more, touching the first, wet area, allowing the colors to mingle and blend. Repeat the process, alternating colors, until the entire background is painted. Go loosely around the leaves, the branches and blossoms, adding fresh color as needed. Try not to work back into what you have already done. Allow the painting to dry thoroughly. Use a hairdryer if necessary.
Adding Finishing Touches
Paint the small amount of color that shows on the petals. At the center top, around the indentation, paint a tiny rust colored area to represent Christ's blood. Use gold, yellow, or a dark color to paint dots in the center to represent the crown of thorns.
Do edits and refinements. Add tiny curly tendrils coming off the branches, growth lines on the leaves and flowers and a small gray shadow under the center area of the flower to show that it is raised.
Let the piece air dry overnight. Then, if it needs punching up in any area, do it, but judiciously. Over painting and overworking dulls the freshness of the initial strokes and color masses. The painting will have luminosity after it dries overnight, a glow. The wet paper will return to pure white and surprise you with how it brings the color to the top and accentuates your intentions.
Sign your work any way that appeals to you. Give this signature some thought and keep it consistent through your paintings. Usually it happens in the lower right corner. Some like it bold, it can be like handwriting, others prefer to semi-conceal it within the painting. Hang your work and know that you have honored the long tradition of the dogwood as an Easter symbol.


Comments
0 comment