views
Using the BIOS Settings
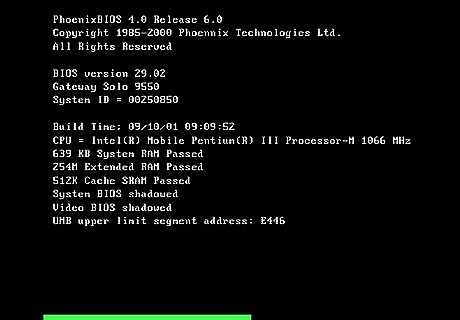
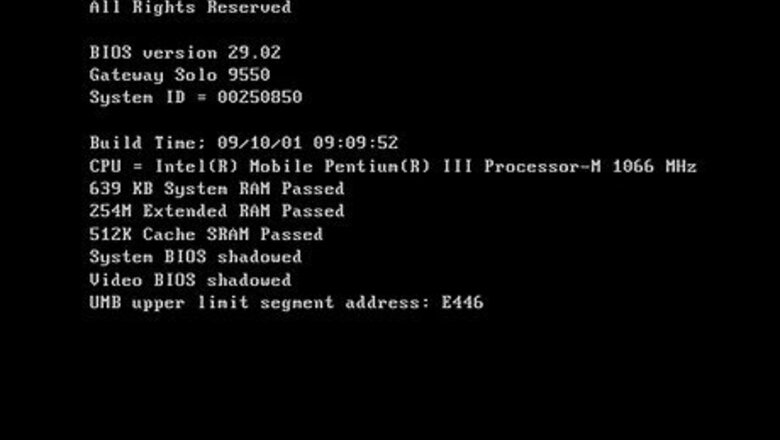
Boot your computer into BIOS. There are a couple ways you can boot your computer into BIOS. You can press the specified button during the bootup process. This button is different depending on the manufacturer of your computer's motherboard. Common keys include F1, F2, F10, F12, Delete, or Esc. The correct key is usually listed when your computer boots up. If the bootup process goes by too quickly, you can use the following steps to reboot your computer into BIOS from within Windows 10: Click the Windows Start button. Click the Gear/Settings icon. Click Update & Security. Click Recovery in the panel to the left. Click Restart now below "Advanced startup." Click Troubleshoot. Click Advanced options. Click UEFI Firmware Settings. Click Restart.
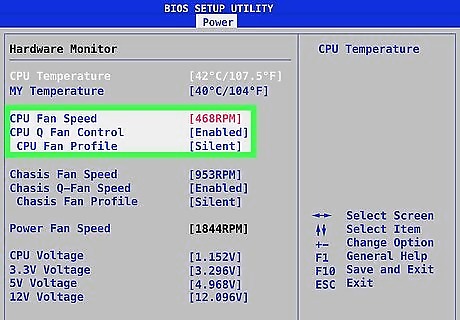
Search for the fan settings. Once your computer boots into BIOS, use the arrow keys on the keyboard to navigate the BIOS menu. The BIOS menu is different for different computer manufacturers. The fan settings can usually be found under "Monitor", "Hardware monitor", "Status", or something similarly named. Not all computer BIOS menus have the option to change the fan settings. Check the user's manual or manufacturer's web page if you can't find the option to change the fan settings. The following indicates where you might find the fan settings for different motherboards. These setting may not be true for all models. Asus motherboards have "Q-Fan Control" under the "Power" menu. Gigabyte motherboards have separate customizable fan settings for "Quiet", "Power Saving", "Performance" and "Entertainment" in the Control Center. You can find fan controls under System Information Viewer (SIV) in the App Center in Windows. ASRock motherboards have “CPU_FAN1 Setting” under the H/W Monitor menu heading, which is the “Hardware Health Event Monitoring Screen”. MSI motherboards have "SYS Fan Control" under "Hardware monitor" in the Settings menu. BioStar motherboards have "Smart fan option" under "PC Health Status". EVGA motherboards have "CPU Smart Fan Settings" in the "Advanced" menu. Intel motherboards have the CPU Fan settings under "Cooling" in the "Advanced" menu.
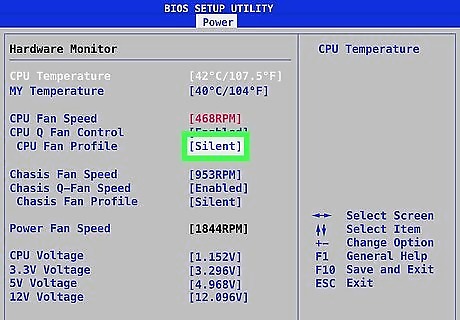
Change the fan settings. The options that are available vary depending on the make and model of your motherboard. Some BIOS menus may have generic settings like "Quiet", or "Performance". Some may allow you to specify the speed or percentage the fan operates at. In some cases, you may be able to specify at what temperature different fan speeds or power percentages activate. Go through the menu and select which fan speeds are most appropriate for your usage. Warning: Lowering the fan speed below recommended settings may increase the chances that your CPU or other components may overheat and cause damage to your computer. Use faster fan speeds for more CPU intensive activities like gaming, or video/audio editing. Use slower fan speeds for more mundane work that doesn't require too much processing power This will allow for quieter fans that are less distracting.
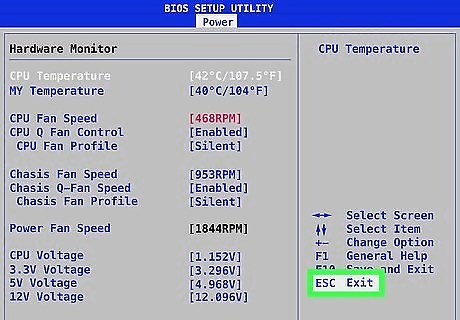
Go to the “Exit “ menu. When you are finished setting the fan settings, go to the Exit menu. This menu usually has options for you to save your settings and reboot your computer.
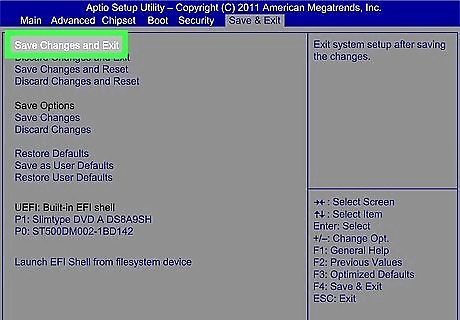
Select “Save and Exit." This will save your new settings and exit the BIOS. Your computer will reboot back into WIndows as normal.
Using Third-Party Software

Go to http://www.almico.com/sfdownload.php in a web browser. This is the website that contains the download for SpeedFan. It's a third-party hardware monitoring application that allows you to control your fan settings. Alternatively, you can check to see if your motherboard has it's own official hardware monitoring app either pre-installed or available for download. Third-party software may not work for fans on all motherboards.
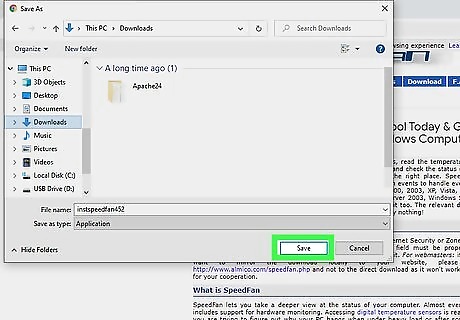
Download and install SpeedFan. Use the following steps to download and install SpeedFan: Click Speedfan [version number] in the paragraph text below "Download." Open the setup file in your web browser or Downloads folder. Click Yes. Click I Agree. Click Next. Click Install. Click Close.
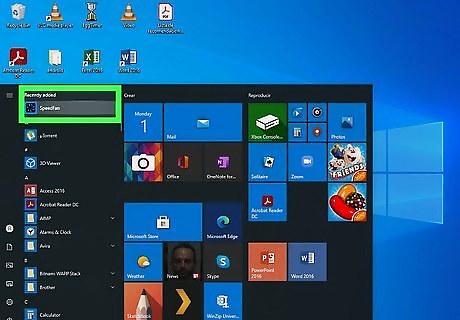
Open SpeedFan. It has an icon that resembles a fan. Click the icon in the Windows Start menu to open SpeedFan.
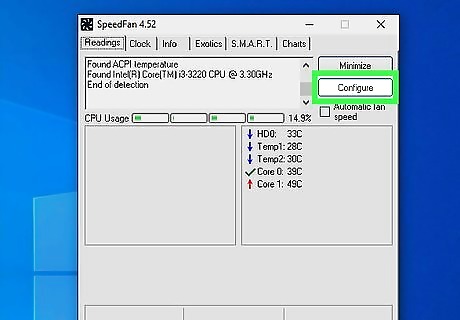
Click Configure. It's the second button on the right under the "Readings" tab.
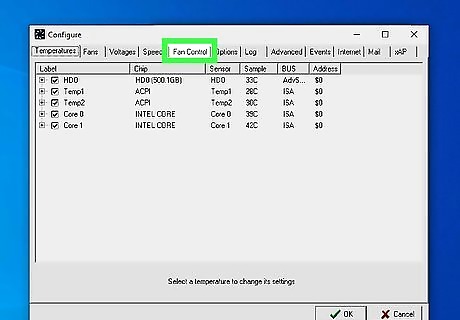
Click the Fan Control tab. It's the fifth tab at the top of the page.
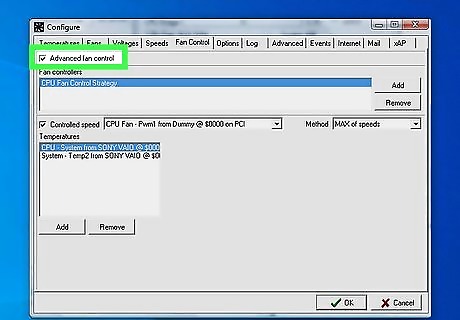
Check "Advanced Fan Control". This displays all fan controllers. If no fan controllers are displayed, SpeedFan will not be able to adjust the speed of your fans.
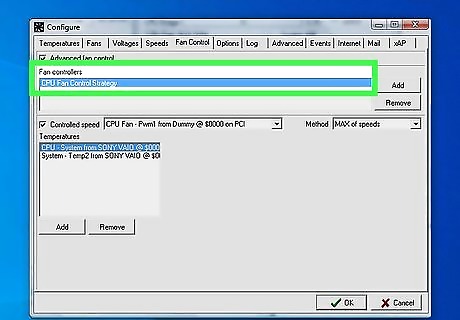
Select "CPU Fan Control Strategy". This displays the parameters of the current fan control strategy. Alternatively, you can click Add to create a new CPU fan control strategy.
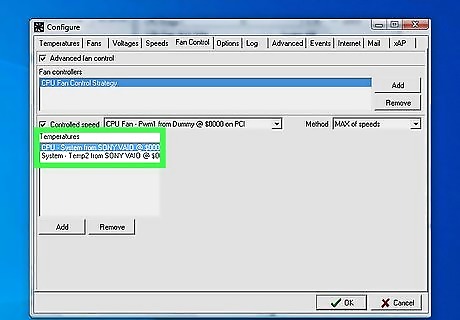
Select a temperature response. Temperature responses are listed in the menu below "Temperatures". This displays a graph with the different temperature responses to the right. Alternatively, you can click Add below "Temperatures" to create a new temperature response.
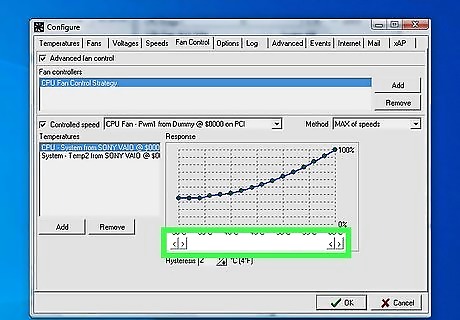
Click < and > to adjust the minimum and maximum temperatures. This adjusts the temperatures in which the current fan control strategy goes into effect. Use the arrow icons on the left below the grid to change the minimum temperature. Use the arrow icons on the right to adjust the maximum temperature.
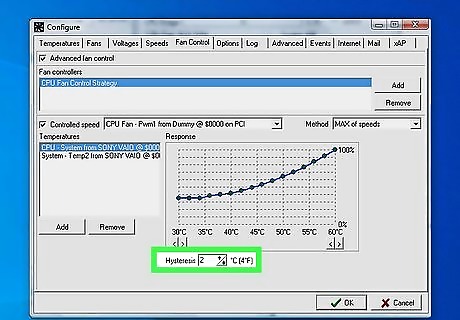
Adjust the hysteresis temperature. The hysteresis value is listed at the bottom of the page. The hysteresis temperature is how far below the minimum temperature the CPU needs to reach before the fan control strategy cuts off. This helps to avoid fan fluctuations.
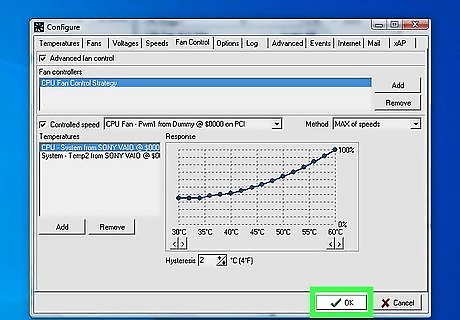
Click Ok. This saves your fan control strategy and applies your settings.
Using a PC Fan Controller
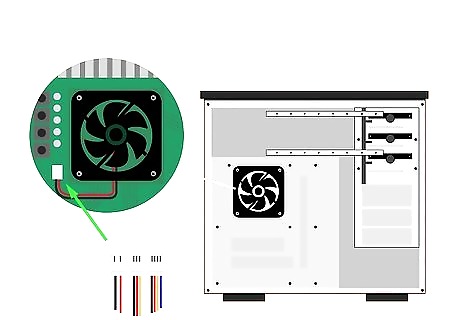
Check your computer hardware. Before you purchase a new fan controller, you'll need to open your computer and check a few things. First, you'll need to see how many fans your computer has so that you can purchase a fan controller that supports all your fans. You'll also need to disconnect each of the fans from the motherboard so that you can see if they use a 2, 3, or 4 pin connector. You'll need to know what type of connector your fans use when you purchase a fan controller. When handling the inside of your computer, make sure you touch something metal to ground yourself. This prevents static discharges that can damage your computer. You may even want to purchase a pair of static wrist bands to wear while you tinker with your computer. The slightest static discharge can ruin your entire computer system.
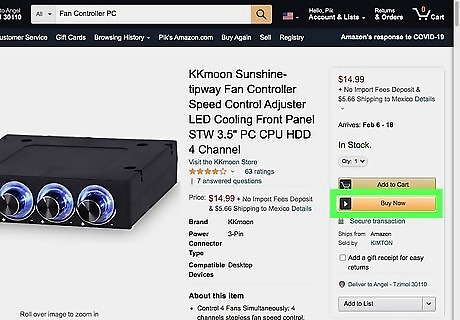
Purchase a fan controller. You can purchase a fan controller online or from a computer store. Make sure the fan controller you purchase is able to support all the fans in your computer and has the appropriate pin connectors. Most fan controllers require an available slot in the drive bay of your computer tower. If your computer's fans use 2 or 3-pin connectors, you may be able to purchase new fans with 3 or 4 pin connectors as an upgrade. 2-pin connectors only supply an electrical current to the fan. 3-pin connectors allow the fan to have speed control. 4-pin connectors add pulse wave modulation (PWM), which controls the fan power by sending power to the fan in pulses.
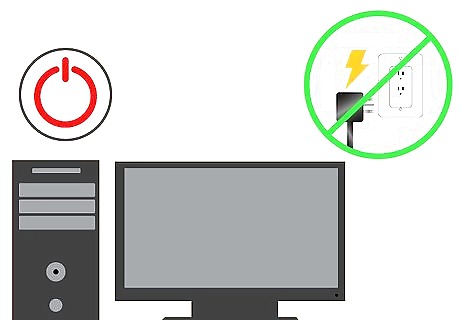
Shut down your computer. Make sure your computer is completely shut down. Then unplug the power cable.
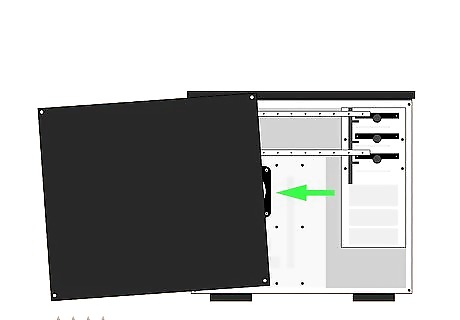
Open the computer system case. Most computer towers allow you to open at least one side to gain access to the inside of the computer. Unscrew the screws holding the side panel on and remove the side panel to gain access to the inside of your computer.
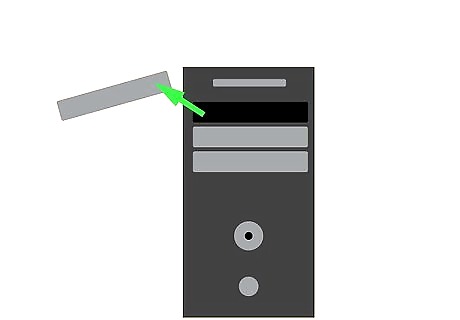
Remove the cover for an available drive bay expansion slot. Most fan controllers require a free drive bay expansion in order to install the fan controller. This is where you would normally install a DVD/Blu-ray drive. Follow the instruction manual for your PC to remove the cover in the expansion bay where you want to install the fan controller.
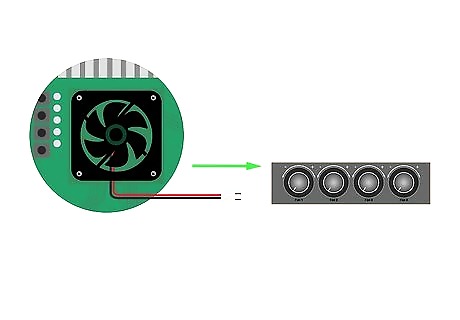
Connect the fans to the outputs on the fan controller. Run the cables connected to your fans through the front drive bay that you are going to put your fan controller in. Connect the fans to the output connectors on the back of the fan controllers. Be sure to note which fan is connected to which output so that you know which control knob each fan is connected to.
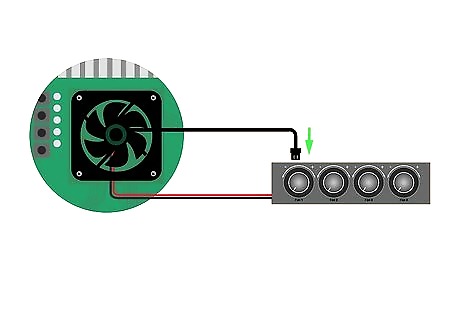
Connect the thermal sensor if needed. Not all fan controllers have a thermal sensor connection. If yours does have a thermal temperature sensor input, disconnect the thermal sensor from the motherboard and attach it to the fan controller. If the fan controller came with its own thermal sensors, follow the instructions in the user's manual to install it correctly.
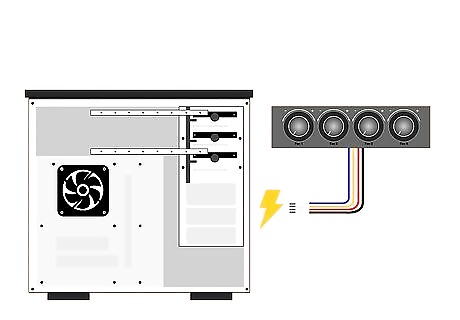
Connect your power supply to your fan controller. The way you connect power to the fan controller is different depending on which fan controller you purchase. Some fans have a power input that you can connect a cable from your power supply to. More simple fan controllers may have an input and an output connection for each fan control. If this is the case, use one of the connection cables that came with the fan controller and connect it to one of the fan outputs on the motherboard. Then connect it to the input on the fan controller. Make sure the output on the fan controller is connected to the fan you want the knob to control. In some cases, you may need an adapter to connect a Molex cable from your power supply to an input connection on the back of the fan controller.
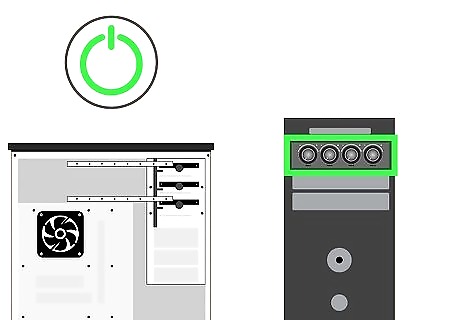
Test the fan controller. Once everything is hooked up, go ahead and power on your PC. Make sure all fans are working and that you are able to adjust them using the fan controller. Make adjustments as necessary and consult the user's manual if you are unsure why something isn't working.

Put your PC back together. Once you are positive everything is working properly go ahead and put your computer back together. Place the fan controller in the expansion bay and secure it using screws or the mounting system your computer uses. Then reattach the side panel of the PC and secure it with screws.


Comments
0 comment