

Using SpeedFan
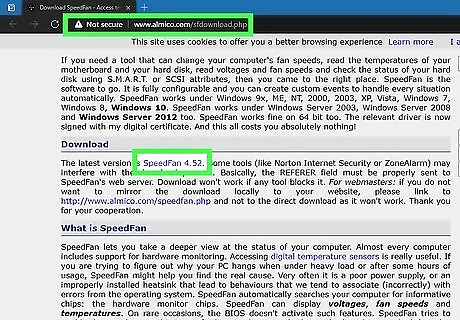
Download SpeedFan. If SpeedFan is compatible with your laptop's motherboard, you can use it to adjust your PC's fan speeds. To download SpeedFan: Go to http://www.almico.com/sfdownload.php and click the first link in the "Download" section. When the file is finished downloading, double-click it to start the installer. Click Yes to run the file. Review the agreement and click I Agree. Click Next. Click Install.

Open SpeedFan. Once the app is installed, you'll find it in your Windows Start menu. You may have to click Yes to give SpeedFan permission to access your PC's settings. After a few moments, you will see some information about your PC on the main screen. The fans and their current speeds should appear in the box just below the "CPU usage" bar. If you don't see any fans here, or the only fans you see are listed as "0 RPM," your motherboard is not supported by SpeedFan.
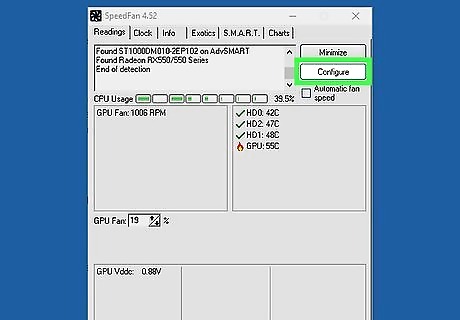
Click the Configure button. It's in the upper-right area of the window.

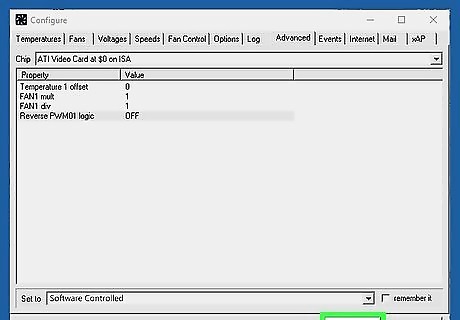
Click the Advanced tab. It's at the top of the window.

Select your CPU from the "Chip" menu. It's at the top of the screen. It's the entry that begins with "IT" and ends with "ISA." In the bottom section, you'll see several properties, a few of which should begin with "PWM (a number) mode." If you don't see your CPU in the menu, go through the other options and look for one with "PWM mode" entries in Property box. If you don't see any options that display a "PWM mode" option in the Property box, you won't be able to change your fan speed.

Set your PWM modes to "Software controlled." To do so, click the first PWM mode entry, and then select Software controlled from the drop-down menu at the bottom. Repeat this for each PWM mode entry (PWM 1 mode, PWM 2 mode, etc.). The default option, Smart Guardian, stands for chip-based control. When this default option is set for any PWM modes, your PC will self-regulate the fan speeds instead of allowing you to make changes.
Click OK. This takes you back to the main SpeedFan screen.

Find which PWM controls each component's fan. Take a look at each fan speed in the box on the left side of the window. You'll also see each of the PWMs listed just beneath this box, each with its own percentage value. Grab a sheet of paper or open a blank text file and log the following: Write down the percentage of the first PWM setting. Now set the first PWM to 0%. After a moment or two, one of the temperatures in right-hand box will begin to rise and turn red. The component with the raised temperature is the one affected by that PWM. Write that down. Enter the original percentage back into the box. Repeat for all other PWMs until you know a) which PWM controls which components' fans, and b) what the default values are for each PWM.

Adjust the fan speeds by raising or lowering the percentage for each PWM. Start by making small adjustments, raising or lowering the speed by just 1 or 2 at first. Watch the temperatures in the right panel to make sure you don't cause any overheating, while also paying attention to how your changes affect performance.
Using the BIOS

Boot your PC into the BIOS/UEFI. Depending on your laptop's model and motherboard, you may be able to control fan speeds in the BIOS or UEFI. Save any work you have open, and then do the following: Press the Windows key + i to open your Settings. Click Update & security. Click Recovery in the left panel. Click Restart now under "Advanced startup" in the right panel. Click Troubleshoot and then Advanced options. Click UEFI Firmware settings and select Restart. This reboots your PC into the BIOS/UEFI.

Locate the menu related to your fan. The location will vary, but check the various menus for anything having to do with fans, fan speed, cooling, or temperature. You may have to select a menu called Advanced first.
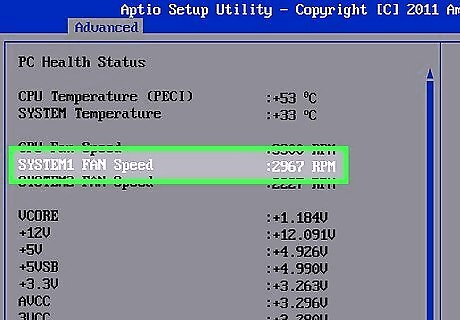
Choose a fan speed setting or profile. The options you can select also vary by manufacturer. You will typically have the option to adjust the temperature at which the fan will speed up, and often the speed itself. If your issue is that the fans are too loud and come on too often, you'd want to increase the temperature at which they activate. Just be careful not to let your PC run too hot, as you could damage your hardware.

Save and exit the BIOS. The exact key you'll need to press will appear with "Save Changes and Exit" toward the bottom of the screen. Press that key to save and exit. When your PC boots back up, it will be using the new fan settings you've set.


Comments
0 comment