

- Install VSFTPD from Ubuntu's repositories using sudo apt install vsftpd.
- Use the file /etc/vsftpd.conf to set up and make changes to your FTP server configuration.
- FTP is not encrypted by default, so if you allow users to authenticate, set up FTPS (FTP over SSL).
Installing VSFTPD
Open a terminal window (if on a desktop workstation). You can skip this step if you're connected to an Ubuntu server remotely. If you want to set up an FTP server on your Ubuntu desktop workstation, press Ctrl + Alt + T to open a terminal now. Keep in mind that FTP is not encrypted. Don't use FTP to transfer secure files.

Type sudo apt update and press ↵ Enter. This updates your package list. When prompted, enter your password to continue.

Type sudo apt install vsftpd and press ↵ Enter. This installs VSPFD, a super fast FTP server for Linux.

Run sudo systemctl enable vsftpd to start VSFTPD automatically. To ensure your FTP server is always available when people need it, use this command to make it start each time your server boots.
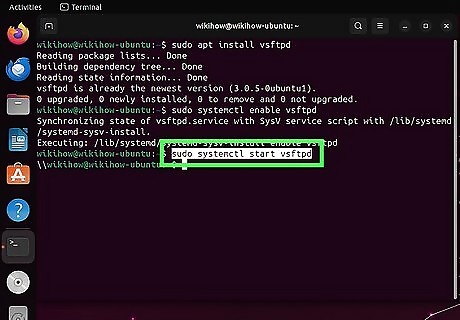
Type sudo systemctl start vsftpd to start the FTP server. The FTP server will now start. You can make sure it's running by issuing the command sudo systemctl status vsftpd.
Allowing Local Users

Open /etc/vsftpd.conf for editing. If you want to allow people with accounts on your Ubuntu system to FTP to the server, you just need to make a few changes to your configuration file. If you haven't already, make a backup of the config file before editing: sudo cp /etc/vsftpd.conf /etc/vsftpd.conf_backup. To use nano to edit vsftpd.conf, type sudo nano /etc/vsftpd.conf and press Enter. Alternatively, you can use Vim or any other editor.
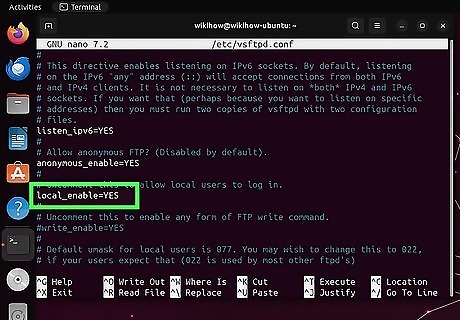
Set "local_enable" to YES. Scroll down to "local_enable" line. If there's a # symbol in front of it, delete that symbol. Then, make sure local_enable=YES.
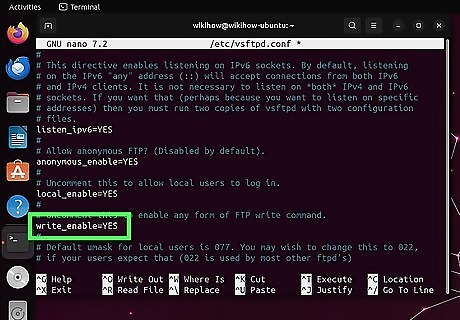
Allow users to upload files (optional). If you want to allow people with accounts to upload files to their home directories via FTP, scroll down to the "write_enable " line and remove the # symbol to uncomment it. Make sure "write_enable" is set to YES.

Restrict FTP users to their home directories (optional). If you only want FTP users to be able to access their own home directories (and you should want that), you can use chroot to limit user access. Here's how: To limit all users to their home directories, uncomment the line "chroot_local_user=YES" by deleting the hash mark (#) before it. If you'd rather limit specific users to their home directories: First, uncomment these lines: chroot_list_enable=YES and chroot_list_file=/etc/vsftpd.chroot_list Save and exit the config file. Type sudo nano /etc/vsftpd.chroot_list (or use your preferred text editor) to create the VSFTPD chroot list. List each user you want to restrict to their home directories on individual lines. Save the file.

Disallow FTP access for specific users (optional). By default, accounts like root, daemon, and sys cannot make FTP connections to the server. You can add additional users by opening /etc/ftpusers (you'll need to use sudo) and adding usernames to the list.
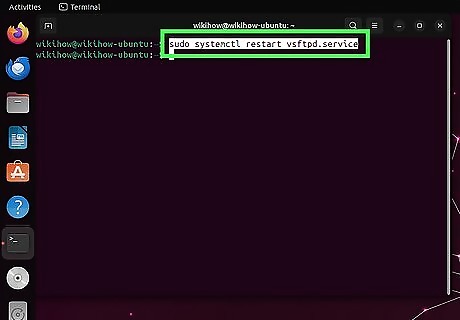
Run sudo systemctl restart vsftpd.service to restart VSFTPD. Users can now FTP to the server.
Setting Up Anonymous FTP

Open /etc/vsftpd.conf for editing. By default, VSFTPD only allows authenticated users to upload and download files. If you want to host files on your FTP server that anyone can download, you'll need to edit the VSFTPD config file to allow anonymous FTP. Create a backup of the config file before editing so you can restore the original if needed. To do this, just type sudo cp /etc/vsftpd.conf /etc/vsftpd.conf_backup. To use nano to edit /etc/vsftpd.conf, type sudo nano /etc/vsftpd.conf and press Enter. Alternatively, you can use Vim or any other editor.

Set "anonymous_enable" to YES. Scroll down to the line that says "anonymous_enable=NO," then replace "NO" with YES. If you don't want to allow people with user accounts on this Ubuntu system to log in with their usernames and passwords, scroll down to "local_enable." If it's set to YES, replace it with NO. By default, anonymous users can't upload files to your FTP server. While you can allow anyone to upload files, it can be risky, so we don't encourage it. But if you'd like to, remove the # symbols from the line "anon_upload_enable=YES" AND "write_enable=YES" to uncomment them. When you're finished, save and exit the config file.

Change the FTP user's home directory (optional). VSFTPD creates a user called ftp during installation and sets its home directory to /srv/ftp. If you want to use a different directory for files on your anonymous FTP server, you can change it easily. Create a new directory (if one doesn't already exist) using mkdir -p /directory/name. For example, mkdir -p /srv/ftp/myCompany/files. Then, use sudo usermod -d /srv/ftp/myCompany/files ftp to make the new directory the ftp user's home directory.

Run sudo systemctl restart vsftpd to restart VSFTPD. You'll need to restart the VSFTPD service each time you change the config file.

Copy files to the FTP user's home directory. Any files you want to make available for download should be placed in the FTP user's home directory. This will allow anonymous users to access and download these files when FTPing to the server anonymously. Now that you've set up anonymous FTP and placed some files in the FTP user's home directory, see Connecting and Transferring Files to learn how others can connect to your FTP server.
Securing VSFTPD

Create a self-signed certificate. The FTP protocol is not encrypted, so it's not the safest transfer method. If you're allowing local users to upload and download files, it's best to enable FTPS, which is FTP over SSL. You can use the openssl command to generate a certificate that will stay active for a year. Run the following command to create an RSA key and certificate: openssl req -x509 -nodes -days 365 -newkey rsa:2048 -keyout /etc/ssl/private/vsftpd.key -out /etc/ssl/certs/vsftpd.crt. Follow the prompts to create your certificate. You can skip entering some of the fields, but the following fields are required: Country Name State or Province Name Locality Name (your city) Common Name (this should be your FTP server's hostname or your organization's name) Once finished, you'll have an RSA certificate file at /etc/ssl/certs/vsftpd.crt and a private key at /etc/ssl/private/vsftpd.key. Remember these locations, as you'll need them in a moment.
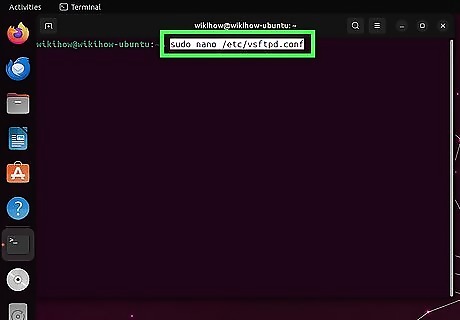
Open /etc/vsftpd.conf for editing. Use nano, vi, or your preferred text editor.
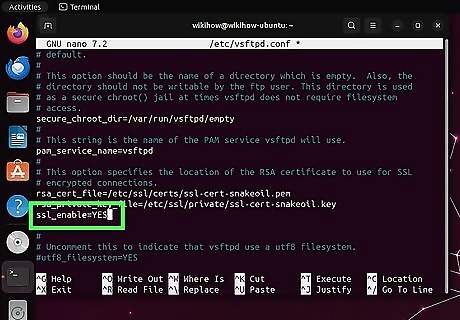
Add required lines for SSL connections. At the bottom of the VSFTP configuration file, you'll see "ssl_enable=NO." Change this value to YES to enable secure connections. If you're allowing anonymous connections, you should also add the following line below: allow_anon_ssl=YES. Add these lines to make SSL connections mandatory: force_local_data_ssl=YES force_local_logins_ssl=YES require_ssl_reuse=NO ssl_ciphers=HIGH If you want to restrict the secure connection type to TLS (recommended), add these three lines: ssl_tlsv1=YES ssl_sslv2=NO ssl_sslv3=NO

Add the private key and cert to the VSFTPD config file. To do this: Replace the path "rsa_cert_file" with /etc/ssl/certs/vsftpd.crt Replace the path for "rsa_private_key_file" with /etc/ssl/private/vsftpd.key.
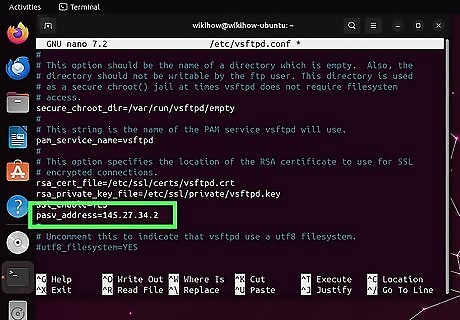
If you're behind a NAT router, add the external IP address. You'll only need to do this if your router is using network address translation (NAT). To do this, add this new line to vsftpd.conf: pasv_address=externalIPaddress. Replace externalIPaddress with the server's external IP. Alternatively, if the server has a domain name, you can add these two lines instead: pasv_addr_resolve=YES pasv_address=your.domain.name You may also need to change the listening port to something other than port 21, which you can do by adding the line listen_port=portnumber.

Save the config file and restart VSFTPD. To restart VSFTPD, run sudo systemctl restart vsftpd.service. If you enable SSL/TLS, users will need to use FTPS—note that FTPS is different than SFTP, which is FTP over SSH. Desktop apps like FileZilla, available for Linux, Windows, and macOS, all support FTPS.
Connecting & Transferring Files

Determine your FTP server's address. Whether you're hosting an FTP server on Ubuntu in your home or paying for a server through a hosting service, users will need your IP address or hostname to connect. To find your Ubuntu server's public IP address, use this command: dig TXT +short o-o.myaddr.l.google.com @ns1.google.com If you're only allowing connections from your internal network, use the command ip addr to view your local IP address. If you have a domain name pointing to your IP address, users can use that to connect to your FTP server.
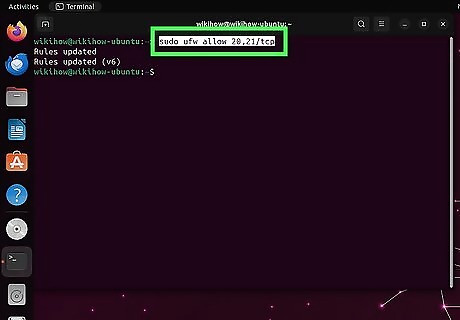
Allow FTP connections through your firewall. If you're using Ubuntu firewall (UFW), it's easy: First, run the command sudo ufw status to see if traffic is already allowed to the FTP ports (21 and 20). If not, run this command to allow access on these ports: sudo ufw allow 20,21/tcp
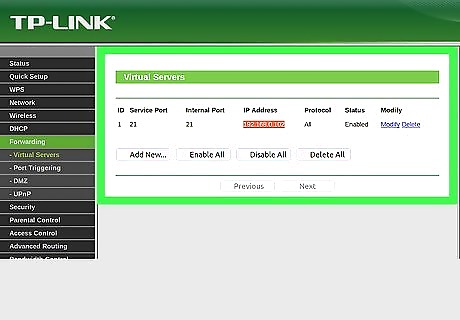
Forward the ports on your router. If you're hosting an FTP server behind a home or office router or network firewall, you may need to allow inbound connections to TCP ports 20 and 21. Port forwarding varies from router to router, so check your router's documentation for instructions.

Connect to the FTP server. Now that your FTP server is running and accessible, users can connect via FTP or SFTP using a file transfer app like FileZilla or the Linux ftp command. Or, if using FTPS, you can use lsftp.
Using FileZilla:
Enter the hostname or IP address of the FTP server.
If connecting with a user account, enter the username. For an anonymous connection, use anonymous as the username and your email address as the password.
If using FTPS, choose Passive transfer mode, and "Require explicit FTP over TLS" as the Encryption type.
Once you connect, enter your password when prompted, and you'll be taken to your home directory.
Command line:
To connect with regular FTP, run the command ftp username@
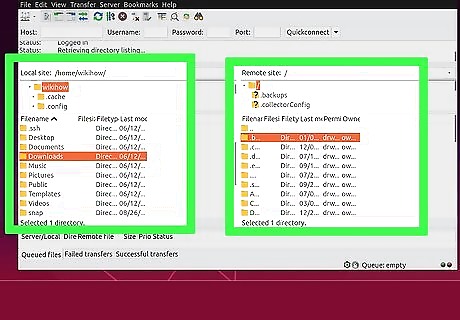
Upload and download files. If you're using an app like FileZilla, you can easily click and drag files and folders from the left-hand window into the right-hand window to upload them to your FTP server page. If you're using FTP or LFTP (for FTPS) at the command line, these commands will be helpful:
cd


Comments
0 comment