views
Making Knit Socks on a Loom
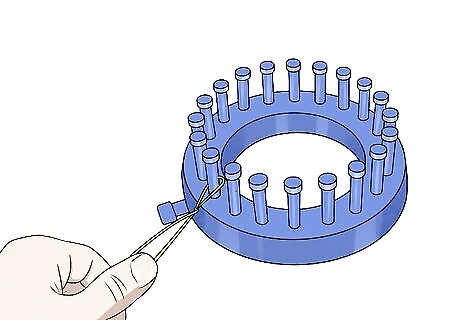
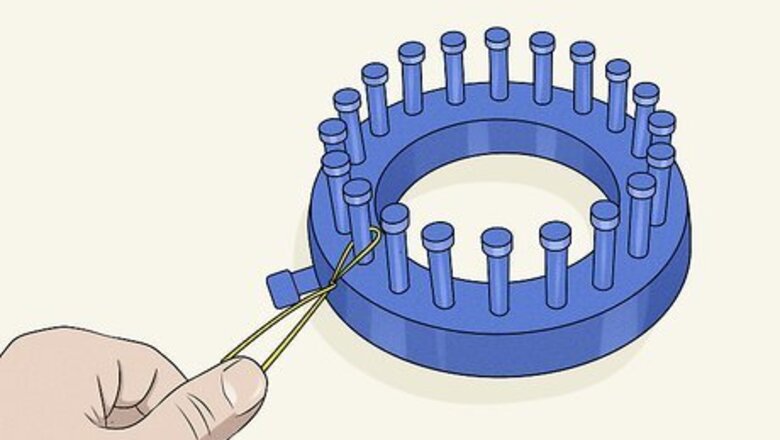
Attach a slipknot to the anchor peg on your loom. This is the small peg on the side of your loom. Loop the yarn around your index and middle finger 2 times to form a slipknot. Then, pull the first loop over the second loop and tug the tail of the yarn to tighten it. Place this loop onto the anchor peg. Do this 1 time to begin the sock.Make sure that you purchase a loom that is meant for making socks. Knitting looms come in many different sizes, but there are special size looms for making socks, gloves, and mittens. A 24-peg loom works best! Choose a chunky or super bulky weight yarn for knitting on a loom.
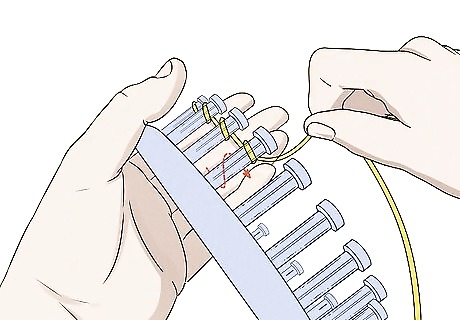
Wrap the yarn around each peg in the loom 1 time and repeat. Next, begin your cast on rows by wrapping the yarn around each 1 of the pegs 1 time. Wrap in the shape of a lowercase letter “e.” Go around each peg from inside the loom first, then around the peg towards the outside of the loom, back into the center, and towards the next peg. Repeat this for each peg on the loom.
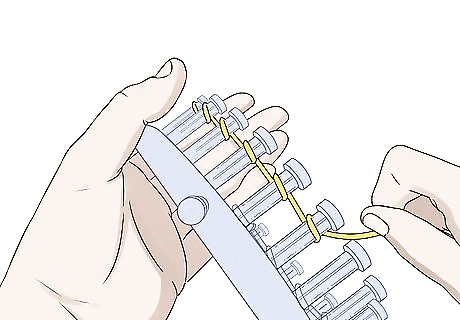
Wrap the yarn around each peg a second time and repeat. Repeat the exact same wrapping process a second time. These 2 rows will be your cast on rows.
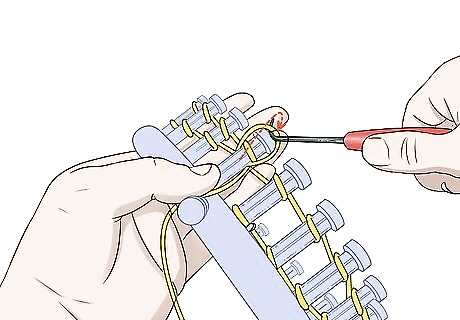
Lift the bottom yarn loop up and over the top loop and repeat. Insert the end of the hook into the bottom loop on the first peg in your loom (next to the anchor peg) and lift this yarn up and over the top loop and off the peg. This will leave 1 loop on the peg. Repeat this for every peg in the round.
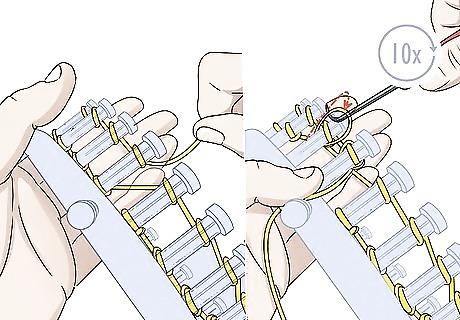
Wrap the yarn around each peg 1 time and lift each loop up and over and repeat. Repeat the wrapping process again for each peg on the loom. Then, lift the bottom loop up and over the top loop on each peg. Repeat for a total of 10 rows.
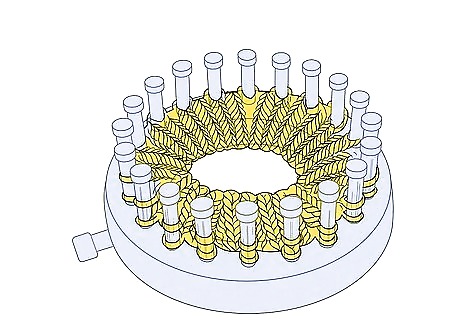
Place the stitches from the first row onto the pegs. To create a cuff for the sock, bring the bottom edge of the knit piece up through the center of the loom. Then, use your fingers and the loom hook to open up a stitch from the first round and place it onto a peg. Continue placing 1 stitch onto each of the pegs until you have a total of 2 stitches on each peg. Make sure that the stitches you are putting onto the pegs are the same ones that you knit with those pegs. Check the rows to ensure that they are even.
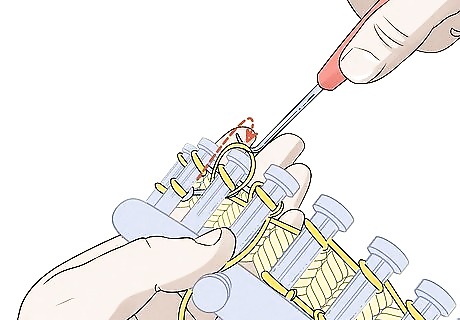
Lift the bottom loop over the top loop and repeat. Use the hook to lift the bottom loop on the first peg up and over the top loop. Repeat this for the whole round. This will secure the cuff of the sock.
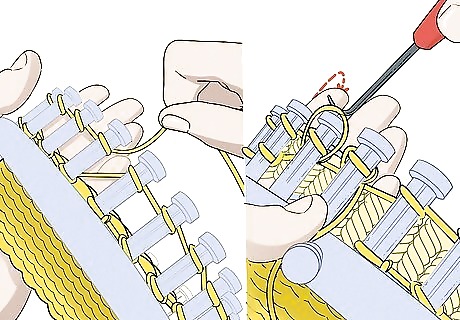
Loop the yarn around each of the pegs 1 time and repeat. Then, lift the bottom loops over the new loops you have created. Knit the rounds by wrapping the yarn around each peg 1 time and then lifting it up and over the top of the peg. Repeat this for 5 rows.
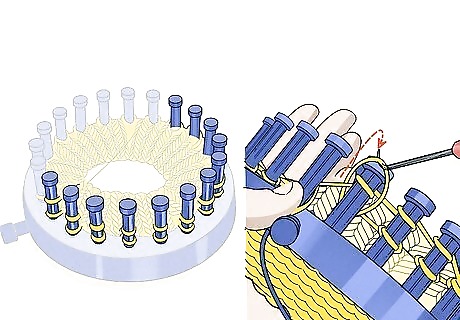
Knit pegs 1 through 12 for the heel flap. Wrap the yarn around pegs 1 through 12, but do not go beyond peg 12. Then, lift the bottom loop of the yarn up and over the top of each peg to knit. Repeat this for 4 rows.
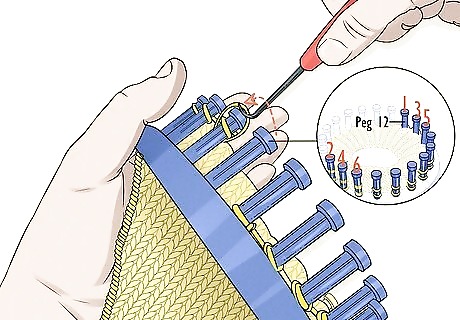
Decrease and repeat for the next 6 rows. To decrease on the loom, start each row by lifting 1 loop off the first peg and placing it onto the peg next to it. Then, wrap the yarn around pegs 2 through 12 and knit them as usual. Knit the 2 loops on the second peg at the same time. Repeat this for the next 5 rows for a total of 6 decrease rows. When you are finished, look for 3 empty pegs on either side of the remaining heel stitches (pegs 4 through 9).
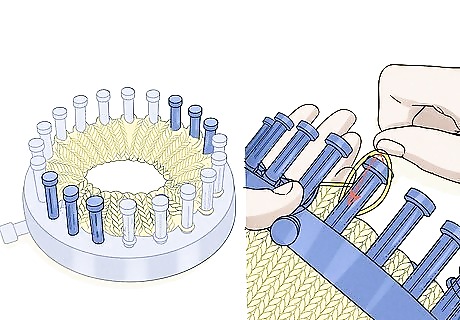
Pick up the stitches from the sides of the heel. Place 1 of each of these stitches onto an empty peg. Use your hook to lift up the stitches that you have taken off of the pegs and put them back onto the empty pegs. For example, place 1 stitch onto pegs 1 through 3 and 10 through 12. Then, place 2 stitches on pegs 4, 9, 13, and 24.
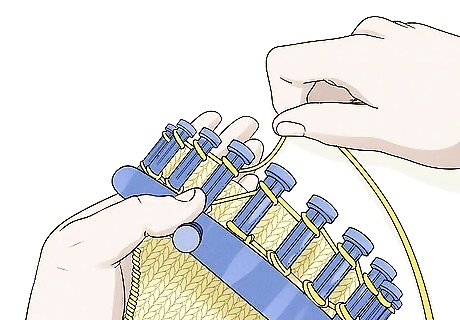
Knit and repeat until the foot portion of the sock is the desired length. Once all of the stitches are back on the loom, wrap the yarn around each of the pegs in the loom. Lift the bottom loop (or the 2 bottom loops if there are 2) up and over the top loop to knit. Continue to knit until the sock is the desired length. You can measure the length against an existing sock, or put your foot through the loom to check the length.
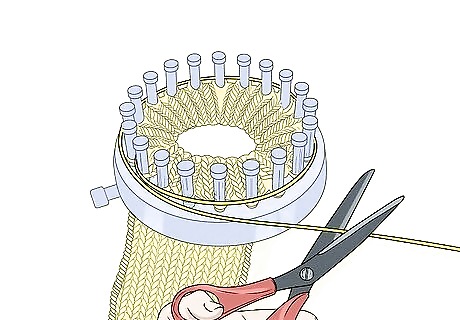
Wrap the yarn around the loom 1.5 times and cut it. Wrap the yarn around the outside of the loom 1.5 times. Cut the yarn at the end of this length.
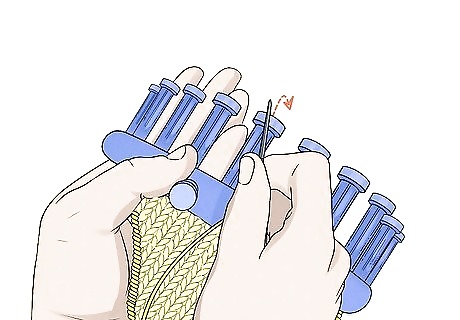
Thread a yarn needle, sew through a loop, and repeat. Insert the end of the yarn through the eye of a yarn needle. Then, begin sewing through each of the loops on the loom. Insert the end of the needle through a loop on the loom. Go into the loop from the bottom of the loom so that the needle is right up against the peg. Push the needle all the way through the loop and pull until the thread is taut. This will lift the loop up and off the peg. Repeat until all of the loops are on the strand of yarn and off the loom.
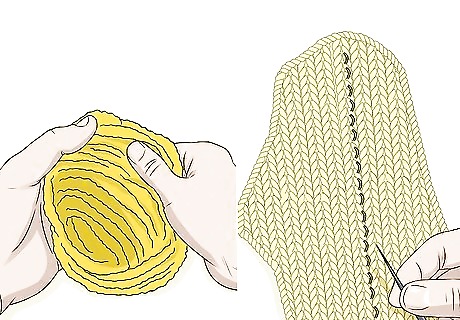
Invert the sock and sew up the toe. Turn the sock inside out so that you can sew up the toe from the inside. This will hide the seam. Hold the edges of the sock together and insert the needle through 2 stitches at a time. Pull the thread taut after each stitch. Repeat until the sock is completely sewn up and then tie off the last stitch and cut the excess yarn. Make your second sock in the same way.
Using 2 Straight Knitting Needles
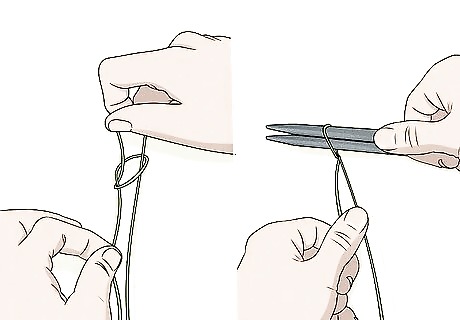
Make a slipknot to start the cast on row. Loop the yarn around your index and middle finger twice. Pull the first loop through the second loop. Then, tug on the tail of the yarn to tighten the base of the slipknot. Slide the loop off your fingers and onto 2 knitting needles held together. Tug the tail again to tighten the slipknot around them. The slipknot counts as your first cast on stitch. Make sure to use a medium-weight yarn for knitting on 2 needles. Worsted weight yarn is a good option.
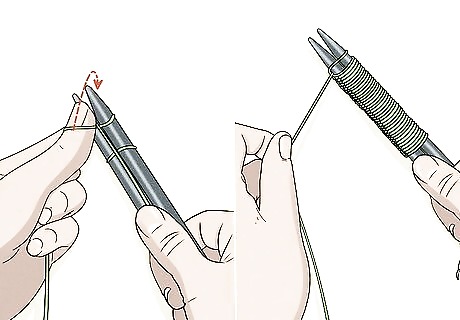
Cast on 36 stitches while holding 2 needles together. This will result in looser cast on stitches and help to ensure that the socks will be large enough to fit over your feet. Form a loop of yarn with your fingers, pinch and twist it 1 time at the base, and then slide it onto the 2 knitting needles. Repeat until you have a total of 36 cast on stitches.
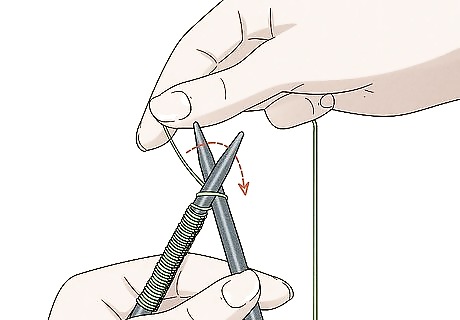
Work in the rib stitch for 2 in (5.1 cm). Knit 1 and then purl 1 stitch going all the way across the row to work in the rib stitch. Then, reverse the pattern going back across the row. The rib stitch will make the top of your sock stretchy, which will help to keep it in place.
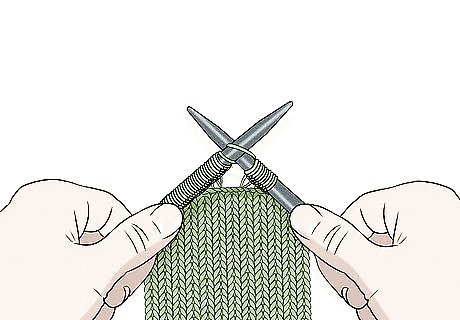
Knit until the sock is the desired length. You can make the sock as long or as short as you like. Measure it against your foot or against an existing sock to determine when the sock is long enough. For example, you could make an ankle sock, a mid-calf sock, or a knee-length sock.
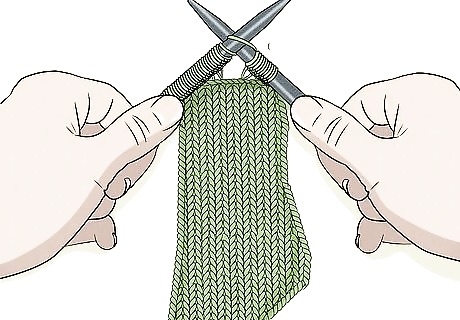
Bind off the last row. When you have finished your sock, knit 2 stitches to start casting off. Then, lift the first stitch up and over the second stitch. Knit 1 again and lift up and over again. Continue to knit 1 and lift 1 up and over the new stitch. Repeat this to the end of the row.
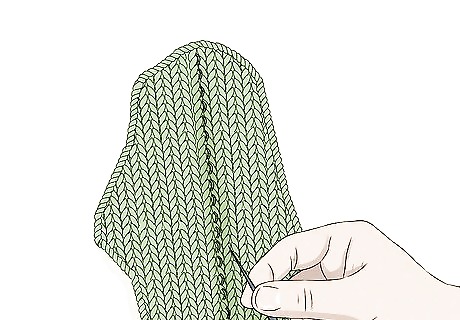
Sew up the seam to close the toe and side of the sock. To complete your sock, leave a tail that is about 24 in (61 cm) after you finish binding off. Then, thread this yarn through a yarn needle. Fold the rectangular piece in half lengthwise and begin sewing from the corner of the toe. Sew all the way across the toe, and then down the length of the side of the sock. Tie off the end of the yarn and cut the excess to secure your sock. Do not sew across the sock opening!
Knitting with Circular Needles
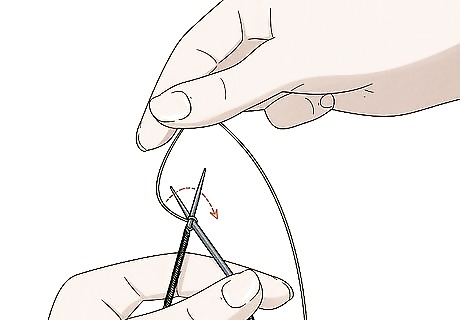
Use a pair of US size 1 (2.25 mm) 9 in (23 cm) cable needles to cast on 64 stitches. Make a slipknot and place it onto the right-hand needle for your first cast on stitch. Loop your working yarn over your left-hand needle. Then, insert your right-hand needle into the loop. Yarn over again and pull the yarn through the loop. Repeat until you have 64 total stitches. This is the ideal number of stitches for a medium-sized pair of socks for an adult, but you can cast on 8 more for larger socks or 8 less for smaller socks. Opt for a fingering or sock weight yarn to make socks on US size 1 (2.25 mm) circular needles. How to Choose the Best Yarn for Socks Opt for a fluffy yarn if you want socks that are soft and plush. Go with a wool or wool blend for warm, durable socks. Try smooth, satiny yarn for socks that will look and feel great.
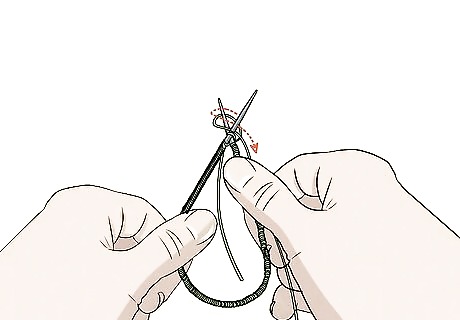
Work in the rib stitch for 4.5 in (11 cm) to create the cuff. The rib stitch will make the top of the sock a bit stretchy. Alternate between knitting 1 and purling 1 for the whole round to work in the rib stitch. Repeat this for each round until the cuff measures 4.5 in (11 cm). EXPERT TIP Shaelynn Haning Shaelynn Haning Professional Tailor & Business Owner Shaelynn Haning is a Tailor & Business Owner based in Tulsa, Oklahoma. Shaelynn is the founder of the highest-rated and most-reviewed alterations and tailoring service in Oklahoma, Tallgrass Tailor, employing a team of skilled craftsmen and women from across the country and the world. Shaelynn is a member of the State of Oklahoma Education Careers and Technologies Board and a member of both the Custom Tailors and Designers Association and the Association of Sewing and Design Professionals. She is the host of The Sew Show with Shae, an entertaining and educational sewing channel posting weekly videos on YouTube. Shaelynn earned her BS in Apparel Design and Product Development from Marist College. Shaelynn Haning Shaelynn Haning Professional Tailor & Business Owner Making socks require skill in circular knitting. Knitting socks by hand takes practice with circular knitting, which wraps around in a tube, not flat panels. You have to know how to create seamless cylindrical fabric to make comfy, well-fitting socks.
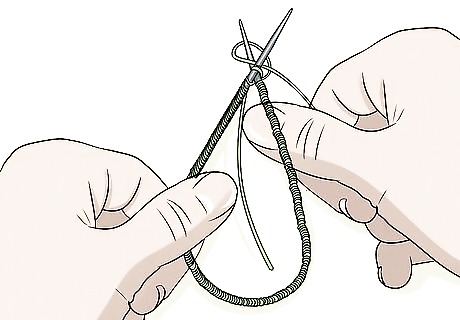
Knit for 6 in (15 cm). After you finish knitting the cuff, begin working the leg and ankle portion of the sock. Knit all of the rounds until the body of the sock measures 6 in (15 cm). You may use a different stitch if desired, but the knit stitch is the easiest option.
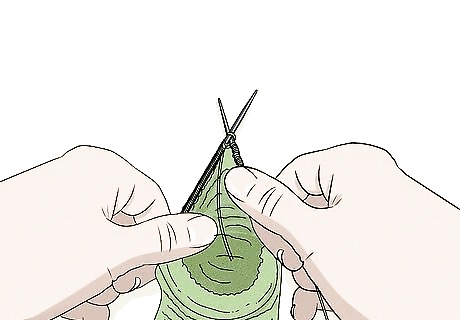
Shape the heel of the sock by working short rows. Work back and forth across a small portion of the sock to shape the heel. Follow this sequence for working the heel of your sock: Place a stitch marker at the beginning of the round. Knit the next 3 stitches. Purl the next 29 stitches. Place another stitch marker after the 29th purl stitch. Repeat the knit 3 and purl 29 row a total of 28 times.
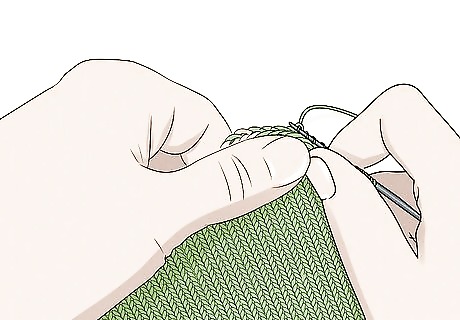
Pick up stitches to complete the round. After you have finished working across the heel rows, use the end of your needle to pick up the stitches along the sides of the heel. Insert your right-hand needle into the first stitch on the edge of the heel portion of your socks. Then, loop the yarn over the end of the needle and pull this loop through the stitch. Continue to do this until you have picked up all of the stitches on 1 side of the heel. Then, knit until you get to the other side of the heel and pick up these stitches in the same way.
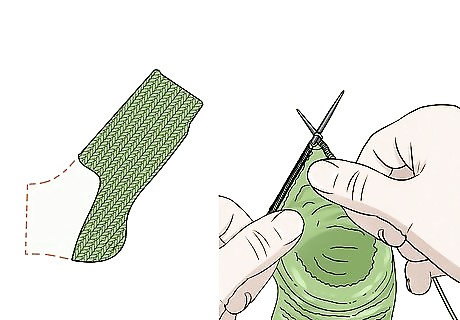
Work decreases to shape the foot portion of the sock. Knit 2 and then knit 2 together until you are back to the original number of stitches in the round. To knit 2 together, insert your right-hand needle into the first 2 stitches in the round. Then, yarn over, and pull through both stitches. As an example, if you have 100 stitches in the round and need to get back to 64, knit 2 and then knit 2 together until the total number of stitches in the round equals 64 again.
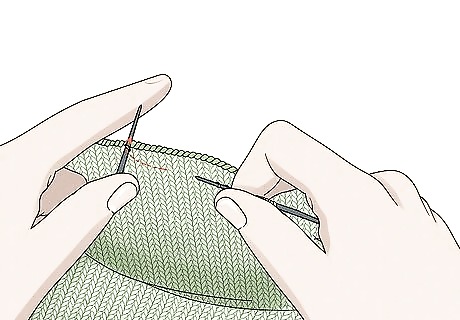
Knit until the foot portion of the sock is the desired length and bind off. Measure the sock against an existing sock or against your foot. When the sock is the desired length, bind off the stitches. Knit 2 to start binding off the round. Then, lift the first stitch up and over the second stitch. Knit 1 again and lift up and over again. Continue to knit 1 and lift 1 up and over.
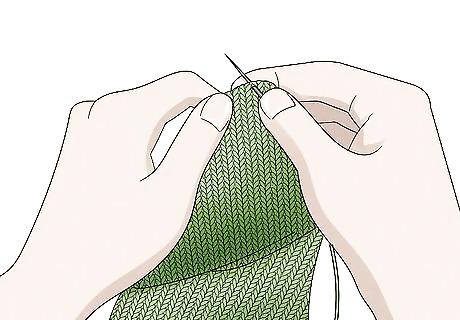
Sew up the end of the sock. Leave a 12 in (30 cm) tail and thread the end of it through the eye of a yarn needle. Then, turn the sock inside out and sew up the toe. Hold together the stitches at the end of the toe and sew through 2 stitches at a time to secure the end of the sock. Tie the end of the yarn through the last stitch and cut the excess to finish the sock. Repeat the process to make a second sock.


Comments
0 comment