
Making the Beam
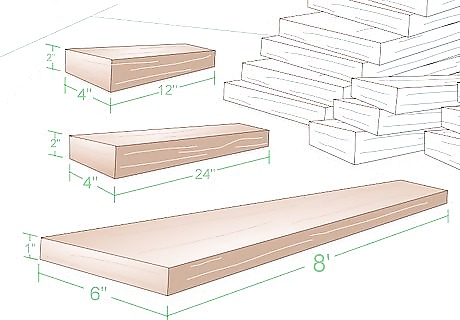
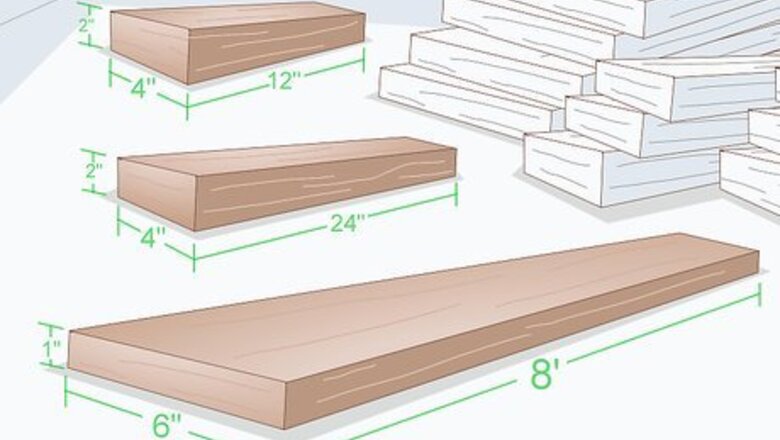
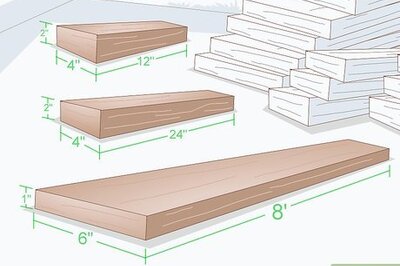
Purchase the required lumber from your local hardware supplier. To build the balance beam you will need six 8 foot (2.44 m) pieces of 1-by-6 pine beams, four 12-inch (61 cm) pieces of 2-by-4 wood planks and four 24-inch (30.5 cm) pieces of 2-by-4 wood planks. You will also need to purchase everything listed below in "Things You'll Need". These items can all be found at your local hardware supplier or stores such as Home Depot and Lowes.
Wash the entire surface area of each wood piece. Use soap, water and a washcloth, sponge or coarse brush to scrub the wood pieces thoroughly. This is very important as dirt and grime can prevent the wood glue from working as effectively. Let the wood sit for a while until it is completely dry before adding the glue.

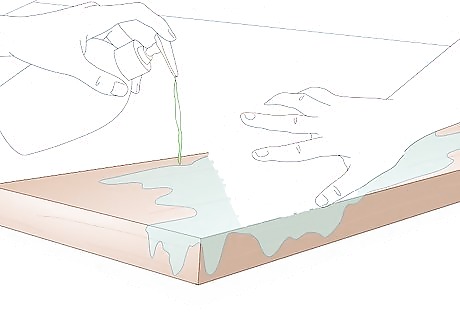
Glue the six 8 feet (2.4 m) wood pieces together. Place the pine beams vertically next to one another as that is how they will need to be administered. Glue the largest sides (the flat sides with the most surface area) of the wooden beams together with an industrial-strength wood glue (preferably waterproof). Use a very generous amount of glue in this process as that is what keeps the wood beams together. Make sure they dry before the next step! When finished the fronts and backs of the beams should be completely flush, creating 1 large beam measuring 8-feet (2.44 m) long and around 4.5-inches (10.2 cm) wide. The 4.5-inch (10.2 cm) surface will be the top of your homemade beam.
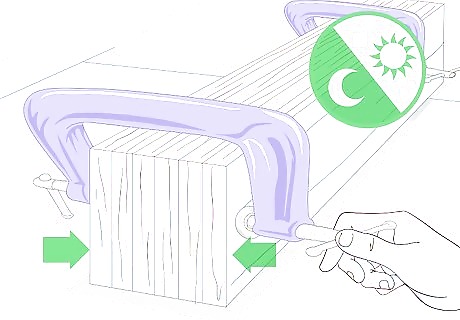
Secure the beams together while the glue dries. The best solution for securing the beams together is to use wood clamps. If you don't have clamps, lay the beams flat on their widest part and apply a heavy weight to help fuse the boards. Allow the beams to dry for at least 24 hours.
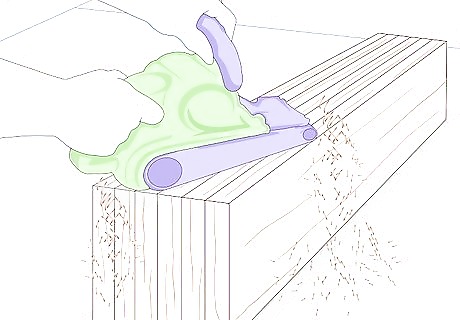
Sand the wood. When the glue has dried, remove the clamps or the weights, and sand the entire surface of the beam. Use a sanding plane or sand belt to ensure the surface is uniform and even.

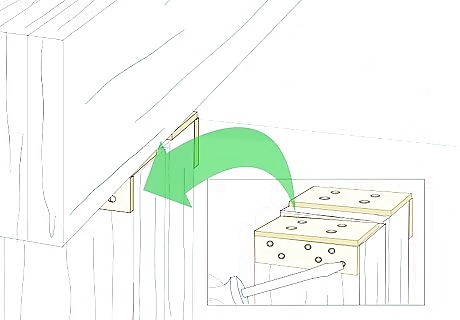
Mount steel galvanized angle holders to the beam. Screw the angle holders (the angle holders will come with screws) to the underside ends of your balance beam approximately 12 inches (30.5 cm) from the end of each side.
Adding the Base
Add legs to the beam. Fasten the four 12-inch (30.5 cm) pieces of 2-by-4 wood planks into the angle holders to create the legs, using 4 wood screws per leg, or 16 screws total. There should be 4 available spaces in the angle holders, 1 for each leg.
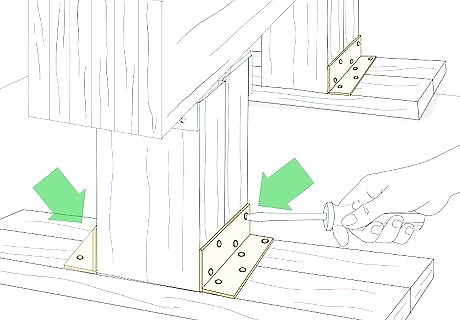
Anchor the base for each leg. Attach one 24-inch (61 cm) piece of 2-by-4 wood plank to the bottom of each leg, using 4 total, with 4 wood screws per anchor. These will ensure greater stability and a balanced surface.
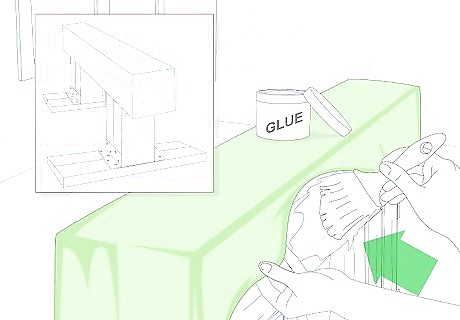
Cover with synthetic suede padding. Cut a long, thin strip of the suede padding to fit the length and width of the beam. Glue the padding onto the surface so it covers the entire beam. For optimal results, use a piece wide enough to fit all the way around the beam with enough left over to fasten to the underside with the angle holders. Allow the padding and glue to fully dry before using the beam.


Comments
0 comment