
Collecting Plant Specimens
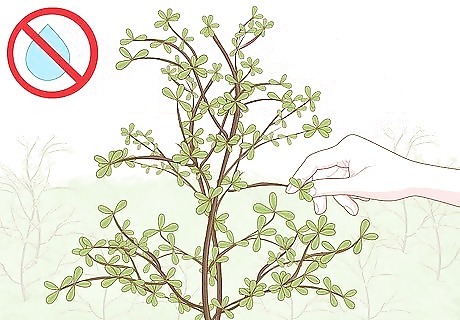
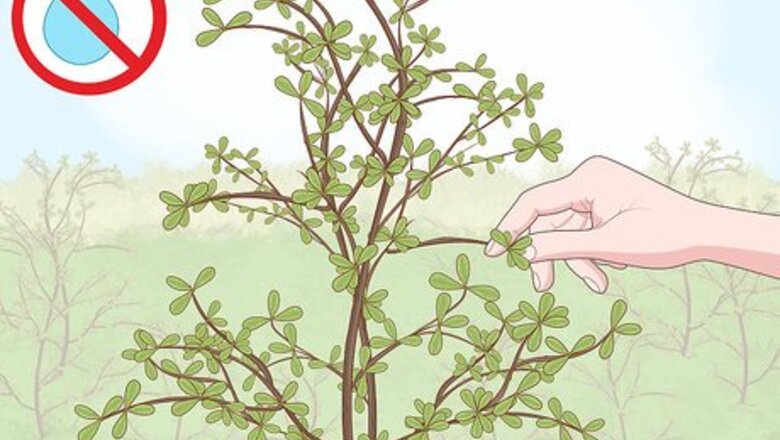
Look for eye-catching plants in various outdoor areas. Forests, fields, and even your own backyard can all be great places to hunt for specimens for your herbarium. Start keeping an eye out wherever you go, though—you never know where you might stumble upon something truly special. Avoid collecting plants immediately after a heavy rain or in wet, marshy locations. Waterlogged specimens are much harder to dry and preserve properly. In some cases, it may be illegal to take home plants from places like national parks or wildlife reserves. Make sure you’re familiar with your local laws before you begin gathering carelessly. Tip: The purpose of an herbarium is to study plants in their most common form. For this reason, it’s best to collect average-sized specimens rather than focusing on the biggest plants.

Photograph the plant and its surroundings in detail. When you come across a plant that stands out to you, stop and snap a few quick pictures. Get at least one close-up of the plant’s most prominent features, such as its flowers, leaves, or branch formations, along with one or two shots of its natural habitat. One benefit of still images is that they can be studied at length. This means they have the potential to tell you a lot more about a particular plant that you can take in with a brief examination. Photos are also useful for creating visual labels so you can identify the specimens in your collection at a glance.

Record key details about the plant and its environment. Hold a ruler or measuring tape up to the plant to find its height, width, and other dimensions. Then, make a note of any other outstanding features you notice, like leaf span or unusual coloration. Once you’ve observed these facts, write them down in a notebook or on scrap piece of paper. Some other points of information you may want to mention include the plant’s common and scientific name, known uses, and when and where you discovered it. Starting an herbarium journal can come in handy for recording size specifications and jotting down other interesting details about the many plants you’ll encounter.

Take a few cuttings using a sharp pair of pruning shears. Snip the plant down low near its base or stem, being careful not to damage its delicate root structure. Ideally, you should leave as much of the plant intact as possible. If you want to take the entire plant home, you also have the option of digging it up roots and all using a hand trowel. When collecting flowers or other blossoming plants, it’s alright to cut higher up on the stem, since the bloom is often the most complex and revealing part. If possible, take two or more identical cuttings. That way, you’ll have an extra in the event that the original is lost or damaged.

Transport your specimens home in a rigid container or thick plastic bag. Slide your cuttings into your container perfectly lengthwise or widthwise (whichever way they have more space) to prevent bending or tearing, then close it up. Leave your specimens inside until you’re ready to begin pressing them. Glass jars and plastic food containers offer the most protection against damage for small specimens. A plastic quart or gallon-sized freezer bag with a sliding zip closure will be perfect for storing most types of plants. If you don’t plan on pressing your plants right away, consider adding a 50% solution of rubbing alcohol or formaldehyde and water to your container before sealing it. This will help your cuttings stay fresh and retain their original appearance longer.
Pressing Your Specimens

Clean and prune your cuttings to prepare them for pressing. Remove the plants you’ve collected from their plastic bags and lightly brush any remaining soil from the stems and leaves. If your specimens contain an overabundance of leaves or offshoots, snip a few off here and there with a pair of manicure scissors to make them more presentable. If you have any particularly small or delicate cuttings you’re worried about damaging, try using a soft-bristled paintbrush or makeup brush to gently sweep away dirt and debris.
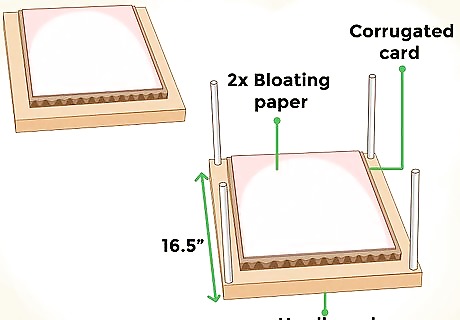
Construct a homemade plant press using hardboard or plywood. Place one board flat against a level surface and cover it with a piece of corrugated card, followed by 2 sheets of blotting paper or folded tissue paper. This will serve as the bottom half of your press. Have a second board and more card and blotting paper on standby for when you’re ready to assemble the top half. You can find hardboard or plywood at any major hardware store. Cutting your boards so that they’re closer to the size as your blotting paper will make it easier to put your press together.Tip: 16.5 in (42 cm) x 11 in (28 cm) is a standard size for plant presses. This should be large enough to easily accommodate most common specimens.
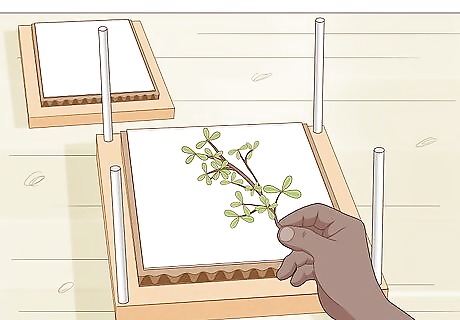
Arrange your specimens on the bottom half of your press. Lay out each cutting in such a way that it looks as attractive as possible and each of its main features can be seen clearly. If possible, stretch smaller specimens out to their full length to ensure that they dry perfectly flat. Leave 1–2 inches (2.5–5.1 cm) of space between each specimen to keep them from overlapping or sticking together. The best way to preserve flowers is to place the face of the blossom against the surface of your press, then bend and smooth the stem down behind it. When dry, it will create a 2D impression of the flower. If you collected multiple cuttings of the same plant, you can create a “snapshot” display by pressing the stems, leaves, and buds separately alongside a whole specimen to highlight its various structures.

Close the press and set heavy objects on top to create pressure. Once you’re satisfied with the layout of your plants, sandwich them with another layer of blotting or tissue paper, corrugated card, and hardboard. Pile bricks, large books, or similar items evenly across the upper board to weigh it down and press the cuttings flat. Another option is to use ratchet straps, ropes, or bands to secure your press and maintain constant pressure. Over the course of a few days, the weight of the press will squeeze all of the moisture out of the fresh cuttings, which will then be absorbed by the blotting paper.
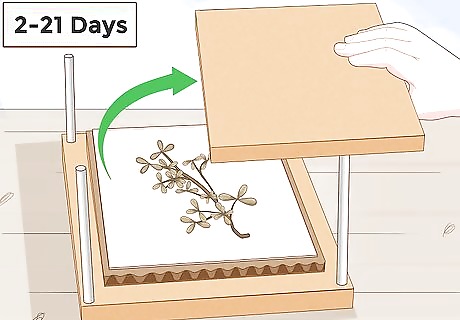
Continue drying and pressing your specimens for 2-21 days. Depending on the size and type of the plants you’re preserving, it may take them anywhere from a couple of days to 3 full weeks to dry completely. In the meantime, check your specimens every 24 hours and replace the blotting paper and corrugated card backing every few days as they become saturated. A drying cabinet or airing cupboard will offer the best results for preserving fresh plants. If one of these spaces isn’t available, look for a warm room with low humidity that might help speed up the process.
Mounting and Labeling Your Plants
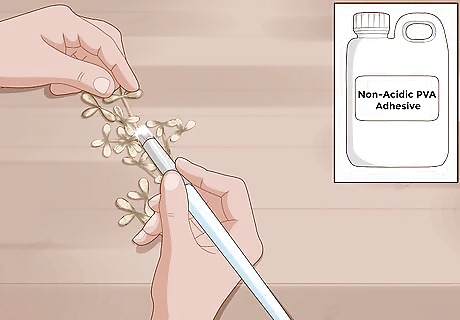
Brush your dried specimens with non-acidic PVA adhesive. Apply a light coating of adhesive to the backside of each plant. You don’t need much, so try not to overdo it. The adhesive will both hold your specimens in place on your backing paper and provide an additional layer of protection against deterioration. Your plants will be extremely fragile after drying, so handle them with care. It may help to use a pair of tweezers to avoid crushing them between your fingers. Non-acidic adhesives are readily available at most office supply stores and home improvement centers.

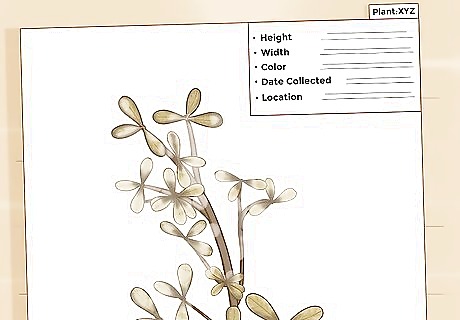
Press your plants onto a sheet of acid-free paper. You might devote an entire sheet to a single species or bring together many different plants on the same sheet to showcase the diversity of your local ecosystem. The way you display your specimens is completely up to you—just make sure each selection is plainly visible and has plenty of room. Use minimal pressure to keep your dried cuttings from breaking. Look for a backing paper that’s roughly the same size as the materials you used to make your press. Remember, 16.5 in (42 cm) x 11 in (28 cm) is standard in the scientific community, but for a home herbarium you could also use A4 paper, which has dimensions similar to regular printer paper.Tip: Acid-free paper breaks down at a much slower rate than ordinary types of paper, which means your herbarium will last for years.

Create label cards to classify each of your specimens. Fill out a blank white note card with the information you recorded earlier while gathering your cuttings. Write the plant’s scientific and common names at the top of the card, then list its height, width, color, and the date and location of collection underneath in bullet-point form. Include any other fascinating tidbits you want your labels to convey as separate footnotes at the bottom. Type, print, and cut out your label cards to give them a more polished, professional appearance.
Glue your labels to your herbarium sheets. Dab some more of your non-acidic PVA adhesive onto the back of each card, then stick it into place on an unused section of paper. Make sure the edges of the card are straight and square. When you’re done, you’ll have neatly-organized scientific plant profile to show for your efforts! Traditionally, informational labels go in the bottom righthand corner of an herbarium. However, you can put your labels wherever you like, as long as they don’t cover up any part of your specimens.


Comments
0 comment