views
What caused it to stop working?
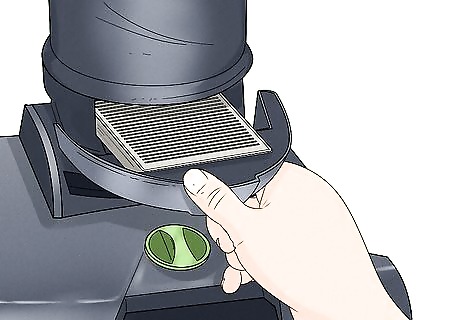
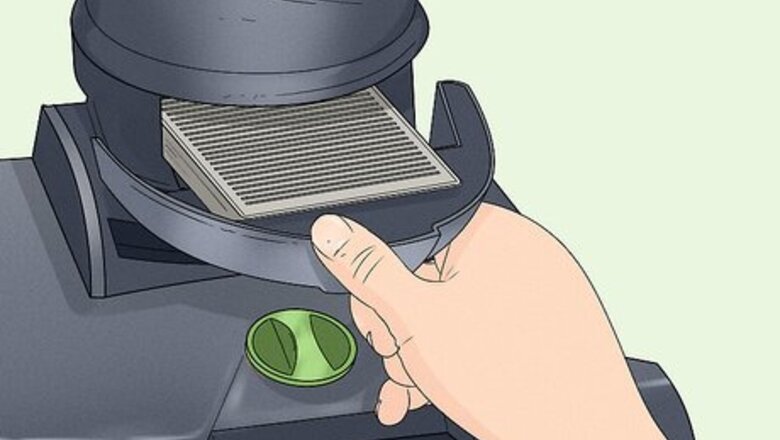
Check the hoses, filters, and rollers if you have a suction problem. A vacuum that loses suction is pretty useless, but the problem is often nothing more than a clogged roller, hose, or filter. To inspect these parts, unplug your vacuum, then turn it over and see if you can manually spin the roller. Look through the hoses and nozzles to see if they are obstructed. Also, check the filter to see if it’s full or covered in dirt and dust. Look for clogs in the hose attachments as well.
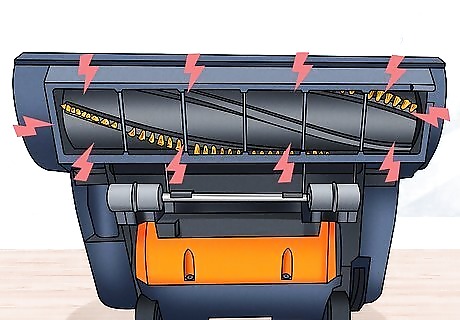
Inspect the belt if the vacuum is noisy or the roller isn’t moving. The belt attaches the motor to the roller that helps pick up dirt and debris. If the vacuum starts making a high-pitched noise and the roller stops spinning, unplug the vacuum and flip it so you can see the underside (the part that skims over the floor). Open the bottom plate, usually by removing a few screws, and check if the belt is cracked or broken. You've probably never shopped for replacement vacuum cleaner belts before, but don't worry—they're widely available at home improvement stores and online. If you can’t find the problem, visit a vacuum repair shop to have it looked at by a technician.
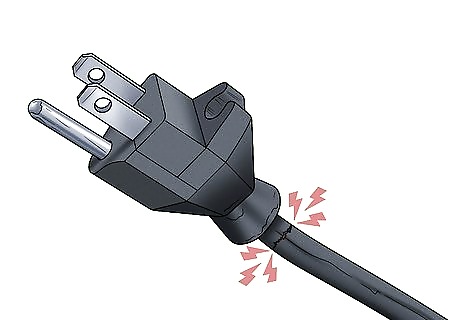
Check the plug if the motor keeps cutting off or won't start up. Your vacuum cleaner’s power cord can handle a lot of abuse, but it may eventually crack, split, or fray—especially near the plug. With the vacuum unplugged, carefully inspect the entire run of the power cord and plug. If you spot any damage, don’t use the vacuum until you fix the cord yourself or have a repair person do the job. If the power cord looks fine, there's probably an issue with the motor. Fixing a bad motor isn’t a DIY job—take the vacuum to a repair shop.
How can I improve low suction?
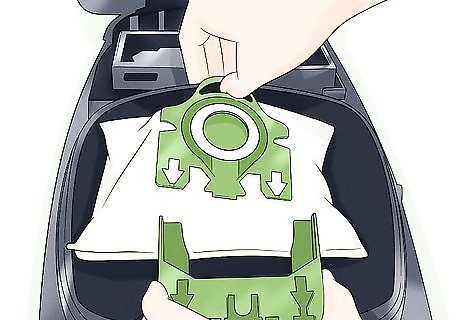
Empty the bag or canister if it’s full of sucked-up debris. If you have a bagged vacuum cleaner, unplug it and undo the clip to open the bag compartment. Slide out the cardboard collar on the bag that connects it to the vacuum, then slide on the collar of the new bag and close the compartment. If you have a bagless canister vacuum, unclip the canister, open the lid, and dump the debris into a trash can. Do this outdoors so you don’t get dust everywhere! Check the product manual for specific instructions.
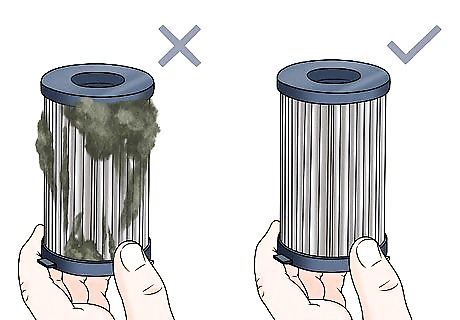
Inspect the filter and clean or replace it as needed. Your vacuum cleaner has at least 1 filter, and maybe several of them! There’s usually one at the exhaust vent (where air blows out when the vacuum is running) and, if it’s a bagged vacuum, where the bag connects to the appliance. Check your product guide or the manufacturer’s website for specific info on finding, cleaning, and replacing filters. If the filter is dirty, take it outdoors and tap it against a hard surface to knock out dust and debris. But make sure the breeze is blowing the dust away from you! Some filters can be rinsed under cool water after you've knocked loose most of the debris. After rinsing your filter, let it dry for at least 24 hours before reinstalling it. Change the filter(s) every 3-6 months to keep your vacuum running efficiently.
Why isn’t the roller spinning?
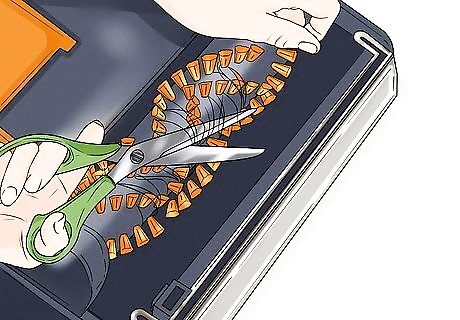
Take off the roller and carefully cut away the hair and debris. Flip your unplugged vacuum upside-down and undo any screws or clips on the access plate for the roller. The roller itself usually comes out by undoing a couple of screws or clips. Cut a straight line through the hair and along the length of the roller with scissors, making sure not to cut through any of the brush bristles. Use a paintbrush to clean the roller bristles and the underside of the vacuum, then put everything back in place. Seeing how much hair and other junk the roller picks up can be a real eye-opener! But the roller won't be able to pick up near as much hair if you don't clean it from time to time. Refer to the product manual or manufacturer’s website throughout this process.
What if there’s a clogged hose?
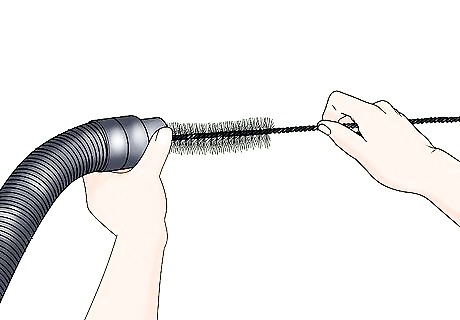
Dislodge any blockages you find in the hose with simple tools. Unless it’s permanently attached to the vacuum, disconnect the hose completely. Use pliers or your fingers to pull out any clogs near the end of the hose. For deeper clogs, bend a wire hanger flat or buy a vacuum cleaner snake tool online. Feed the wire/snake into the tube, twist it around, and pull out the obstruction. Call a vacuum repair person if there are clogs you can’t reach. Clean any blockages out of the attachments as well. If you can disconnect the hose completely, drop a coin through it to see if there are any obstructions. If the coin falls straight through the hose, then it’s unclogged. Don’t drop a coin into the tube if it’s connected to your vacuum cleaner!
How do I change a broken belt?
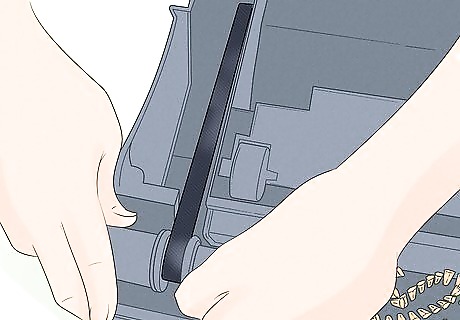
Find the belt attached to the roller and replace it with a matching one. Unplug the vacuum, flip it over, and undo the screws or clips on the access plate by the roller. Identify the belt that runs from the roller to the motor. Slide the old belt off of its 2 connection points and dust those areas with a paintbrush or toothbrush. Buy a matching replacement belt and slide it onto the connection points, with the lettering on the belt facing outward. Spin the roller by hand to test it before putting the access plate back on. With some models, you may have to remove the roller to replace the belt. Always refer to the product manual for your particular vacuum model. Vacuum cleaner belts are inexpensive and can easily be purchased online. For whatever reason, though, the belts aren't universal, so make sure you buy one that's designed for your vacuum cleaner model.
What if the plug is broken?
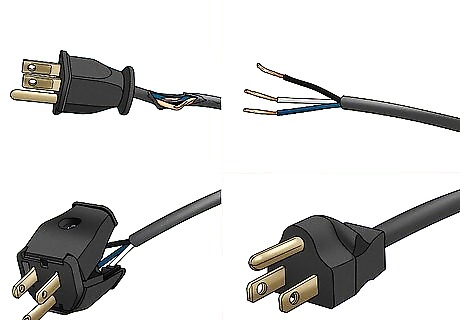
Repair it yourself by cutting off the plug and wiring on a new one. Use wire cutters to cut through the (unplugged!) power cord about 2–3 in (5.1–7.6 cm) away from the plug. Strip away 1–2 in (2.5–5.1 cm) of the power cord’s covering to expose the 2 or 3 interior wires, then strip off the coatings of each of these wires with your wire strippers, exposing about ⁄2–1 in (1.3–2.5 cm) of each wire. Unscrew the cover of the replacement plug, then wrap each color-coded wire in the power cord 2-3 times around its corresponding terminal in the new plug. Put the cover back on the new plug. If the power cord is damaged closer to the middle, cut out the damaged section, buy 2 new plugs (a “male” with prongs and a “female” with the slots that accept the prongs), wire them as described above, and plug them together to complete the repair. All power cords have a white “neutral” wire and a black “hot” wire. If your vacuum’s power cord also has a green “ground” wire inside, attach it to the screw on the green “ground” port of your new plug. Not all vacuums have a ground wire. If you're uncomfortable with the thought of doing DIY electrical wiring repairs, let an experienced repair person do the job instead.
Is it worth paying to have it repaired?

Call a pro to compare repair and replacement costs for major issues. While many repairs are manageable for the average DIYer, it’s best to let a professional vacuum repair person handle any repairs to the vacuum’s motor, for example. Repair costs can vary widely based on the type of repair that needs to be done, so you may have to decide whether it’s best to replace the vacuum instead. If the repair cost is more than 50% of the price of a comparable new vacuum cleaner, it’s usually best to just buy a new one, especially if your current vacuum is more than 5 years old. Keep in mind that the cost of a new vacuum cleaner can range from around $50 USD to $1000 USD or more.
How long should my vacuum cleaner last?
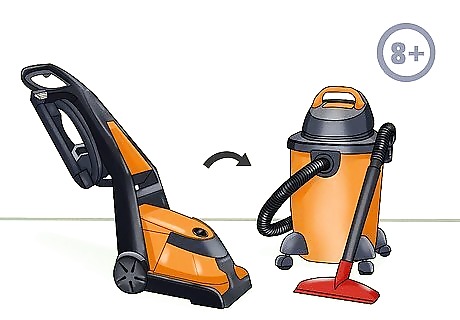
If your vacuum is 8+ years old, expect to replace instead of repair it. The average vacuum cleaner lasts about 8 years with moderate to heavy use. Once your vacuum gets beyond this age, breakdowns will probably become increasingly likely. If a breakdown that you can’t fix yourself happens after this point, you’re probably better off buying a new vacuum instead of paying to have the old one fixed. The more often you use your vacuum cleaner, the faster it will wear out. But that's no excuse to skip out on sweeping up around your home!


Comments
0 comment