

Sizing the Frame
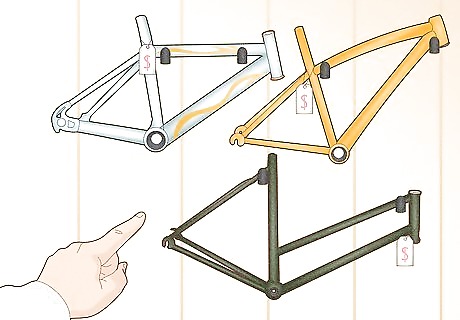
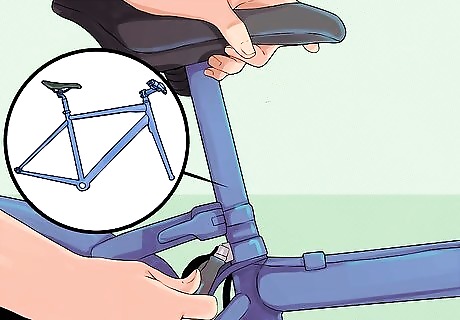
Know that you must buy the right frame for your style of riding. The frame is the metal or carbon-fiber body of the bike, and, unlike the handlebars or seat (known as a "saddle"), it is not adjustable. Thus, buying the proper frame is the most important thing you can do when shopping for a bike. There is a variety of frames available on the market, but the frame shape generally changes based on the type of riding the bike is made for. Know, however, that there are as many different frame configurations as there are bike makers, each with "specialized" functions. However, the general shape of the bike helps determine its function more often than not: Road bikes are most often used by commuters, fitness, and racing fitness riding. The frames are usually large, isosceles (all sides the same length) triangles with a top bar, or top tube, that is parallel to the ground. Racing bikes usually have smaller frames, while touring or commuter bikes often have larger frames. Road bike frame sizes are measured in centimeters. Mountain bikes have a lower center of gravity to keep you on balance riding over roots, rocks, and mud on the trail. The center triangle is more compact, with the top tube sometimes angling down, away from the handlebars. Mountain bike frame sizes are measured in inches. Hybrid bikes combine features of road and mountain bikes. You can use these for both street riding and casual trail riding. These frames are usually measured in centimeters. Cruiser bikes have odd, sideways S-shaped or curved frames that allow you to sit nearly upright while riding. The handlebars are high above the seat and the pedals slightly in front of you so that you comfortably cruise around town. Sometimes called "city bikes" or "commuter bikes," these are made for short distances. Fitting these bikes is less about measurements than pure comfort on a test ride. Kids bikes have smaller frames similar to mountain bikes, helping them keep their balance with a lower center of gravity. They are very adjustable to compensate for quickly growing kids. They are usually measured by wheel size.
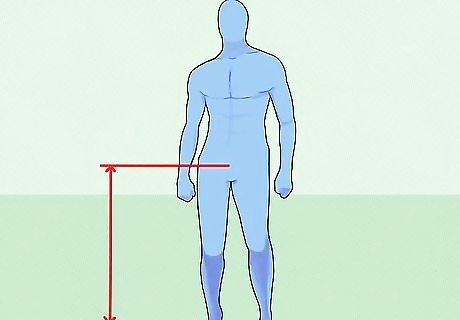
Take your inseam measurement, the most important bike measurement there is. Stand with your feet 6 inches apart, then measure from the inside of your foot up to your crotch, where your leg meets your waist. Think of the seam on the inside of a pair of jeans. You need to measure the distance from the bottom of your foot to where your seat should be. If you are sizing a mountain bike, measure in inches. If you are sizing a road bike, measure in centimeters. For the most precise measurement: Take a thick, hardcover book and "sit" on the spine as if it was your bike seat. Still standing, measure to the top of the book from the floor.

Use your inseam to calculate seat tube length for road bikes. Multiply your inseam measurement, in centimeters, by .67 to get your suggested seat tube (bar reaching from seat to pedals) length. The seat tube is usually, though not always, measured from the top of the tube to the center point of the crankshaft. Know that this measurement is simply a starting point -- you will likely need to make specific adjustments later on.

Use your inseam to find the proper length of your top tube for mountain bikers. Multiply your inseam (in inches) by .67, then subtract 4" from the answer to get the length of your top tube. Use the top-tube for your measurement when possible if you are a mountain biker, as seat tube (pedals to seat) measurements are tricky and change from manufacturer to manufacturer. For example, if you have a 33 inch inseam, you would need a 17.5" top tube (17.75" tubes are hard to find):33" x .67 = 21.75" 21.75" - 4" = 17.75 Some mountain bikers prefer to measure by seat tube length, like road bikers. If your bike shop gives frame size by seat tube length, take your inseam and multiply it by .185. The resulting number is the recommended distance between your seat and the middle of the crankshaft, which is the circular piece the pedal rotates on.
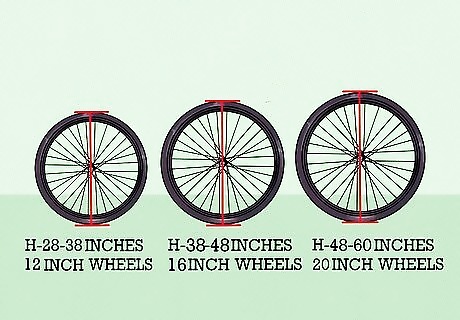
Use wheel diameter to help purchase children's bikes. Most kid bikes are adjustable, accommodating random growth spurts so you don't need to buy a new bike every year. That said, a child's bike should still fit them so they can put their feet flat on the ground while they’re sitting on the saddle. For a child's inseam of 12-17 inches: 12-inch wheels For a child's inseam of 18-22 inches: 16-inch wheels For a child's inseam of 22-25 inches: 20-inch wheels

Adjust the seat height to fit your legs before testing a bike frame. The height of the seat is easily modified on a bike to fit you, and the right size frame will feel wrong if the seat isn't high enough. You want to have it raised so that, on the bottom of your pedal stroke (one foot is at the lowest point), your knee is slightly bent, not straight. Have a friend or someone at the bike shop hold the bike in place while you get on. Pedal backward, stopping with one foot at the very bottom of the pedal's rotation, and adjust your seat height so that it is slightly bent. It is very rare that the last person who tested the bike needed the same seat height as you, so you must adjust this before knowing if the frame is the wrong size. Make sure you are not shifting or dropping your hips with each pedal stroke, as this will make your foot drop lower than it should and result in an improper fit.
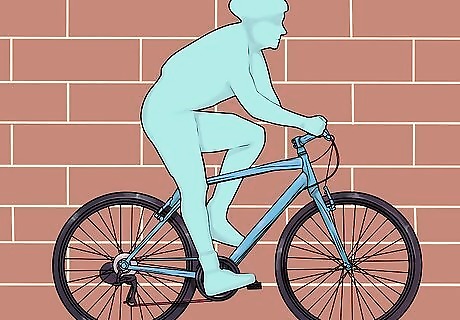
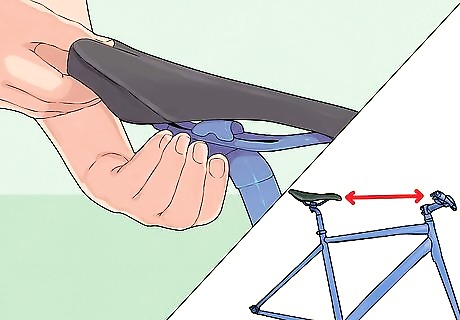
Find the "reach" that is most comfortable for you. There are a lot of measurements out there for finding the proper length between your seat and the handlebars, but they all end with the same advice -- pick one that you're comfortable with. At the end of the day, you'll feel like the reach to the handlebars is right if: You can touch every shifter and brakes comfortably. Your elbows are slightly bent. You can bend from the waist, not the back, to reach down. In general, casual riders will want closer, higher handlebars while racers want a longer reach.
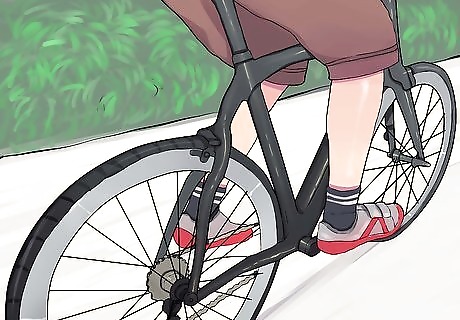
Do a stand-over test to see if the bike fits you properly. Straddle the top tube of the bike with your feet shoulder width apart. Grab the stem that connects to the handlebars with one hand and the seat with the other hand. Pull the frame up against your pelvic bone. Have a friend measure the distance between the ground and the wheels. A road bike should only have 1–2 in (2.5–5.1 cm) of space between the wheels and ground. If not, then you need a bigger frame. A mountain bike should have 3–4 in (7.6–10.2 cm) of space beneath the tires. If it’s any more or less, change the frame size.
Test out your suggested frame size before buying. Everyone's body is a little different, and the proportions of your arms, legs, and torso might mean you need a different frame to feel comfortable. Use your inseam measurements to get a starting frame size, then go to a local bike shop and test it out. Then test out a size bigger and size smaller. If you are in between sizes that both feel comfortable, think about your riding style: Smaller bikes are generally lighter and a bit more maneuverable. However, this difference is negligible, and you might not be able to adjust the bike a size if you find yourself uncomfortable later on. Many mountain bikers and racers opt for the smaller frame. Larger bikes can make you reach a bit too far, but you can often raise and lower the handlebars to a greater degree, allowing you better customization options if you decide you need a better fit further down the road. Many road bikers chose the larger bike for a more comfortable fit.
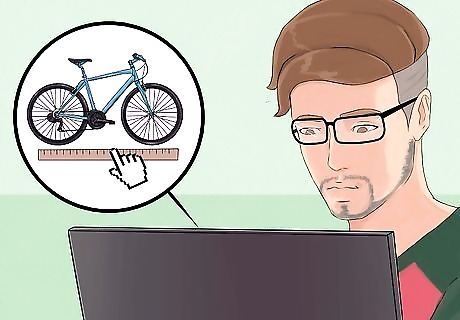
Use an online sizing guide if you cannot test out bikes. While they are far from perfect, since they cannot possibly account for your unique body type, sizing guides are useful nonetheless for sizing a frame. You can find them online with a quick internet search for "(Mountain/Road/Kids/BMX/etc.) Frame Sizing Guide." Most of them require you to input your height and inseam, as well as your riding style. They then give you a range of frames to try out.
Visit a bike shop for a professional sizing session. Most bicycle stores will help you determine the best size for your comfort and needs. They will take measurements for you and let you test out different types of bikes. If you don't want to size your bike yourself, this is a quick and easy option.
Remember that your comfort comes first. Everyone is different, so if you don't feel comfortable riding a bike the "should" fit you, you need to get it re-sized. Test a few different frame sizes before buying, and feel free to play with the seat and handlebars until you find your sweet spot. Rent a few bikes before buying so that you can get 2-3 days of riding in. Talk to you local bike staff, even if you might buy a bike online. Let them know about any specific issues you've had and possible reasons.
Making Size Adjustments

Know that you must adjust the seat and handlebars to truly size a bike. Getting the right frame size is only one part of sizing a bike correctly. Think of sizing measurements as your first draft -- it is the basis for everything that follows, but you need to make finer adjustments to get everything right.
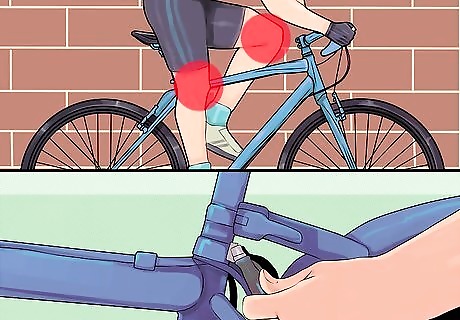
Make minor adjustments to your seat height if you feel knee pain. While you should set your seat before you buy a bike, making finer adjustments is crucial to comfortable sizing. Remember to pedal with the balls of your feet and don't swing your hips up and down with each stroke. If you feel pain in the back of your knee when riding, your seat is too high. Lower it 1-2cm. If you feel pain in the front of your knee when riding, your seat is too low. Raise it 1-2cm.
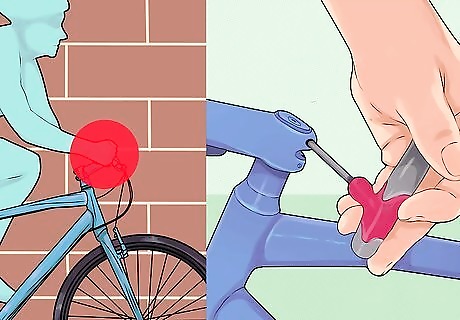
Adjust how far forward the seat is to change your distance to the handlebars. Loosen the bolt underneath the back of the seat to move the seat forward or backward several centimeters. Make sure the seat is far enough forward for you for you to reach the handlebars comfortably. If your seat is in the right position, you will be able to stand on the pedals without using the handlebars to pull you up. If you have trouble standing, reaching for the bars, or feel finger numbness, then your seat is too far back. Trouble riding down hills and/or shoulder pain usually means your seat is too far forward.
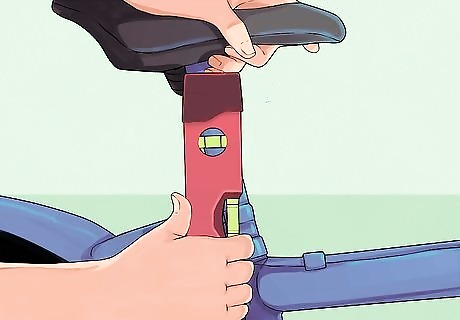
Start with your seat angle leveled evenly with the ground. Use a carpenter's level to make sure the seat is flat, as this ensures even distribution of your weight. While some people believe a seat should be tilted up, a level seat is almost always the best starting point. However, if you experience crotch discomfort, you can try: Women typically tilt the seat down for comfort. Men typically tilt the seat up for comfort. Loosen the bolt on the side of the seat to change the seat angle. You can easily loosen the bolt, change the angle, then tighten again. Some older seats have two small bolts underneath the seat, one in front of the seat post and one behind. You must tighten one side to push that side up while loosening the other, almost like a see-saw.
Adjust your handlebars to ride comfortably. You want to ride in a way that's comfortable for you, and that changes from person to person. You want to feel in control of the bike without lower back pain. Most beginner riders want the handlebars to be even with saddle, or 1-2" lower for racers and mountain bikers. Your elbows should be slightly bent and your fingers light on the handlebars -- they could freely play the piano if there was one there. The position of your handlebars is determined by four things: Top Tube Length refers to the length of the bar between your handlebar stem and seat post. These are adjusted to fit the frame, and unless you have a very disproportionate body (torso much larger/smaller than legs) getting a properly sized frame will give you a properly sized top-tube. Stem length is the distance between your top tube and the handlebars. The longer the stem, the further away the bars will be from your seat. Stems run from $15-$150 and are the primary way to adjust your frame to make it fit your torso. Longer stems bend you into a more aerodynamic position while shorter stems lead to a more upright, calmer riding style. Handlebar angle can be changed independently from your stem. To do so, loosen the 4 bolts where the stem meets the handlebars and angle it up or down to your comfort. This is a great way to get an extra 1-3 inches on your handlebar position, which can make a big difference in comfort. Handlebar height may often be changed by adding or removing the metal spacers where your stem meets your frame. To do so, loosen the bolt on the top of the stem and the two that clamp the stem to your frame and remove the handlebars. Then add or remove the spacers accordingly. You can only make minor changes, however, as there is not a lot of room for new spacers. Some older road bikes with quill or threaded stems may allow you to adjust the handlebar height by raising or lowering the stem.


Comments
0 comment