

Casting On
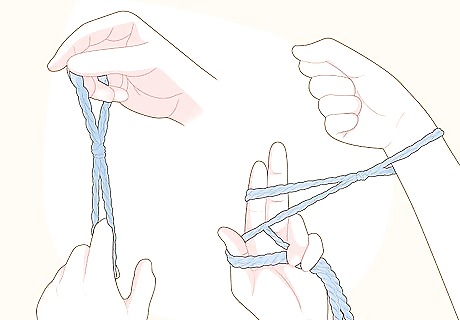
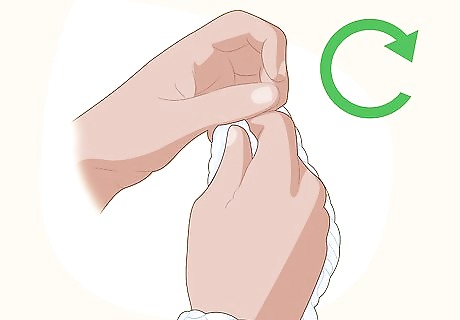
Make a slipknot on your wrist. Loop the working yarn around your wrist 2 times, then pull the first loop through the second loop. Pull the tail end of the slipknot to tighten it. You can place the slipknot onto your dominant or non-dominant wrist to start, whichever feels more comfortable to you. Just keep in mind that you will be switching back and forth either way. Make sure to leave a tail of yarn that is 24 in (61 cm).Tip: Some good yarn options include arm-knitting yarn, 3 strands of super bulky yarn held together, or an unconventional material, such as clothesline or rope.
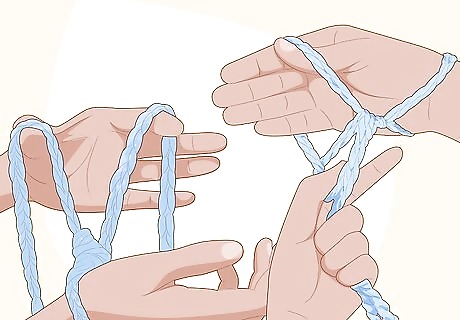
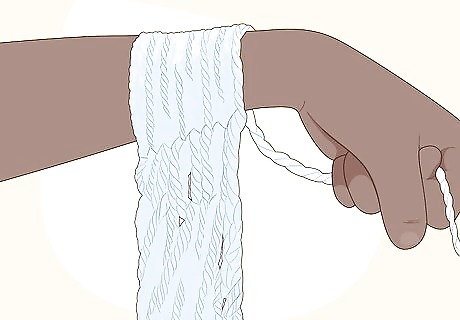
Create a new loop and pull through to cast on a new stitch. Grasp the yarn tail next to the base of your slipknot, twist it 1 time counterclockwise, and slip it over your wrist. Then, grasp the working yarn and pull this through the loop on your wrist to create a new cast on stitch. Repeat this until you have cast on the desired number of stitches.

Maintain even tension as you cast on. Pull the yarn taut after each cast on stitch to ensure that the stitches are all the same size. Keeping even tension as you cast on and knit will help to ensure that your finished project has an even look to it. Do not pull the yarn so tight that you cannot remove the stitches from your arm at the end of the row.
Knitting Across Your Arm
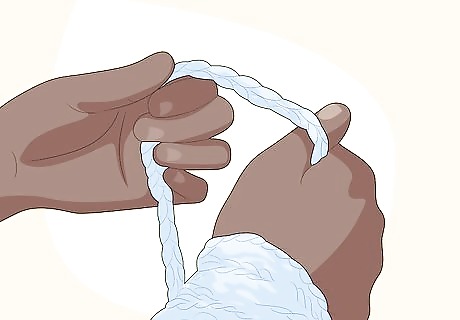
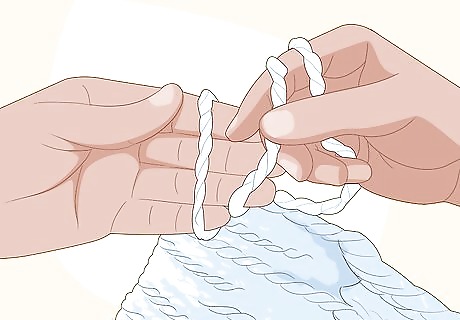
Grasp the working yarn with your stitch hand. This is the same hand as the arm you have cast onto. If you cast on to your right arm, then use your right hand to grasp the working yarn. If you used your left arm, then grasp the yarn with your left hand.
Use your other hand to pull the working yarn through. Bring the yarn through the first cast on stitch while holding onto the yarn with the cast on hand. Use your other hand to lift the first loop on your arm up and over your hand. Then, slip the loop of yarn on your hand onto your other arm. This completes 1 stitch.
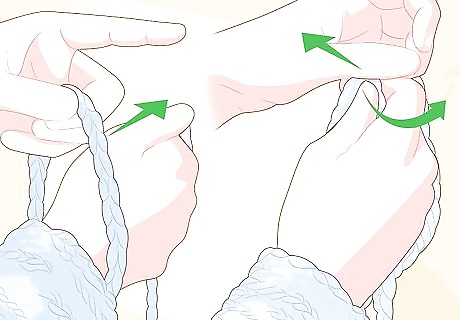
Repeat the stitches to the end of the row. Continue to knit the rest of the stitches on your arm in the same way, transferring them from 1 arm to the other. When you get to the end of the row, knit the stitches back onto your other arm again. Keep working rows in this fashion to complete your project.Tip: If you need to stop arm knitting for a while, place the stitches onto a plastic trash bag. Thread the bag through the loops and then tie the ends of the bag together.
Finishing an Arm-Knitting Project
Bind off the stitches when your project is the desired size. To bind off, knit the first 2 stitches in the row as you normally would. Then, use the hand of the arm holding the stitches to pull the first stitch you knit up and over the second 1. Knit 1 more stitch, then pull the new first stitch up and over the one you just knit. Continue to bind off stitches until you reach the end of the row.
Tie off the last stitch. After binding off the last stitch in the row, you will have a single loop. Pull the end of the yarn extending from the stitch through the loop and tie it in a knot. This will secure the end of your project.
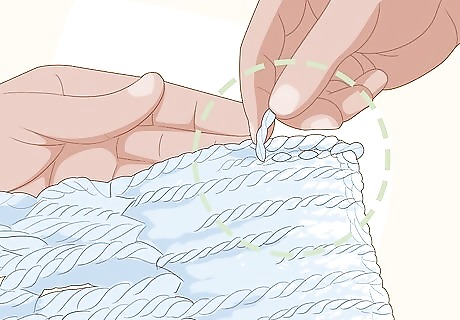
Weave in the loose ends if desired. If you want to work the tails of yarn that are left over after you finish knitting, use your fingers to weave them in and out of the edge of your finished project. Keep weaving in the end until you cannot weave any more! If there are any tails of yarn poking out that you want to get rid of, cut them as close to the stitches as possible. Just be careful not to cut through any of the stitches! Trying to decide on an arm-knitting project? Make a scarf as a practice project. Cast on 6 stitches to create a scarf. Knit across the rows until the scarf is the desired length. Arm-knit a throw rug for your bedroom. Cast on 12 stitches and knit across all rows until the rug is the desired size. Create a blanket when you have at least an hour free. Cast on 20 stitches and knit until the blanket is the desired length.


Comments
0 comment