
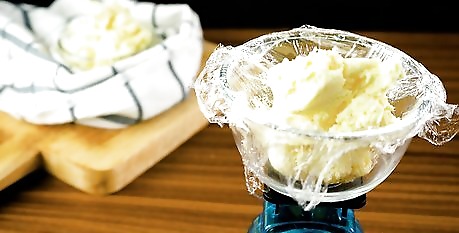
Using a Kitchen Scale
Cover the top of your kitchen scale with plastic wrap. First, pull the roll of plastic wrap over the top of the scale to see how much you need to cut. Then, cut the plastic wrap so that it covers the entire scale top. Lay the cut piece of plastic wrap flat on top of the scale to protect the surface. You can use any type of kitchen scale, including an analog or digital. Covering the scale with plastic or wax paper will allow you to measure the shortening without adding weight while keeping the shortening from getting on the scale. You can also use wax paper instead of plastic wrap to cover the scale.
Scoop the shortening onto the covered scale. Using a spoon, scoop the shortening out of its container and onto the plastic wrap covered scale little by little. Once the scale reads the amount of shortening that you need, replace the lid on the shortening container and store it as you usually do. If you add too much shortening to the scale, you can use the spoon to scoop a bit back into the shortening container until you get the right amount. Once you’re done scooping the shortening, place the spoon in the dishwasher or soak it in hot water to start breaking down the shortening residue.
Pick up the edges of the plastic to remove the shortening from the scale. Pull the edges of the plastic wrap together to form a little pouch. Then, you can either set the pouch aside until you need to use it, or flip the pouch over to remove the shortening from the plastic wrap and use it as needed. If you aren’t using the shortening for a while, you may want to use a clip or twist-tie to keep the plastic wrap shortening pouch closed. Shortening doesn’t tend to stick to plastic wrap or wax paper much, so it should come off cleanly and easily. Once you’ve used the shortening, discard the plastic wrap or wax paper in the trash so that you don’t get any shortening residue on any kitchen surfaces or utensils.
Weigh the shortening in a bowl if your scale is small. If you need a lot of shortening and you think it might spill over the sides of your scale, first line a bowl with plastic wrap. Measure the weight of the lined bowl first, taking note of the weight. Add the weight of the bowl to the amount of shortening you need. Then, add shortening into the bowl on the scale with a spoon as needed until the total weight reaches the weight of the bowl plus the amount of shortening needed. Once you have the correct amount of shortening in the lined bowl, lift the edges of the plastic wrap into a pouch to transfer the shortening out of bowl and use as needed.
Lining a Measuring Cup
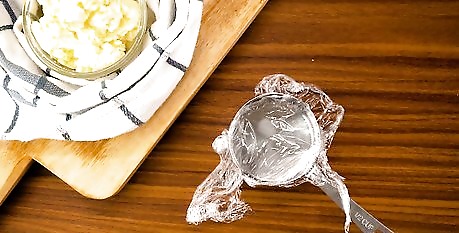
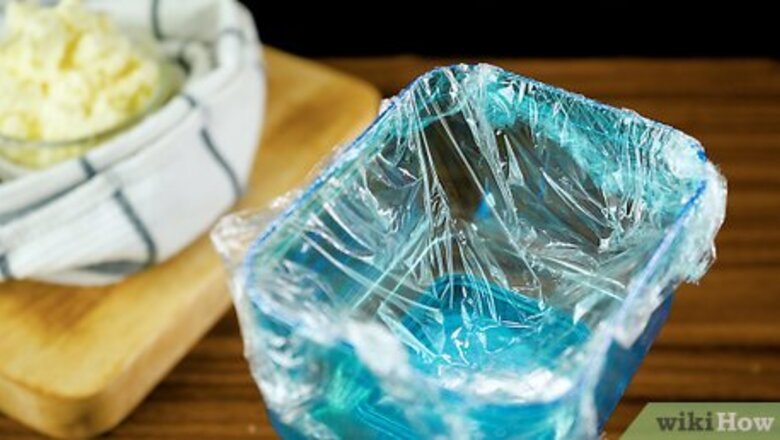
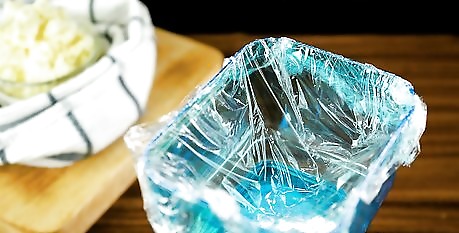
Line a measuring cup with plastic wrap. Select a measuring cup that holds the amount of shortening you need. Then, pull the roll of plastic wrap over the top and press the plastic down into the cup until it lines the bottom and edges as closely as possible. Cut the plastic wrap from the roll, leaving a bit extra on the sides so the plastic wrap hangs over a bit. If possible, use a measuring cup that holds the exact amount of shortening that you need, or an exact fraction of what you need. For example, if you need ⁄2 cup (120 mL) of shortening, use a measuring cup that holds exactly ⁄2 cup (120 mL), or a cup that holds ⁄4 cup (59 mL). This will make it easier for you to get the measurements precise.
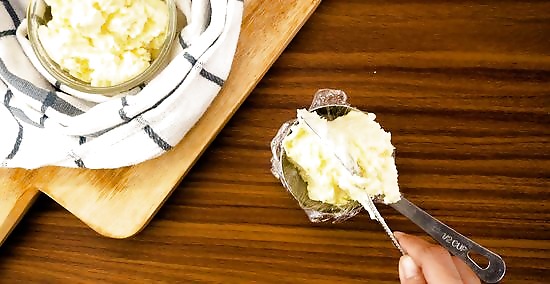
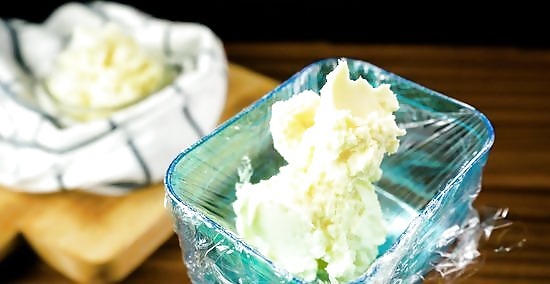
Use a spoon to scoop shortening into the lined measuring cup. Fill the measuring cup with shortening one scoop at a time. After putting a few scoops into the measuring cup, press down on the shortening with the back of the spoon to remove any air pockets. Then, continue adding shortening to the lined measuring cup and pressing it down until the measuring cup is full.

Scrape a butter knife or spoon across the top to flatten the shortening. The shortening should be flat and even with the top of the measuring cup. If it domes up over the rim at all, use the spoon or a butter knife to scrape across the top to remove the dome and create a flat surface. Place the contents of the spoon back into the shortening container for future use. Place the spoon in the dishwasher or soak it in hot water once you’re done scooping so that it won’t transfer any shortening residue onto any of your kitchen surfaces.
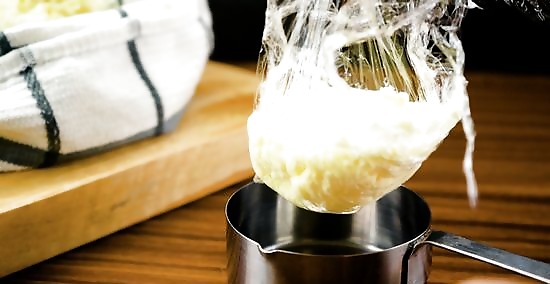
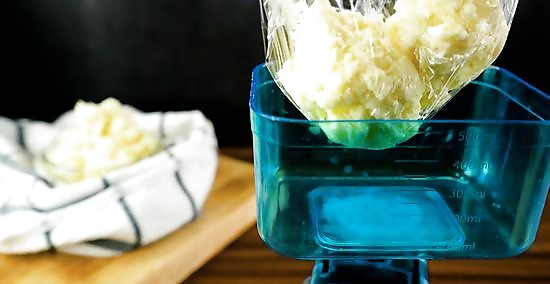
Pull the edges of the plastic wrap together to transfer it out of the cup. This will create a little pouch full of the shortening so you can then lift it out of the measuring cup. Flip the plastic wrap over to transfer the shortening into a bowl with the rest of your ingredients, or set it off to the side to use later. To keep the shortening in a pouch for later, use a clip or twist-tie to keep the plastic wrap pouch closed. Discard the plastic wrap in the trash after you’ve used the shortening so that it doesn’t transfer any shortening residue onto any kitchen surfaces or utensils.
Trying the Water Displacement Technique
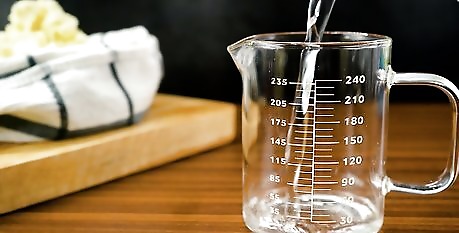
Fill a measuring cup with water. Using cool or room temperature water, fill a measuring cup with the same amount of water as you need shortening. For example, if you need ⁄2 cup (120 mL) of shortening, fill the measuring cup up with water to the ⁄2 cup (120 mL) mark. You’ll need a measuring cup that’s twice the size of the amount of shortening you need.

Scoop the shortening into the water. Using a spoon, scoop shortening into the water one spoonful at a time. Continue to add shortening until the water level reaches the mark indicating twice the amount of shortening that you need. For example, if you need ⁄2 cup (120 mL) of shortening and have filled the measuring cup with ⁄2 cup (120 mL) of water, scoop shortening into the water until the water line reaches the 1 cup (240 mL) mark, which is twice the amount of shortening you need.
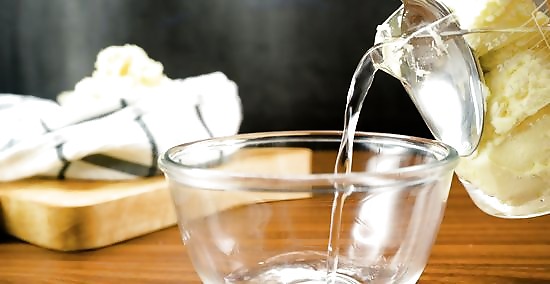
Pour the water out of the measuring cup. First, place a spoon sideways along the edge of the measuring cup to keep the shortening in the cup as you pour. Then, slowly tilt the cup to empty the water out into the sink. Once the water is drained out, you’ll be left with the exact amount of shortening you need. For example, if you filled the measuring cup with ⁄2 cup (120 mL) of water and scooped shortening into the water until the water line reached the 1 cup (240 mL) mark, you’ll be left with exactly ⁄2 cup (120 mL) of shortening once the water is drained out. This method is effective for measuring shortening because the water fills any air pockets, eliminating the need for you to pack down the shortening. There will be some shortening residue in the measuring cup, but it will be easier to clean because the water that was poured in first will serve as a barrier.


Comments
0 comment