
Preparing a Sample

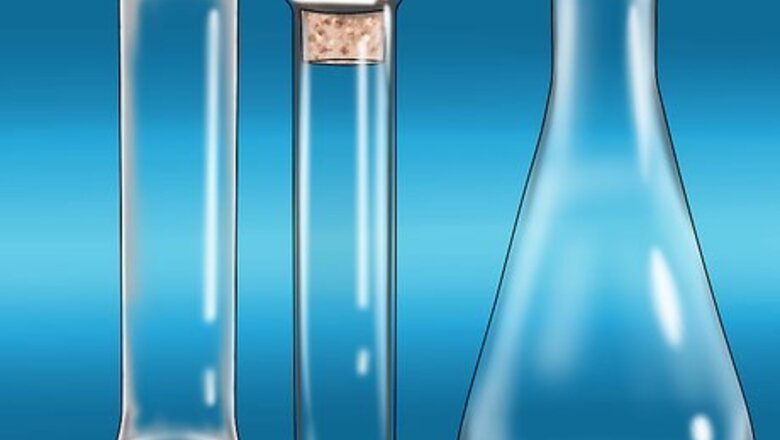
Collect a CO2 sample. To begin your test, you will need a sealed test tube filled with collected gas. You can collect carbon dioxide in a gas jar, a boiling tube, or another airtight container. Collection is usually performed over water in a beaker. CO2 gas is denser than air, so you can collect it using "downward delivery" or a gas syringe.

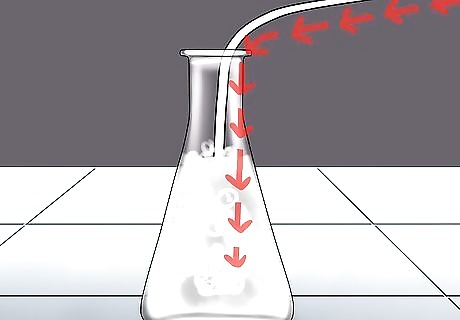
Mix calcium carbonate with hydrochloric acid (HCl). The simplest way to collect carbon dioxide is to react calcium carbonate (or limestone chips) with hydrochloric acid. First, pour 20 mL of HCl into a conical flask. Add a spoonful of calcium carbonate (or limestone chips) to the HCL. When the reaction starts, cover the conical flask with a bung and delivery tube: you will collect the gas through the delivery tube and into an upturned test tube (which is immersed in bowl of water). If the water in the test tube is displaced, then gas is being collected. You can continue to collect the gas for as long as the reaction occurs. For classroom demonstrations, you only need a small amount of hydrochloric acid, which is diluted to 1 M; a 2 M concentration works best, but should be used with extra care because it's a strong acid. The equation is: CaCO3(s) + 2HCl(aq) ==> CaCl2(aq) + H2O(l) + CO2(g). Be very careful when working with hydrochloric acid – wear gloves, a lab coat, and protective goggles, and do not let the acid touch your skin! It's best to only perform this reaction if you have access to a lab environment.
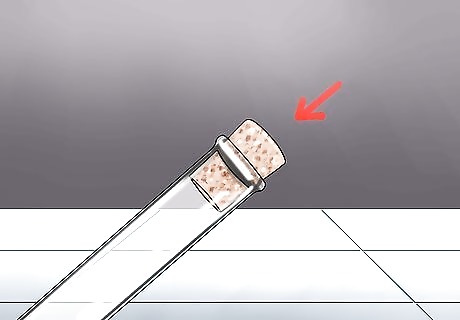
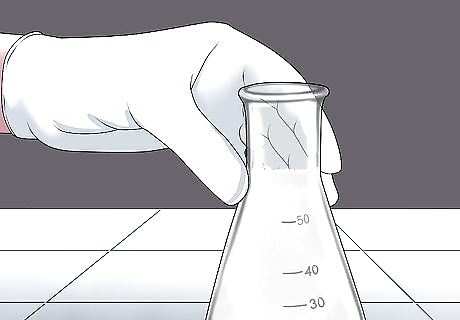
Cover the test tube with a bung. Put the tube on a rack to keep it safe until you perform the test. The "bung" is essentially a small cork or cap that allows you to pipe the contents of the test tube elsewhere through a connected delivery tube. It's important to seal the CO2 gas into the container. If you leave it open, the gas will mix with the air, and your test will be much less effective.
Bubbling Through Limewater
Bubble the gas through limewater. The most effective way to test for CO2 is to bubble the gas through "limewater", a diluted solution of calcium hydroxide (slaked lime). When you bubble carbon dioxide through the solution, it forms a solid precipitate of calcium carbonate – chalk or limestone. Calcium carbonate is insoluble in water. Thus, if there is CO2 present in the sample, the limewater will turn milky, cloudy white. Limewater is also called "white wash" or "milk of lime." If you see these terms, you'll know they mean limewater.

Make a limewater solution. The process is simple: dilute calcium hydroxide with water. Calcium hydroxide (Ca(OH)2) is a colorless white powder that you can buy from most chemistry suppliers. Pure limewater, once mixed, is clear and colorless, with a slight earthy smell and the bitter, alkaline taste of calcium hydroxide, as its pH is 12.3. Follow these steps to make your own limewater: Put 1 teaspoon (4.9 mL) of calcium hydroxide into a clean 1 gallon (3.8 L) or smaller glass jar. Limewater is a saturated solution, which means there will be some extra chemical that doesn't dissolve. A teaspoon will result in a fully saturated solution, whether you use a gallon jar or a smaller container. Fill the jar with distilled water. It's best to use distilled water for this experiment, as it will give you a purer solution. Put a lid on the jar. Shake the solution vigorously for 1-2 minutes, then let it stand for 24 hours. Pour the clearer solution off the top of the jar through a clean coffee filter or filter paper. Be very careful not to stir up the sediment. If necessary, repeat this filtering step until you obtain a clear limewater solution. Store in a clean jar or bottle.
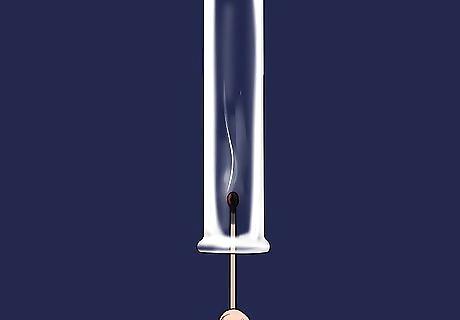
Bubble the gas through the limewater. Half-fill a test tube with limewater – then boil it. Use a delivery tube to pipe the contents of the CO2 sample test tube directly into the boiling limewater. You can use a flexible pipe or a (metal) straw as a delivery tube, if nothing better is around. Let the captured gas "bubble" through the liquid, and wait for the reaction to take place. If you don't want to boil anything, you can use a gas syringe to discharge the CO2 gas directly into the half-filled limewater test tube. Stopper the test tube, then shake vigorously for 1-2 minutes. If there is carbon dioxide in the sample, then the solution should grow cloudy.
Look for cloudy water. If CO2 is present, the limewater will turn milky white with calcium carbonate particulates, as the calcium carbonate solution is insoluble and will precipitate out of the solution. If the limewater is boiling, and the gas is piped directly into the limewater, then the reaction should begin immediately. If nothing happens after a minute or so, you can safely assume that there is no carbon dioxide in your sample.
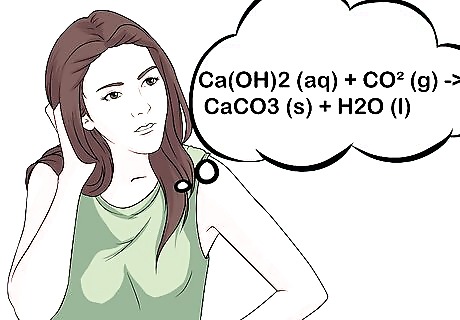
Know the chemical reaction. Understand what exactly is taking place to indicate the presence of CO2. The equation for the test is: Ca(OH)2 (aq) + CO2 (g) ==> CaCO3 (s) + H2O (l). In non-chemistry language: liquid limewater + gas (which contains CO2) react to solid lime (the particles) and liquid water. If you bubble the CO2 through the limewater for an extended period of time, your water will eventually turn clear. That's because of a chemical reaction! Here's why: CO2 + H2O ==> H2CO3 (carbon dioxide + water = carbonic acid) H2CO3 + CaCO3 ==> Ca(HCO3)2 (carbonic acid + calcium carbonate = calcium hydrogen carbonate) Calcium hydrogen carbonate is soluble in water, making your solution clear!
Testing with a Lit Splint
Try using the sample to extinguish fire. Carbon dioxide extinguishes fires, in high concentrations. You'll simply need to hold a small lit flame inside a test tube that you suspect contains CO2. If the gas is present, the flame should go out immediately. Combustion (creation of a flame) is the reaction of oxygen with another substance; it is a rapid oxidation of the organic compound and a reduction of oxygen. The fire goes out because the oxygen is replaced by the CO2, which is not a combustible gas. Bear in mind that any oxygen-free gas will also extinguish a flame in this manner. Thus, this is an unreliable test for carbon dioxide, and it may lead you to misidentify the gas.

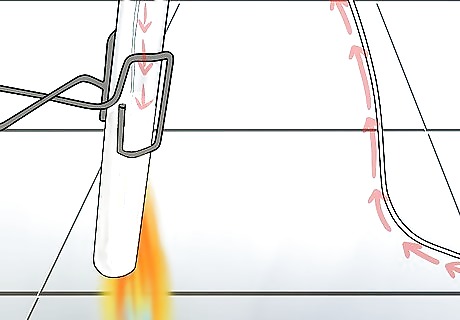
Collect the gas in an upside-down test tube. Make sure that the sample has been properly stored and stoppered before you try to test for CO2. Be reasonably certain that the test tube does not contain any flammable or explosive gases; in this case, the introduction of fire could be dangerous, or at least very frightening.
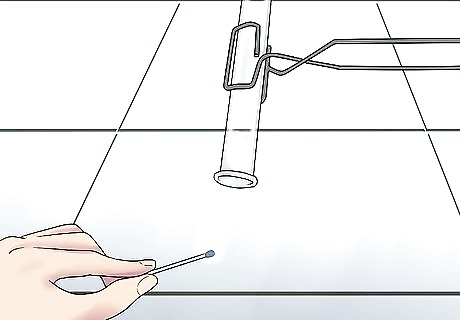
Place a small flame inside the test tube. Use a splint or any long, thin strip of wood. In a pinch, a match or a lighter will do – but the further your hands are from the opening of the test tube, the safer your experiment will be. If the flame immediately goes out, there's likely a high concentration of CO2 in the test tube.

Alternately, try using a gas syringe to put out a candle. Fill a syringe with carbon dioxide. Then, use a drop of molten wax to affix a short candle to the surface of a coin. Next, place the candle and coin into a wide-mouthed cup – and light the candle. Equip the syringe with the tubing, and push the syringe to transfer the CO2 to the bottom of the cup. If you push out the entire contents of the syringe within a second or two, the flame should go out.


Comments
0 comment